and then let it cook overnite Thursday.

Out of the clamp, I went over the joinery making sure everything was good and solid.

Today, I gave the carcass its final sanding, then machined my back boards.

So depending on my final width and the distance between the center boards and the edges, I may end up with a partial board showing on either ends. That's OK as long as my middle board is centered.
Since I'm using solid boards, they are going to expand & contract, so they must have the room to do so.
To lap or not to lap? We got two options here, half ship-lapped or Tongue & groove.
they both do a similar job, except that you can easily get more expansion coverage with a half ship lapped joint. In this case, this is not really a concern, so it boiled down to what is more efficient for me. And I want to add a beaded detail to one of the board edge.

Another consideration, is the thickness of my boards, they have to fit within a 1/2 in rabbet. And I want to add a beaded details purely for the look.
The area I have to cover is 36-1/2 in.
I made 7 boards at 5-1/2 in wide (38-1/2) and one at 4-3/4 and another at 5 (total coverage 48-1/4 in)
That coverage is of course before I cut the half lap, so it would be reduced. By how much? Do not know yet, I must experiment and figured it out.
I played around with my 1/2 inch thick boards to get a feel of my desired look.

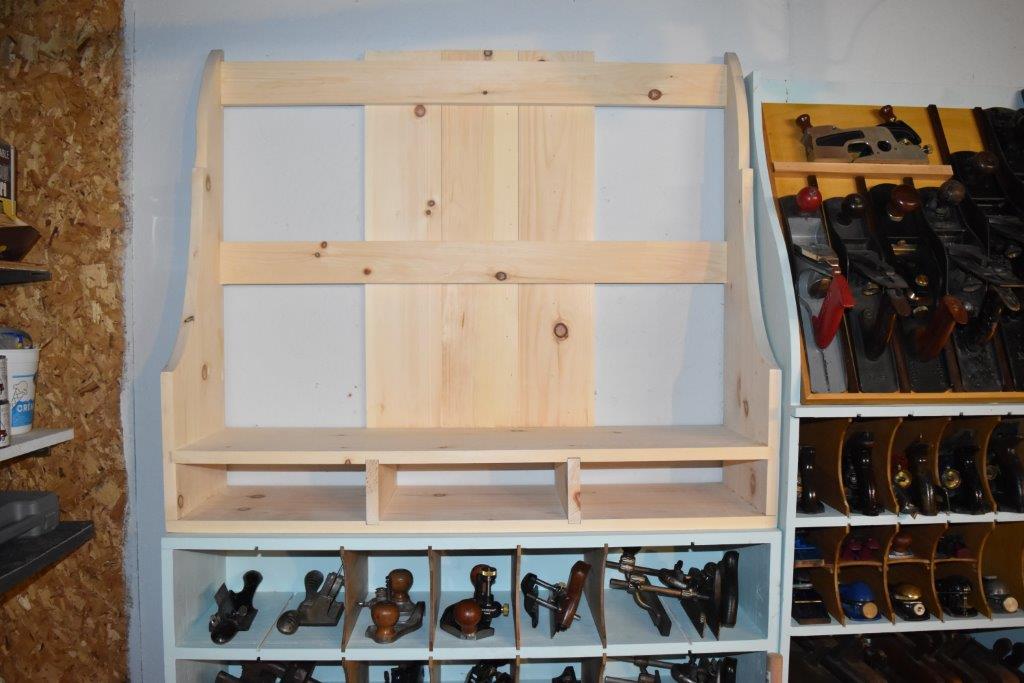

7 Boards in place, some in the back, some in the front.
I know I should have enough boards to cover, now must figured out my joinery
And lastly, these boards are covering the back of my rails, so I have to be able to removed them if or when I want to change the holders for the saws contained within the till. These holders are screwed in the rails from the back. So why not screw all the way through the back board and the rails? Because these back boards need the room to move, and they would be constrained too much (?)
So, my back boards will simply be screwed in, one screw in the middle of each boards on the rails. All the expansion contractions will be taken by the ship lapped portion.
In the end, this is what it all boiled down for me
My boards are 5-1/2 in wide and cover only the open back of the till, they do not go all the way down to cover the back of the drawers cavity.
Why, because if I close off those cavity, my drawers being somewhat piston fit, would give me problems, unless there is a way for the air being pushed back by the drawers, have a place to go. Easiest thing to do, is simply to leave the back open...
These are the main planes I plan on trying, a Stanley No 78 Duplex rabbet and Stanley No 48 Swing fence T&G. But first they would need a touch up sharpening, and I must also pick one of my beader planes.

Stanley's No 78 and 48
Meanwhile, I must finalize some small details in the back and glue in my drawers dividers (2)
and I can start to prime & paint the carcass.
Bob, seeing the light at the end of this project, time to gear up on the next one...not necessarily in line :-)
My vote is for the ship lap and bead. I also think that because you are painting this, getting a centered board isn't necessary.
ReplyDeleteAfter playing around with some ideas last nite, I decided on the beaded ship lap options.
ReplyDeleteAs for the centering of the middle board, I know, not really required, but I want to do that :-) Have not decided yet if I am going to paint these boards or stained them darker?? Your thoughts??
Bob, getting ready for another day of bathroom renos at my friend place.