My back boards are all done, beads and all, painted.
One of them had a loose knot so I soaked it all around with super glue on both sides Friday. It is now solid and has been painted over.

The end board that I salvaged has been recut to its proper width and also painted.

The French cleat parts are installed, both on the till and the wall.
Normally I install the bottom spacer to the wall and screw the cabinet to it, but in this case, I would have nothing to screw into the back of the till.
So I reversed the operation. Understanding that it would be tricky to hit the stud from within those small drawers boxes, I first put my spacer to the wall as usual, to mark my holes location, then removed it, drilled its holes and secured it to the till with glue and screws. That way, I'm guaranteed to hit the studs when I screw it to the wall.

The screws holes on the French cleat part on the wall need to be
recessed in order for the till to lay flat on the wall.
My new holders made of maple have been machined, but one had a crack I didn't see and it came apart once I separated my sandwich of maple...

No biggie, I made extra parts just in case...
Still managed to make three trips to the woodshop yesterday...
My saw handle board has been cut in 2 parts, to better accommodate the various saw's hangs. I added a piece at the bottom of the back saw handle board to raise the handles up, some where touching the shelf on the till. Similarly, my middle kerf board got its kerf recut deeper and I added a piece in the back also to give me more room to fully engaged the saw's plate.
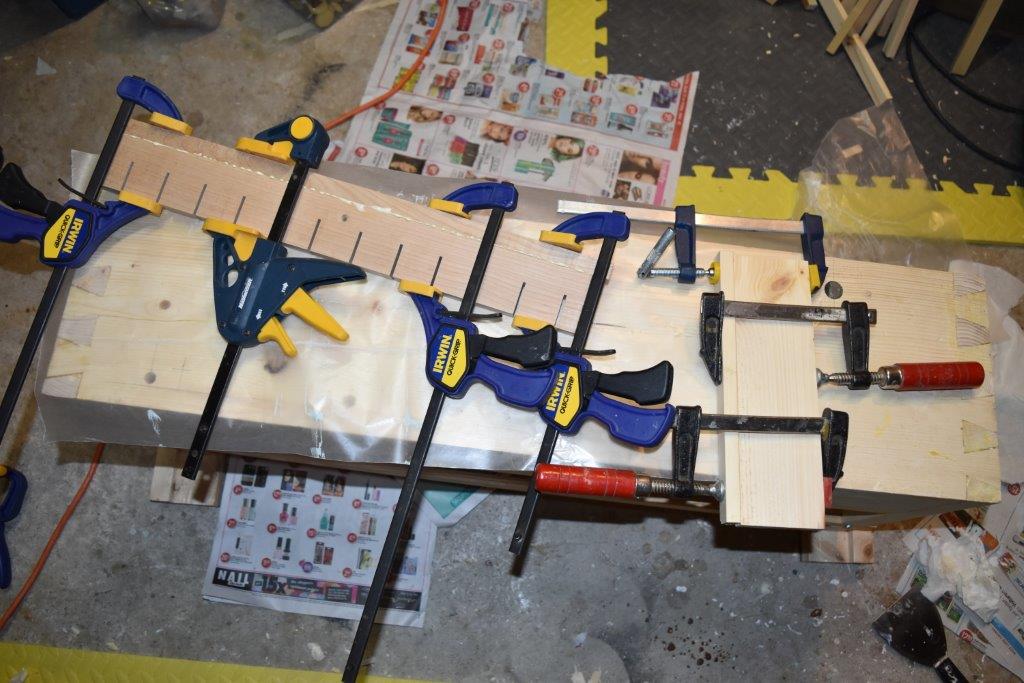
Both boards cooking last nite

This morning after cleaning up my glued boards, I cut a round profile on the
top part of the handle board, using a block plane to rough out the waste
then a Hollow plane followed by a light sanding.
Now it's time to finalize my optimum locations for each (3) sections.
That required a few back and forth experiments with my boards width and saw kerf's depth, and a few trips to the woodshop.
I first experimented with various kerf depth but in the end I cut them all the same depth. That way, the saws are not dedicated to a peculiar spot on the till. I think it's better that way.

This testing could go an and on...
I got quite a variety of hangs on my saws selection!

I also experimented with two kerf boards for the back saw.
I find that engaging the plate with only one makes the longest one too floppy.
In the end, I cut the middle kerf board in two parts, the longer one for the handsaws (which gave me so much trouble to get it right) got a piece added on, then I recut about a 1/4 in off it. The shorter one (3 kerfs for the Mitre box saws) did not get any add on piece behind.
And the back saws get two short length of 6 kerfs board, mounted with a space in between to engage all the saws in two places.
To install the kerf boards, I pre-drilled the hardwood pieces to avoid nasty surprises at this stage. I said earlier that I was going to used oak for those kerf boards (pine being too soft, and would get chew up) but in the end I used maple. I was worrying about the tannin reacting with the steel plate of the saws.


And the handle boards can be secured. I'm using metal L-brackets with screws to fasten these. 3 brackets on the longer piece, only 2 on the short one.
Once finally installed, the back boards went on. I said I was going to screw them in, but by now, I was getting tired of screwing everything by hand so I just pinned them with 18 gauge 3/4 in pins. I put 6 on each boards, should be more than sufficient and should not be too difficult to removed them if ever needed.

Dime spacers in place, pinned each boards in three places
with two pins top, middle and bottom.
Will be able to flex and move as required with the seasons.
It can now be loaded with its precious cargo...well once the wipe on Poly is dried. I forgot to do the top kerf piece this morning so it just recently got its coat(s)
I will wait until it is dry before I put the saws in...
So there it is, finally in all its glory! minus its cargo...

Only thing left to do is to build the three drawers. Since it may be a little while until I get "Round tuit" I decided that I should paint the inside cavities for the drawers, so it doesn't look "unfinished" :-)
Meanwhile, it is now time to start to prepared the wood for my next project, the bottom tool chest cabinet for my antique small joiner chest.
Oh, and I better start on the drawers wood parts also :-)
Bob, really happy how his modest shop is turning out so far.
Looks good next to the plane till.
ReplyDeleteThanks Ralph
ReplyDeleteIt was a tad frustrating dealing with the various hangs, but I'm happy how it turned out.
Currently it fits 21 saws, but I could have easily fitted 22 as I originally planned. But I was not about to go make yet another kerf board...
Bob, relaxing finally :-)
Oh, and BTW, Im glad you talked me into adding a small bevel on the other boards facing the bead, look really sharp!
ReplyDeleteThanks again
Bob