Saturday, February 27, 2016

Today is my blog 1st anniversary

I started this blog on Feb 27th last year as a mean to help me cope with everything going on with my dear wife. I need the distraction, to be able to keep strong as we face this dreaded cancer together.

My first post was on the first plane till requirements

So, is it working? Some days, and sometimes not... But it does give me an outlet to be able to keep my sanity.

I really did not know what to expect but with Ralph's encouragement I gave it a try.  Here we are a year later and to my complete amazement, my dribbles have been viewed close to a million times in a 100 different countries around the world, wow! I don't know what to say except thank you for your readership and support.

As when I wrote this, it has been viewed 972,928 times...
Should reach a million shortly, amazing!

Along the way, I made some good friends around the world and I'm always surprised when people locally tells me they read my blog faithfully.

This blog has also motivated me to cleaned up and better organized my shop, since many photographs are taken within.

The shop when I started
The shop now, thanks to my blog :-)

Currently my woodworking projects have crawled to a stop, due to circumstances I'm sure you understand, but I do have a list of project I am planing for this year... starting... sometimes...

I am not quite done with my hand tool shop re-organisation projects. I still need a boring till, a bottom wooden chest for under my antique joiner chest, and finish a few things around the place.  Then there is still the power tool shop AKA Garage, which is dire need of uncluttering and still need to bring in 220V for my Unisaw.

But all of these are currently on the back burner as we are about to embark on a
new promising drug trial which is sadly her last hope, so fingers crossed!!!!

My dear wife Heather of 32 years and hopefully a few more.


So to all of you who have taken the time to read my dribbles, my humble thank you and here is to the next year full of hope...

Bob
And Rudy
Who is busy giving me more woodworking projects :-)


Friday, February 26, 2016

This and that...

Friday being my respite time off for a few hours, I used it to do some errands and make appointment for my car next schedule maintenance, the dealership being right across the hospital were I had to pick up some stuff for her upcoming Catscan, next Tuesday.

In my travel back to go to the Base Woodshop I did a quick (?) stop at one of our local antique dealer, just to see if they had any tools :-)
Well they did, and had a sale; everything in store 50% off, so bonus.... You know what that meant... Should be able to find something :-)

An old beat up leg vise. Not sure it would be worth the trouble of salvaging it...

An older Stanley, Sweetheart mitre box.
And NO, I don't need another one :-)

The Stanley Sweetheart logo makes it late 20s.
Too bad the board is so chew up... as is often the case.
There really is no excuse for that :-(

I have no idea how old Narex has been making tools, never heard of them until LV start carrying them. That chisel looks 60s ?? I may go back and pick it up, got me intrigued... As if I need another chisel... :-)

A barn beam boring machine. I am not sure it is complete??
Besides the obviously missing boring bit. 

A large gouge with a hockey stick handle.
How Canadian, Heh! :-)

Not much planes, and some are incomplete...

In this bucket of saws, I spied with my little eye...

A small Shurly-Dietrich panel saw. 
That is the only thing that I bought.

So after sanding project parts for my son, I took the saw apart and proceed to give it a quick clean up. Same as I did for the mitre saw previously.


Shurly-Dietrich Galt Ont Can.
They were one of the first Canadian company to start using Maple leaf and Beavers on their product. Two symbols long associated with Canada.

The saw nuts makes it look modern, but in their later years they were bought by the US saw maker Atkins around 1930 and their last saws were stamped SDA
Shurly-Dietrich-Atkins, so this one preceded this.


The saw nuts came off easy, I did not had to restrained them. 

Reason is the saw nuts have a square shank and a square hole in the handle
to prevent the nut to rotate. Both mitre saw I did recently did not had this feature and were spinning freely.

Strange hole pattern, look like it was off and had to be re-drilled??

I sanded the handle, there was not much finish left on it.

She is now re-assembled and back home in my saw till. I need to pick up some stain and finish for my saw handles. This SD panel saw had some trace of red stain on it. I happened to have "more" SD saws and some do come with a red finish on it, so I think that is what I will do with this one.

One of my "other" SD saw with a redish handle.

It has the beaver medallion on it.

I really like these Shurly-Dietrich saws, they are excellent quality.
The blade is nice and straight and still cut decent, but it could sure used a fresh sharpening job :-)

That little panel saw I picked up today is filed Crosscut 11 TPI

And stamped as such; 11

All in all, not a bad day. Made some progress on my son's project and found this little gem of a saw. It's a good day...

Bob, who should finish that post for Gerhard soon about his Yankee drills.

Friday, February 19, 2016

All about Mitre Box Part 4 Cleaning and prepping the saw

Now that the box is cleaned up and has a new board made, it is time to turn our attention to the saw.  Today, being Friday, is when I get a few hours of respite, roughly from noon to four. God bless you VON, so I usually heads out to the woodshop.

I have currently two saws for this box, since I found another No 60 MB in an auction earlier.
They are both Disston made for Stanley, 24X4 in and 11 TPI.
I may as well cleaned up both... Then decide which one I am going to tweak for THAT box.

If the handle has to come off for whatever reasons, I will try to make sure I have a proper screwdriver for it in order to avoid the inevitable damages if you try to use a poorly fitted screwdriver... And if that meant grinding a screwdriver to fit, so be it!

When I give an initial cleaning, I remove the handle. It would be easier after to scrub the saw plate without introducing bent into it


A problem that often shows up with saws of the 70s vintage, as these are, is the dome screw head rotate and prevent the tightening or releasing of the saw nut.


You have to tighten the dome head toward the handle to stop it from rotating. Use whatever kind of clamp to achieved that, but remember you still need to be able to rotate out the screw head on the other side. 
I find that a 6 in C-clamp work for that, It has enough give to 
skew out of the way,  but don't over tighten it...

Similar to how I cleaned the box, I use liberal mount of WD40 and start by scraping with razor blades. Why scraping? Rust is anything but smooth, and it is also the quickest way to cut thru years of old grime, just use judicious amount of WD40. Watch out it can get very messy...

After many wipe down and re-re-scraping, I will then give it a light (very light) sanding using a hard block to make sure I do not erase any etching, if present.

Miter box saw made especially for The Stanley Works of Canada

Doing this cleanup it is almost guaranteed that you will screw up the set of the teeth. Not too worry, it will have to be reset after sharpening anyway...
But nonetheless I try not to muck with it too much.

But sure enough, rubbing your hands near the tooth line 
it is bound to catch you if the teeth have any sharpness or set left in them... :-)

Depending on the finish condition on the handle I may remove the handle and strip and refinish it. But mostly, I just gives it a good scrubbing to remove grime.
I normally used Murphy Oil soap. In this case, there was not much of the original finish left and it was very dirty, so I decided to sand it off, 120 grit with a ROS.
Ah! The inhumanity of it all! :-)

I then finish with a light hand sanding

Once cleaned I go over its condition, looking for a straight blade, well sited in the spline (back bar). In order to correct some minor buckle I may have to tap the spline deeper, but not in this case. Both saw plates are straight as an arrow...


I also look for pitting near the tooth line. Just like any other woodworking edge tool, pitting near the edge is bad. Each little cross cut tooth is to be shaped like a knife (cross cut) or a chisel  (rip)

look good at, and, near the tooth line, no serious rust damages.


I temporarily re-attach the handles to the saw, using the original hardware.
They will have to come off again to refinished them. At the same time I will refinish the mitre box new sacrificial board.


Next would be jointing, sharpening and setting the saw. Wax the plate then tweak it for a particular mitre box.

Bob, grateful for the respite I get. I need the distractions.


Thursday, February 11, 2016

All about Mitre Box Part 3 Ahh the smell of WD 40 in the evenings

This Wednesday I got a break, I got to do a shift at the Wood Hobby shop on base, while a friend looked after Heather. Thank you Jeannie.

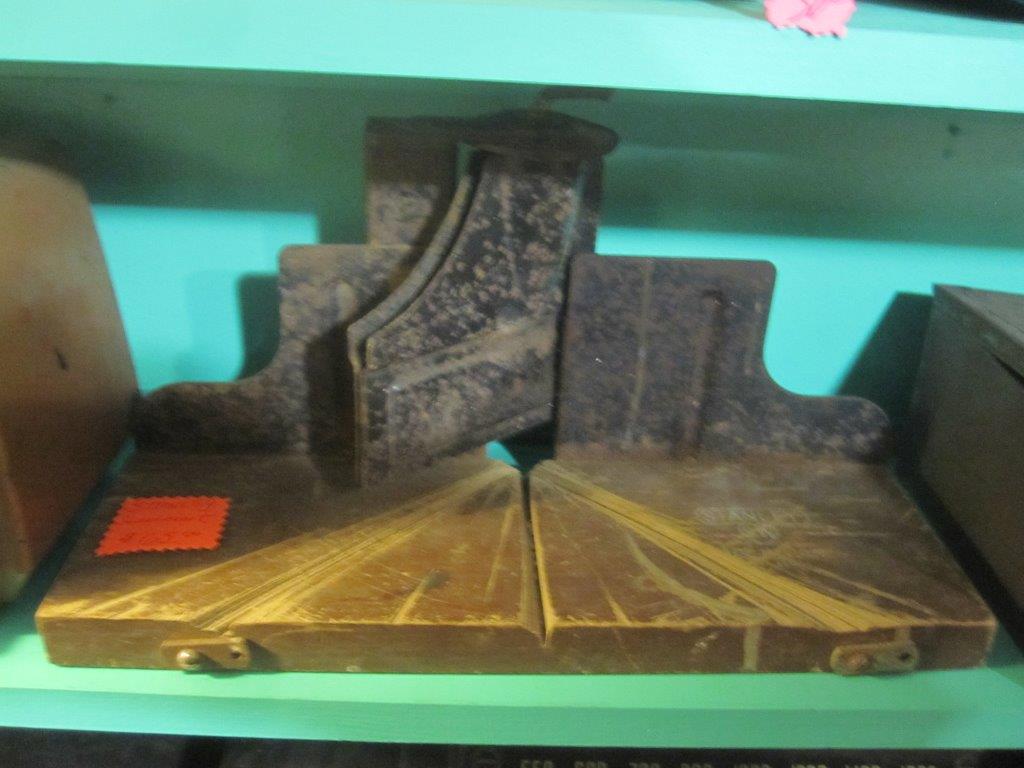
Did not really had any projects on the go, so I decided to bring in my Stanley Mitre box No 60 and tear it down. Inspect its condition and clean it.

Just in case I brought in some Liquid Wrench, but it was not necessary, 
WD40 works fine and that is what I used to scrub it clean.

As received, the front post was installed in the rear position.
The give away is the spring, it is designed to lift the saw off the saw kerf at completion of the cut. Since the saw then clear the board it can then be rotated without harming the saw. That feature does not quite work with the spring in the rear...

Stripped down for initial assessment.

Everything looks fine, nothing is broken. The screws (4) holding both vertical post had damaged slots on them, a little bit of work with a file took care of that. These post were supposed to be removed when breaking down the box for traveling or storage. That is true of all these types of mitre box, it does not affect their precise set up, there is a gib screw on the cast fitting to adjust them just perfectly... That screw does not move so when re-installing the post, their position is not affected, once set.   

In our Day to Day shop environment there is really no need to disassemble the posts,  except if you are thinking of taking it on the road, then I would advise you do take them down in order to protect them and their settings.

The sacrificial board has obviously been sacrificed to the gods :-)
I would need a replacement. That is the result of not taking the time to properly adjust the saw stops to prevent this... Tsk, tsk.

This look like the original board, it has never been removed ( I can tell by the screws, pristine looking Phillips) and two peculiar things. The board has some coating on it (Shellac or varnish?) and it has a small angle on the back side.

Strip further down to clean the casting and inspect.
Nothing broken,but there is a start of rusting under the brackets. 
Removed and cleaned off.

Not sure what kind of grease that was but it is pretty dry and gummy.
Notice the offset hole? That is to tweak the position of the swinging arm just right.

First initial clean up. I spray literally WD 40 on it and scrub it with a brush, wipe it, re-coat it and then lightly sand with 120 grit. I am not trying to make it shinny new looking, just get the grime off and stop the light surface rust. I leave the machining marks, It would be counter productive to sand them all off and I would ruin the precision. 


Base is now fully cleaned, look at the transition between the fence and the bed casting, it has a fillet.

That is why the old board has a taper on the back edge

So it fit closely to the fence without being  raised.
Granted the taper is overkill, but it is sure to fit without a hitch :-)
If you are making a new one don't forget that small detail.

After a bit more selective scrubbing, it is ready for re-assembly.

My friend Dave starting to machine a replacement board out of some ash he had. What kind of wood should you use? You want something that is flat and will remain so, quarter saw would be ideal. Something easy on the saw teeth, that rule out MDF or plywood. We used ash, because that is what we had. 

After dimensioning to size, the thickness is critical . It is about 1/2 in thick. Too thick and you will not be able to used the two grab screws adjustable in and out to grab the piece being cut.  You can see that without the taper it would not sit flush with the fence.

We duplicate the angle on the old board which turns out to be 40 degrees.
There is about a 1/8 of an inch thickness left at the top.

Ready for another life of dutiful service in my shop.
Well almost, still need to let the new board adjust itself in its environment, my shop, to let it do any stupid wood tricks then tweak the adjustments.

After a few days I will re-assess the board condition, making sure it stayed flat.
Then give it a coat of polyurethane to seal it.
I still need to take apart the two posts guides, give them a good cleaning.
There are the odd screws that could uses replacement, and I just happened to have a donor MB No 60, so bonus :-)

Next parts would be cleaning up the saw and tuned it for the box and run thru the adjustments making sure everything is working as expected and finally do some test cuts :-)

I dunno when I will be able to do that,  but sometimes in the near future...

Bob, resurrecting yet one more vintage tool