Monday, May 27, 2019

Resaw completed

Saturday my son Matt came down for a visit, we took two boards to the wood shop and finish resawing.

As before, my boards had a flat (ish) face and square edge.  That was accomplished by using a combination of hand planes and power jointer.  Surface quality be damn, but I then had a flat face and one square edge to proceed to the next machines.

The machines I used: Going CCW, Unisaw, 24 In bandsaw, 32 in drum sander

I checked the tension on the large bandsaw blade but I was still having drift issues,  Checked the fence, a smidgen out of square, humm.  Not touching it, we have a dedicated maintenance man looking after our machinery.  Everybody else is hands off if there is a problem.  Write it up in the maintenance log and he will get to it.

Rockwell Delta 24 in bandsaw


The small kerf I had helped, but it was only deep on the first 3 inches or so on each ends.  Had to come back from the other side and still ended up with one taper board.

For my last board I ran a saw kerf about 2-1/2 in  deep on each long sides on the Unisaw.
Ran two passes to achieved my depth.  Or one would be asking for burning marks :-)
Did not bother on the ends pieces, for two reasons.
1- Safety.  Running the board on the short end balancing a long board is not safe.
2-  Not needed.  The two deep curves leaves only a thin narrow web in the center of my board, it was more than enough to guide the bandsaw blade and kept it centered.

That produced my best boards so far, meaning less work afterward.

As per my previous attempts, I ran all my boards thru the drum sander to get an uniform thickness.
Once I was getting the cut side flat, I flipped the boards over to cleaned up the flat (ish) side.
they were ran thru until they had the same thickness as my other rough cut pieces.

I now have enough material prepared for making 2 boxes, with some spares

From the two long boards in the middle to the right, my stock for the boxes.
To the left, spare materials including my two tapered boards

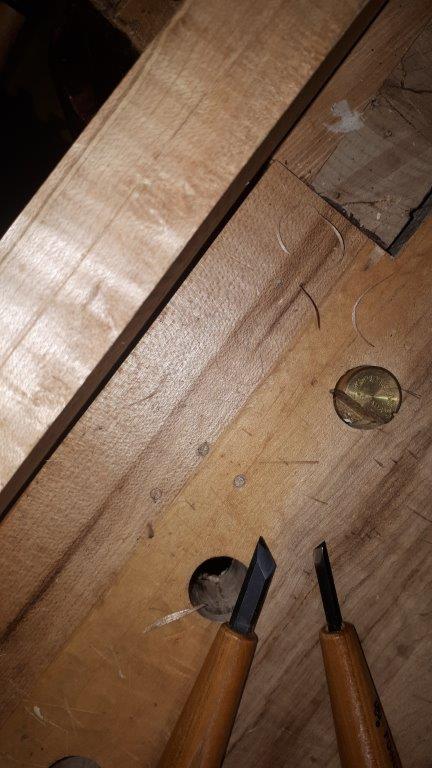
Back home, now the next steps is cleaning up the surfaces, with a combination of  a high angle blade in my LV BU jack and scrapers.  Hopefully, I'll be able to get a good surface tear free (?) if not I'll have to resort to sandpapers.  Probably a combination of both in the end.


The current surface left by the drum sander.
You can see small ridges.

My biggest challenges would be in matching the grains/figures.  It is quite varied from boards to boards.

When Matthew asked how I was planning to assemble the boxes, I told him, dovetailed of course.
He told me he would like to learn how to do that.

Music to my ears.  Of course, we will do his fist ones in pine not figured maple :-)
I try to use each project we do together to introduce him to his tools selections I put aside for him.
We discussed his next project, it would be a rectangular box to hide the cord mess below the big screen TV.
He want to dovetail that box. Surely overkill, but he his my son, Overbuilt everything !! :-)

Now its been a while I did dovetails in hardwood, I usually bang them out in pine, which is a lot more forgiving.
I think I would be wise to makes some practice cuts in scrap pieces first before I commit

Bob, getting ready for Rotary business.


Thursday, May 23, 2019

Further adventures in resawing

So were I left last nite, I was only a couples inches from both ends.  Considering, my board is roughly 21 X 8 inches I have a way to go and I am starting to drift right.  Need some course correction.

When I face a problem I like to mull it over a good glass of cold beverage by the relaxing 
sound of a fire, which erases previous woodworking masterpieces screwups.
So relaxing :-)


One idea that keep pooping up was why not give that frame resaw a try.  The blade is rusty, a bit dull and the some tooth misshapen, but what the Heh!

Yes it works surprisingly well, but I could sure uses more space around it.

Tried from both sides, still a bit off body position, that cannot be good.

Lets try a different vice in the garage.

My record Auto vice No 74

I went for this one because it is my only bench vice that rotate.  Hoping to get a better angle at my piece of wood.

RECORD AUTO VICE No 74

Before they got into plane making, Record was mostly producing vices. C&J Hampton trading as Record tools, manufactured various patterns of vices.  Mechanics vices, steel vice, cast iron vices, over 91 types / models for various trades: Mechanics, pipe fitters, woodworkers etc
Most Record vices we are familiar today are painted (enamel) blue, but back then they also used red to distinguished the cast steel ones (Red) from the cast iron ones (Blue)

The Auto vice No 74 was a 4 in wide jaw X 4-1/2 in opening, made with special features for car mechanics, hence the name Auto (vice) for No 74 and Garage (vice) for No 75

Auto vice No 74

 There was also a bigger brother the No 75

Auto vice No 75

Brochure extolling special features of vice.

On mine there is a patent number/date 310723/28.  Lets have a look under British patents


The rotating base is activated by loosening the large wing nut,  lift the vise body rotate right or left and drop back into preset casting.

You can see the preset positions in the fixed plate casting.
That one has the optional vise jaws liners (a pair).
Pic from EBay

Back to our resawing in progress...

Vice rotated as far as practical to get a good clearances in front.

Using the saw smaller kerf, I was able to coax the cut line back in.
In use I put my arms on each long sides, easier to balance.

Cut line restored, I'm happy.


This saw cut amazingly well, in spite of itself !!
And I got enough clearances for a full stroke.

Pulled all the way.

Pushed all the way.

You really get to used just about the whole saw plate.

Holding the board vertically is another story.
The board up front push back on the forward stroke.


Flipping the board in the back position of the vise, it pull back on the return stroke if you don't eased up enough on the saw frame.
OK, not ideal, but that was interesting results.  I am going to built some sort of saw bench to handle this type of resaw.  It works amazingly fast and is easy to balance the saw, you quickly get the hang of it.

As this type of frame resaws goes, mine is a bit on the smallish sizes.


The frame is about 37-1/2 in high.

The blade is about 29-1/2 in long.

Considering my board is 21 in long and my saw blade 29-1/2 in long, I cannot give a long enough push or pull to clear all the saw dust between the teeth.

The bade is shining up from its work out.
Looks at the saw dust hanging between some teeth, 
they never exit the wood to expel.

Its smaller kerf and 5 TPI makes it quite fast, faster than my former speed demon, Disston No D8.
BTW, I answered Ralph in a previous comment that the D8 was 5 TPI, its not, see pics.

Disston D8 3 TPI / 4 PPI
Notice some tooth are starting to get misshapen, Mea Culpea.
I tend to quickly touch up my teeth between full sharpening session were the teeth will be restored.
Its a lazy habit to just sharpen the tip, but it work for me.  I pay the piper later.

The frame resaw blade 1 in wide 5 TPI.  
Notice the changing tooth shapes, someone is lazier than me :-)
Upon close inspection, the blade is in better shape than expected
and it works, bonus !

So after all that, my kerfs are brought back in line and I am down about 3 some inches on both sides
21 - (3+3) = 15 inches to go... a subdue yeah!!!

I can see power tools in a near future to the rescue, I'm a bit constrained by time.

A fun experience nonetheless and surprising results.

Bob, overdue for a nap

Wednesday, May 22, 2019

Adventure in resawing

I've put my riving effort on temporary hold to get going on a pressing project.
In need to make one, then suddenly, two boxes for a friend.  Special boxes...

For that task, I was given a few special boards coming out of their father's shop.
They are shorts of rough 4/4 boards of quilted and bird's eye maple, mostly and something that look like some sort of Mahogany??

The original plan was to turn pens for all the siblings, but now I need two less pens and two boxes :-(

My first plan was of course to resaw them on our large bandsaw at the wood shop on base.
Quick and simple...

Well,... sorta. I got some boards alright but smaller stock than expected.

Two similar rough boards gave me the small pile of lumber on the right,
 rough cut to my dimension.  Out of it, I got two long sides and one short side, 
I'm short one side for only one box.  And that board in the back

Which, as Rudy is pointing out, is quite tapered
The salvageable length is not the same thickness as my other boards

This is the end thickness I came up with.
Great from my project but material and time consuming.

That bandsaw was really drifting and cupping as judged by my cuts results, while it stay on top and followed my line on top.  Should had check on the tension first I suppose?? Duh!
It was tight, but apparently not tight enough?

Plan B resaw at home by hand,  No biggy, done it before.
Except that these are not pine boards but figured hard maple.

Since I already had the saw out and ready for sharpening, 
may as well touch it up before removing it.

I do have another antique frame resaw but the blade need some attention, a lot more than my daily user, Disston No 8

Option No 3, need some work before
 getting back to earning its keep.
Maybe find or make a new blade??


My boards are a good 1-1/8 inch strong. 

Next was to establish a mark all around centered on the board to aid in resawing.
But what to use, I do not have a resaw plane ...yet...
A quick peek a boo into the magical willow basket of gauges and I came up with this gauge


Stanley No 65 circa early 60s with a full length pin

That worked pretty good, took a few passes 
and encountered a few tricky spots.

Next how to deepen it? That would not be sufficient to guide the saw plate.
Carving and using the saw plate did it for me

I used small palm sized Japanese carving tool
A single bevel knife first to deepen the cut then 
the V groove gouge to enlarged it for the saw plate 

A tad messy but it works.
Notice the stray cut parallel to the colored streak.
Just jumping to follow the grain line.

Dragged the saw plate back and forth to widen
 and deepen the cut.  Shown final depth on one edge

Then it was sawing in diagonals the corner, flipping the board back and forth
cutting across 


Until I finally went down a good two inches...finally, hard maple sure as heck does not resaw as easily as pine :-)

By then I was starting to drift on both sides, time to correct.
At this rate I may have to rethink the power saw options

Were I stopped, about two inches down

Starting to drift right

I am getting 1/2 inch thick boards out of it


Another option on the back burner

And then all too soon it was time to quit and get ready for the grand kids visit :-)

Bob, and Rudy tidying up before they arrived with Grandma

Tuesday, May 21, 2019

To rive or not to rive...

I always had these dreams that one day, I'll ended up with a pile of freshly riven oak pins and other assorted roughly sized chair parts. You know, how hard can it be??

Well, apparently wood is smarter than me :-)
But we are getting ahead of ourselves.

I am on built up ground surrounded by somewhat untouched forest.  We had a lot of strong winds since last fall and throughout the winter.  Nothing like experienced by the Suete winds in the Highlands of Cap Breton.  But still, and as a result I have lots of broken limbs and branches to clean up and tend to some damaged trees, mostly pruning.  Lots of it ended up in my fire pit, but I always like to keep some memento from a tree that I had to cut down. Being saving a portion of the trunk to either resaw or rive into boards and some log sections to be treated similarly.  Then there is carving and turning and, and...

So far I have had three silver maple logs, that were cut in Jul 2018 (since resawed into boards)  and two red oak logs still drying outside since being cut in Nov 2018. A few poplar and white birch smaller logs and bigger butt pieces of white pine. All of the same vintage as above.


My maple logs, were driven to New Brunswick, Canada, from my place, here in Nova Scotia and back.  Just because I can!


Yeah, I know, ridiculously far away, but for one good reason.  That was to visit my fellow RCAF vet Ray who retired there.

It was the first time we played with his new toy


These boards have been stacked inside my garage since our return, late Nov.


With the start of Spring (!!???) we have started  a lot of seedling and cleaned up the outside beds and spread that seafood fertilizer that was behind the only place I had floor room for stacking my wood.

Since that stuff is gone I reassembled my lumber pile pushed as far as it would go against the wall.
And setting up the portable green houses, we now have 2, after buying the last one on sale at the end of last season. Good deal :-)


All that to say, with all the rain we have been getting, I haven't had much of a chance to tend to my fire pit, lots of accumulating piles around it. Must get to it soon.


And talking of wood, my "green wood" is no longer much green..er, its been a while.


Yeah, two days without rain.
Who say you cannot start a fire under rain? Hogwash ! :-)

So cut to the chase Bubba, and today finally got to experiment with a few pieces of logs.

Looking over at the objects to be used, it appear at first glance quite rudimentary technology.
NO Bluetooth included, can you even imagined ? :-)

A few, I thought judiciously selected, small logs to split.
They just laugh at me, mostly :-)

Should not be too hard to figured out !!
The 2 parts froe, was (became quickly) easy to figured out how its handle went in, the basher was self explanatory once you stopped hitting yourself with it.

Select a log that somewhat appear to hold flatterish on its own, locate froe blade and grunt and bash away at the stubborn blade which did not seems to do much, except chewing away at my rock maple basher...


No way Amigo, am I not making any progress with that log.

Its really crushing the fibers of this rock sugar maple bat


 OK, so maybe I am seeing a tad bigger than I should, and the grain??? And still greenish, but have started to dry and harden.  Lets try something, smaller and a piece of Poplar should be easier?

Ah yes, that one works. Now it is at this instant that you realized why 
some genius invented the riving brake, cause...all I can do is bashing it through.


Splitted in halves, quarters and ended up with a few "useable" ?? pieces. 

About half my production, wow :-)
There should be at least a few good toothpicks in there

At the same instant I had another stroke of genius and realized I had not tried any oak logs yet, Dah!!!
Off to my wood pile outside and rescue what looks like a good candidate, except for the two large forking trunks at one end.  Probably would tend to split straighter and easier if I was to cut off that butt end, but... I am on a mission to conquer splitting wood, how hard can it be?

No, still laughed at me. 
Ok, butt jokes asides, it should had started easier???

Wait a minute Einstein, is that even Oak??  Did I mentioned it was, surprise, raining when I went to select it? 

For comparison, this is one of the two red Oak trees trunks I saved.

At the end of my feeble effort it was Wood 5 Bob 1

OK, time to regroup and analyse.  Which meant some of these logs that gave me a hard time...disappeared... just like that.  

I see nothing, I ear nothing...:-)
The white wine is a new one introduced by our good friends at Luckett Vinery
Sometimes you have to make the call.  Goes well with bonfire while your mistakes disappeared.
Oups, did I said that?


So besides being obviously blind in my wood recognition tests, my stock was not greenish anymore.  I been monitoring my wood pile of Silver maple boards, they have since stabilized at 13 % EMC and are going down ever so sloooowly. At about a year of drying time per inch, I have a way to go, most of my big boards are 2 in thick.
The stock that I managed to split by blind luck, still felt humid inside


Bob, regrouping with himselves under fire.  Move it Privates dammit !!