Friday, March 25, 2016

Sharpening equipment

Continuing our series on my minimalist tool list.
All the tools you have been busy acquiring since I started this series would be quickly rendered useless unless you have a meant to keep them sharp.


SHARPENING EDGE TOOLS, CHISEL, PLANE IRONS ETC.

First understand that it DOES NOT MATTER which system you use, oil stones, waterstones, diamond plates, scary sharp (sand papers) etc THEY  ALL WORKS.

If you already have some money invested into one of these system, keep it.
If you are starting from scratch, pick one any one and stick with it.

Understand also that there are three steps required to bring a tool cutting edge to be sharp.
1- Grinding
Could be done on your coarsest stones or sand paper or with a grinder, handcrank or power.
2- Honing
Must be done UNTIL a burr is formed on the other side. Most people stop before they achieve that burr across the WHOLE edge and as a result, will never achieve sharp.
That step is accomplished using your medium stone (roughly 1200 in waterstone, Black Arkansas in oil stone or roughly 320 to 600 in sandpaper)
3- Polishing
Were we cut the burr and refine the edge. Use your finest stone.  I stop at 6000 on my waterstones with a Nagura stone then I strop it.

This commercial strop has a shaped edge to handle my carving gouges

Shop made with a peel & stick micron sandpaper.
A good source is from Fiber optic technician, they never reuses their paper and there is a lot of life left in them after they just polish the end of the fiber.
Or... you can buy them :-)


In the above pic the polished ceramic tile is for using sandpaper, and setting the bevel flat on the plate.

The super flat surface (more than flat enough for our needs) is also great to set flat the bevel on our tools in the side clamping jig, if you do not have a setting jig or want to duplicate an existing odd ball angle. Spritz water put on a piece of sandpaper and go to town. I don't use spray glue.

The hand grinder is but one example and then there are my two most used waterstones, 1200 and 6000, which BTW you must use with a Nagura stone to achieve best results..

There is a lot of controversy and strong opinions when it comes to sharpening.
All I have to say about using a jig for holding your chisels and plane irons is that it will get your sharper, faster. Why? Because repeat ability and consistency wins the race...every time.
I don't see it as a crutch, and yes, I am proficient with free hand sharpening without training wheels, but I still used it to get me there faster, period!

And talking of sharpening jig, I much prefer the side clamping jigs like the Eclipse over any that clamp from the top of the blade such as the Veritas jigs.
The Lie-Nielsen appears very nice and etc. but it is way too pricey for my taste and needs, so save your money and get a cheap clone of the Eclipse, they are everywhere and all seems to come out of the same factory (?)
They are not perfect, what do you expect at that price point, but they are very serviceable and easy to tweak, see how I do it here


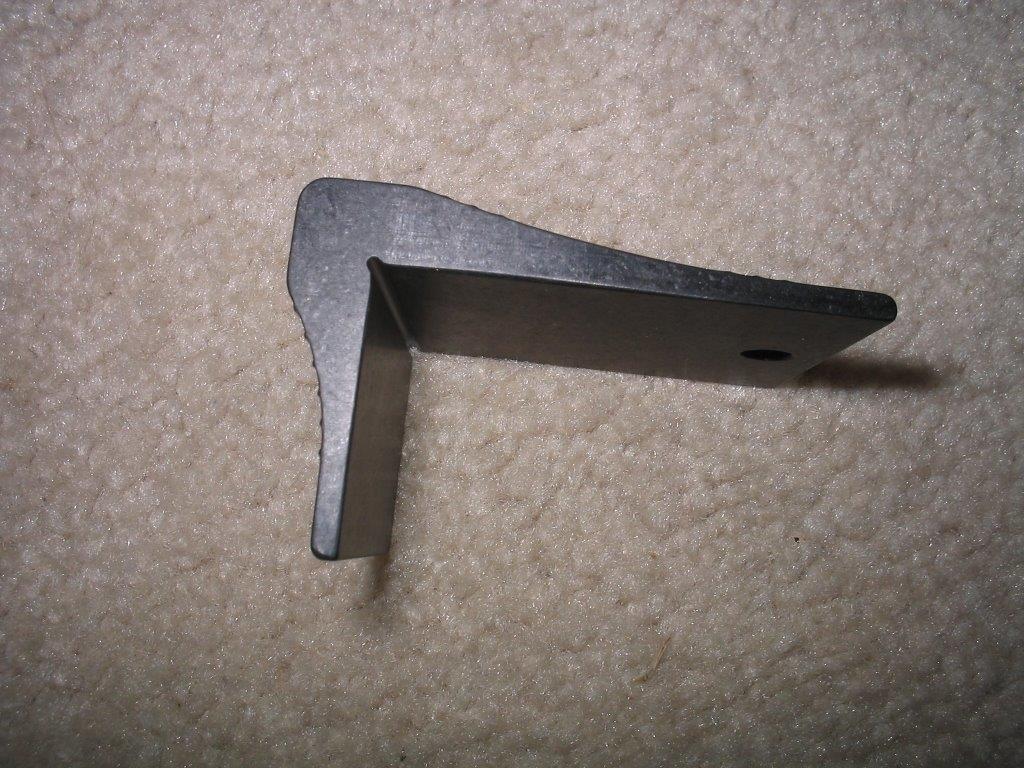
Such a side clamping guide benefit greatly from the use of a simple setting jig to get consistent angle set


Finally you NEED a place set up to be able to sharpen without having to clear everything to make room. The easier it is to stop and sharpen, the more often you will do it and your tools will stay sharper and your sanity will benefit also :-)
You do not need a full blown dedicated sharpening bench but make yourself as a minimum a board of some sort to hold your stones and etc.

My temporary set up on a re-purposed bedside table using 

SHARPENING SCRAPERS

You need a mill file and a burnisher. DO NOT skimp on the burnisher and forget stupid ideas about using a router bit shank, screwdriver shaft and whatever.
You NEED a proper burnisher. They come in various shape and profile, I use my Veritas ones, work great.

From T to B
Veritas small carbide burnisher
Veritas Tri-Burnisher
Home made burnisher made from an hardened rod inside a Xerox photocopier

Requirement of a good burnisher, a smooth and hard surface, harder than the steel used on the scrapers.

There are a few special holders to help you get a consistent burr angle, but I never used one, so cannot comment on their efficiency.

The mill file, about 8 in, is used to remove the old burr and dress the edge smooth and flat. A small guide either commercial or shop made (a chunk of 2X4 with a slot to hold the file) in order to hold the file at 90 degrees is a good help, but not necessarily required. You can use the same guide you use for jointing the teeth of your saws


If shop made (chunk of 2X4) you can also easily use your jig to help you hold the scraper straight while honing the edge at 90 degrees on your stones


SHARPENING SAWS

You need a saw vice, either commercial or shop made, to hold your saw plate steady while filing, a good set of triangular files to sharpen them and a suitable saw set.

A few of my antique saw vises From L-R
Sargent No 103, Unmarked, Disston No 1

Some of my sawsets, as you can see they comes in a wide variety. 
I would recommend a pistol type such as 
the Stanley 42 or Eclipse (second from Left top)

A good set of triangular files, sized to your saws tooth line.
You want the file to be twice as big as the tooth depth in order to get to use both sides of the file, which would give you 6 sides versus only three.  

You can add, a black marker (much easier than the old timey method of using a candle smoke to darken the teeth) and a good light source, a magnifier glass is also very handy.

MISCELLANEOUS

Other useful things to add would be some sort of angle checker, strong magnification and light (think those lighted magnifier bench lamp)


If you are starting with sand paper, and I highly recommend it before settling on a stones system, keep in mind that in the long run, it is not inexpensive since you are gonna go through lots of paper. Do the math and you will realize that it adds up quickly... But it is very convenient, portable and accessible anywhere you are, handy.
When rehabbing old cutters I always start with sandpapers before I finish with my stones, to avoid unnecessary wear and tear on my precious stones.

There are all kinds of jigs you can build such as Ralph's Molding iron jig


There are all kinds of specially shaped files, hones and etc to help you get into the nooks and cranny's of various moulding profile irons or carving tools.
Buy them as you have a need for them.

You can easily cut the profile of the cutters, using the actual tool, on a piece of wood then rub some honing compound into it to strop your profiled cutters.

Do not dred sharpening, it may be a necessary evil, but it is a crucial skill you need to develop early on in order to enjoy your woodworking. There is nothing more frustrating, and often dangerous, than using a dull tool! So buckle up and learn to sharpen your tools...

Bob, sharpening his mind with cold beverages :-)

Wednesday, March 23, 2016

Drilling and fastening selection

Tools used to put stuff together, and sometimes to take it apart.


MALLET

There are a variety of choices as far as mallet used to strike chisels are concerned, but they should be kind to your chisels. That is why my favorite chisel basher is a traditional wooden carpenter mallet. 16-20 Oz is big enough to drive your biggest mortise chisel.

They come in a variety of sizes, 
use one appropriate to your work

Another one I like is the Veritas brass carpenter mallet. I like the heft of it and the fact that it has replaceable wood striking faces

Veritas Cabinet makers mallet


Another good choice would be the traditional wooden carving mallet, which you could turn if you have access to a lathe, or know someone with one.

From L-R 
The newer polyurethane lined carving mallet, 
and the traditional turned wood mallet

HAMMERS

Claw hammer

Typical Claw hammer

Not so typical Ripping hammer

A good old claw hammer 16 oz would serve you right and you probably have one of these already. Wood , metal or fiberglass handle? Totally up to you.
These three variations on the handles are all for the same reasons: How to prevent the handle from breaking and how best to absorb vibrations.
I prefer a wooden handle follow by a good fiberglass one. Word of caution, not all hammers in these three styles are created equal. Get a good one.

If you already have one, use it until you are ready to upgrade to a 21st century magnesium one with built in laser so you know exactly where you are about to strike :-)  But on second thoughts, keep the one you have until you break it.

Warrington Hammer

Feature a wide tapered peen. Also makes a good plane's hammer.

This design allow you to sneak the peen between your fingers when you hold something small like a pin or small brad. When I first read that, I thought, yeah right, I'm going to smash my fingers. But lo and behold it does not take long to get accustomed to it and it works as advertised. Perhaps not necessary, but very handy.

Ball Peen hammer

Ball peen and Warrington patterns both comes in a variety of head weight.
Start with one in 8-12 oz range and add as your needs dictate.

Also called a mechanic hammer. Even if we are woodworkers and not metal bashers, there is a multitude of tasks around the shop where it comes handy.
Eventually, you will need to perform the odd metal working jobs as you start to make your own tools and it is the right kind of hammer to drive pins in and out on tools and machinery.

NAIL SETS

Stanley nail set

I shown two types, the regular set most of us a familiar with and a new comer on our scene, the Japanese type. It is very handy as a small anvil to straighten nails and etc. Also take a look at the head, it allows you to reach inside assemblies such as carcass. Very clever simple design and oh, it also work great to countersink nails :-)

Inexpensive but very handy Japanese nail set

Next I would add a small anvil unless you happen to have already a mechanic vise with a built in anvil surface.

Small portable anvil, very handy.

My Record No 100 does not have an anvil surface. 
DO NOT use the rear movable piece as an anvil

My Record Autovise No 74 has a small anvil in the back

NAIL PINCERS

Technically a end cutter as opposed to the common side cutters.
These are used to pull nails or to cut them almost flush with the wood surface.
Easily modified on a bench grinder into a flush cutter or tapering one side for easier reach on the nail head.

A pair of cheap (Cheep for Ken) end cutter used as a nail pincer.
You want a rounded head to be able to rock the nails out

Typical side cutters


SCREWDRIVERS

The majority of us probably own various sizes and types of screwdrivers so why specify this type? Because in woodworking, the common screw still reign supreme and to be able to drive it down below the surface, without damaging the surrounding surface, you need parallel edge and a non taper end will seat better in the screw slot and prevent cam out. So regardless of how big your collection of screwdrivers is, I urge you to get a proper set of screwdrivers for woodworkers.

For some reasons I could never figured out, the classic British pattern has always been expensive, even more so on the vintage market.

Marples set in 4, 6, 8, and 10 in. There is also a 3 and 5 in 

 But there are lots of alternatives, even as a set of 1/4 in hex drive replaceable tip sets. What you want is a parallel tip, not flared out

Moores & Wright ratchet screwdriver, parallel tip 

The type to avoid, the common variety with flared end tips

BORING TOOLS


Making holes in the fabric of time... Huh? Well Yah, you try to make a hole without these tools and see how long it takes you :-)

A good brace, a handrill and a reaming awl, will handles the majority of your holes making needs. Again size is everything, if you are into making post and beam construction, then a post beam drill should be a priority, if not, you will probably never use one.

BRACE


Your typical ratchet brace with a Barber chuck, Millers-Falls

Most braces will be found with a 2 jaws chuck, just what 
you need to hold securely the tapered shank bits.
Not so good with round shanks.

Some braces have a three or four jaws chuck, 
which hold regular round shanks much better

Even a non-ratchet brace would be a good buy.

When you start using brace and bits, you quickly realize that there were no standard for the tapering shanks, as a results some brace hold their bits better than some others. The Spofford or Fray brace excel at holding them all due to its unique construction. Pretty well bomb proof construction also...

Stanley Spofford (yes, Stanley bought them) brace

The unique split case held by a large thumbscrew 
can hold every tapered bits I can throw at it


And of course how good is a brace without the bits...
The most common and popular bits are the IRWIN and the JENNINGS types.
Although I very much like my center bits, Irwins are a lot much easier to come across.

Irwin bits, solid core. More sturdy than Jennings

Jennings bit, bit is twisted around its axis to form the flutes.
Because the flutes are closer together than on Jennings, they tend to bore truer

Which ones you get is strictly a personal preference and depends on what is available to you. Brace bits are normally sized in 16th of an inch. Thus a bit stamped No 4 is 4/16 or 1/4 in, up to 16/16 = 1 inch.
What you want then is preferably a complete set of 13 bits, No 4 to 16.

HANDRILL

For smaller holes, a hand drill or a push drill is what you need.
Of both types, the handrill is much more plentiful owning to the fact that practically every household in North America had one in the days prior to the advent of the electric drill.

The iconic No 5 from Millers-Falls is probably the most plentiful out there followed by the No 2.

Typical No 5 as found in the wild. Not so typical is the fact that 
the often missing side knob is present on that one.

Not having a side knob is no deal breaker but should be reflected in the price.

These takes your every days round shank's bits. Their chucks usually take up to a 1/4 in or 3/8 in for the bigger models. 
I keep on hand a small set of LV brad point bits, 12 bits from 5/64 to 1/4. Not cheap about $60 but well worth the price. Of course regular twist bits will work just fine.

PUSH DRILL, GIMLETS AND SQUARE AWLS

For smaller holes, these three types of tools are what it is called for.

I did not listed the push drill but it is a very handy tool to add to your arsenal.
My favs are the Millers-Falls Buck Rogers No 100 and the Stanley No 41 variety. They both came with a set of 8 bits. Note that they are both also using proprietary bit shanks design, you cannot interchanges them. Keep that in mind as you look for a vintage one.


GIMLETS

Although the Square awls make small holes effortlessly, I was surprise at the small size of the Veritas chisel point awl  Work great for those small screws for some hardware, but so small I'm almost scare to break it.
I would then recommend a small set of gimlets in addition or instead of  that square awl.
Note that they do make bigger stronger square awls.

Gimlets comes in slightly different forms but all works the same

My Veritas small drilling awl


 Later additions

A good depth stop is handy, although at the speed we are drilling by hands, the piece of tape trick work great and is in no danger of being damaged by drilling too fast :-) 

There are various patented design to work on brace bits, 
this is the one I used.

 A good set of cordless drill and impact driver is very handy... and they are still a cordless tools :-)
Stay away from NiCad battery technology go with Li-Ion and go with a 18-20 Volt range. Compact and more than powerful enough. If money is still plentiful try the new Brush less technology.

Bob, making holes in people theory since 1956

Monday, March 21, 2016

Measuring and Markings tool selections

This is one category where all the money you saved on the saws selections would be spent!!  You cannot skimp on these tools, you rely on them for precision.


SQUARES

I don't know what you call a square that is not square, but unless it is, it is useless under any name!
 The Combination square is one of the first square you should get and it MUST be precise. That means forget about all these El Cheapo imitations at the Big Box store or hardware store and get yourself a real one.

Starrett is a brand that get mentions a lot everywhere and for good reasons.
Starrett tools were never cheap but you are paying for precise machining and a tool that will outlast us all. Other machinist precision brands are Sharpe & Brown, Mitutoyo and etc. Forget Stanley, Johnson and Empire etc.
A good 12 in Combination Square will cost you about $100 but it is worth every pennies.

My 50+ years old Starrett, still perfectly square since the day it was made.
Ruler is a bit dark, but I rarely used the markings if ever.

Cast iron head, not poly carbonate, or glass filled or aluminum and etc.
Low sheen finish on the ruler, etched markings, precise machining of the slot and pawl so that the ruler slide easily and lock square every times.
Why 12 in? Because it also double as a straight  edge, a precision ruler etc.

TRY SQUARES

Forget these nice looking rosewood handled square, they are often only "square" on the inside of the square and not on the outside, it will bite you eventually....

Here is your first clue, the brass edge is **Only** on the inside

Get yourselves some Machinist metal square. Often called Engineers square.
Look for BS939 Grade B. That means British Standard 939 and Grade B is not as precise as true machinist squares (grade A) but plenty good for our woodworking. The specs are less than 0.001 in deviation per inch over the full length of the blade.  And since a small 3 or 4 in is the one used often we are well within tolerances for working wood... we are not machinist but woodworkers.

These are Groz. Made in India, BS 939 B inexpensive and plenty good,
But regardless of which brands or how old, always check them regularly.

DOVETAIL MARKERS, SADDLE SQUARE

Not a must, but sure makes your layout faster and easier
There are various styles, you can easily makes one with a piece of scrap wood, but I really like these saddle squares from Veritas. Makes transferring your line across two faces so much easier. I also used the saddle square and the mitre saddle which I also used as guide to pare my 45 degrees with a chisel on small stock.

They make  a whole series of these in various angles
Myself I used 14 degrees for most everything

Another type of dovetail marker.

Other considerations:
Woodpecker has been making a series of "red" tool which are pretty good, Ralph swear by them.

Another tool which is very handy in the square dept is the Veritas Cabinet maker square, very handy. Just ask Ralph...


SLIDING T-BEVEL

These simple looking tool are very handy but can be frustrating in use... because of the blade locking mechanism.
Ideally once locked you should be able to lay it flat on both sides, most don't.

Those that lock with a lever, even with the area recessed, 
don't lay flat on this side

Forget about laying flat with a big knob sticking out

The only ones that can lay flat on both sides are the ones that use a locking mechanism at the butt end, providing the nut is not bigger than the stock.

This Millers-Falls "Buck Rogers" lays flat

So does this Disston, except that the wing nut is a smidge bigger and depending on the locking position it sticks up a bit. I can easily work around that.

Sliding T Bevel are very handy and you should have a "few" on hands. That way you can leave one set at a given setting throughout a project or check your drilling angles from two directions etc. Here is a new and inexpensive T-Bevel that lock on the butt.

WINDING STICKS

A must when flattening stock with planes, but regardless of how you are trying to flatten your stock with machines or by hands, you need these to check for twist.

Veritas winding sticks

You could make you own out of wood, or buy commercial ones such as from Veritas, but you could easily save yourselves a few bucks by buying a piece of extruded angle anodized aluminum at your local hardware store for a few bucks, cut it in half and voila! a rugged pair of winding sticks.. Perhaps use a black marker to make the top of one of your stick stand out more and you are good to go and would not cry if (when) you will knock it off your bench :-)
In addition by using them inverted (resting on the two edges) they are very stable.

MARKING GAUGES

You cannot have too many, just like Sliding T-Bevel and dividers.
At a minimum you need two types, which are sometimes incorporate into one tool. A marking gauge and a Mortise gauge.

The marking gauge has a single pin, whereas the mortise gauge has a fixed pin and a movable one.

The traditional British mortise gauge often comes with a fixed pin on one side of the beam (the marking gauge) and two pins on the other side (the mortise gauge)
They also often feature a recessed screw to lock the beam, requiring the use of a screwdriver whereas the American ones used a wing nut type of screw.

Stanley No 76 mortise gauge

Featuring a special plate to be able to trace around curves

Typical screw recessed locking screw on British gauges

A modern Veritas wheel gauge, first generation.
To cutter does not recess into the head, nor is there a flat on the head to prevent it from rolling around. Both problems are fixed on the new ones.
I get around that by dropping it in one of my bench dog holes when in use.

Pin or Wheel gauges? I have and used both, the wheel types are able to scratch a good line cross grain, easier than a pin, but have more of a tendency to follow the grain when used along the grain. Proper holding techniques can easily overcome that tendency. Wheel types are also easy to sharpen, just rub on the flat side.

Micro adjust one such as the Tite-Mark and the redesigned Veritas are very nice (insert drool here)

DIVIDERS, CALIPERS AND COMPASS

A must in the shop. They come is various sizes, usually in 4, 6, 8 inches and bigger. You need a least one and preferably a few, again to leave them set throughout a project. This is one tool where buying as a set can save you some money.

This is a 8 in set

Stay away from cheap kindergarden type compass and buy yourself a good solid one. at least in the 6 to 8 in range or bigger.  For bigger circle you are better off with a set of trammel points.

This is what I meant by Kindergarden set :-)
And yes, that was my first kit as a kid, which somehow survived me...

My next set as a teenager, also survived me and is still in use.

My regular shop one, notice the perfect use for 
those small pencil at the Lee-Valley store to write in your order...
Oups you are supposed to leave the pencil at the stores :-)

Trammel points set. you are only limited by the length of the bar 
which you can make any size you need

MARKING KNIFE

Another essential tool for making precise marks AND setting the stage for the chisel or saw to follow. A true marking knife has only one beveled face, the flat face is riding against the ruler, square or whatever.

Paul Beebe marking knife. Good all purpose knife but the blade
 is too thick for some uses such as small dovetails

Czeck Kerf Kadet knife. Pricey but I love it. Good balance, 
nice thin and long blade sneaks in everywhere

Crown small awl. Some prefer to use an awl to strike marks, 
but I prefer the cut edge left by the knife

Recently Lee Valley came out with a great marking knife, nice thin, long blade in a glass reinforced plastic handle, inexpensive and great buy. If you are starting, and don't have any, buy one!

Beside the marking knife, I like to use a shop knife to deepened the marks left by the marking knife to help register the chisel or saw plate. You could also used a chisel to do that, but a good shop knife quickly becomes indispensable.
My all time favourite is the German chip knife No 8.

Technically it is a carving knife, but I just love the way
 the handle fit my hand and the balance

CENTER PUNCH

There are many such punch and variations, but I like a good automatic punch. Put it where you need it, depress the top and it fire a spring loaded tip to leave a mark. So handy, to me it is indispensable and do belong into any minimalist tool list. Perfect to ensure you are drilling right on the money...

Automatic punch


RULERS AND TAPES

I prefer a rigid ruler to a tape measure any day, but a small tape comes in handy, especially when measuring your stock and getting the rough cuts set up.
When I says small I mean around 10-12 ft should be plenty long. Larger ones such as 25 ft are more for carpentry than woodworking, beside why carry around the extra bulk and weight!

Or for the ultimate in compactness carry one of those in your pocket.
That is a 6 ft tape... Yes it is a replica of an antique.

I used both metallic and wood rulers. Metal ones should have their markings etched then ink filled for durability and legibility. You want a low sheen or the glare will get you :-)

I just love folding rules, vintage ones are a crap shot at times, but they now have started to make them again, yeah!

Traditionally woodworkers would carry a 2ft, 2 fold rule and a long Zig-Zag type for longer distances up to 8 ft. My Zig-Zag rule has a brass slider on one ends which is very handy.

Rabone No 1167 2 ft,  2 fold rule.
That one has "Blind man" markings, big ass numbers for old guys like me :-)

Lufkin X48 Red ends, 8 ft rule with a brass slider

Other handy rules to have around would be a good pocket clip 6 in metal ruler


And a center finder rule. I don't know how I got along without one all these years before, soooooooo handy to have.


In many instances you don't need to know the exact measurement, you just need to know if an opening, or assembly is square or a set reference length. A simple pinch sticks will act as a Go-Nogo gauge and is a lot simpler to use than trying to measure the diagonals of an assembly at glue time. You can buy the hardware at Lee Valley or buy a complete unit at Woodpecker or Rockler or you can simply make your own (watch Pinch rods and Squeezy blocks). Very simple, but sooooooo handy.  What size? Sized to whatever your needs are.
A pair of these in two different size should handle the vast majority of your needs.

The Veritas hardware for making a pair. I already have one made, this is for another sizes as a one day project, someday...

Finally since the world is not flat, you need to be able to find level and plumb, and sometimes you need to determine what are all the angles you see :-)

LEVEL

For woodworking a torpedo level, about 9 in long is all you need. The 2 ft and 4 ft etc are more suited to carpentry and house renovations.

You have the choice of a glass vial or electronic version. Heck you can even download one of the various Apps for Smart phones that will turn your phone into a handy level.

Good old fashioned and reliable glass or poly vials

Electronic. You don't even have to look at it, it beeps when level is reached.
Have this one for over 20 years now, and my wife is constantly stealing it for leveling pictures :-)

A pint of beer makes a very handy level...until it is empty of course :-)


ANGLE FINDERS

There are numerous tools out there that would fit the bill, from the simple plastic angle protractor found in any drafting kit to the various digital gizmos available.
Whatever you get, get one that you can read easily and adapted to your job.
For example you would be hard pressed to check the angle of a blade in a tablesaw armed only with your drafting set Angle protractor!!

Inexpensive plastic angle finder. Pretty good but maddening at times trying to remember how to read that darn thingy...Save the instructions :-)

Heck of a lot easier to read, no instructions required :-)

Love this little digital gauge, I find new uses every day for it. 

While you could easily make such a board with an angle protractor, you can buy an Bevel setting board. It is very handy to have.


Next I would add a set of setup's blocks. They are not only handy they make setting up tools and cuts so easily and precisely without trying to decipher small strange markings (you know those pesky metric thingy)
I had to exert great control not to include such a set into this minimalist list. That how much I rely on them all the time. The thing about measurement accuracy and transfers of those numbers on various devices is: Every time you measure or read a distance, you introduce errors. By not trying to measure anything by using Go-Nogo gauges and known dimensions blocks, the actual "measure" is very accurate and easy to duplicate over and over without errors.

This is the basic (starter set). It is the one I used all the times

I like it so much, when they came out with expansion sets, I bought them too.
This is the 1/16 expansion kit and the 1/32 set with the starter kit.


Another great tool which work in a similar fashion, is a taper gauge.
That in effect spread the measurements out for easier reading.


So by now you may get the idea that I don't like to take actual measure, and if so, you would be right...

Bob, who doesn't like to be restricted by imperial or metric measurements. I am a Free Range wooodworker you hooo