Saturday, July 14, 2018

The Grampa birdhouse, 2018 edition

I read from Chris Schwarz years ago that in woodworking book publishing, bird houses books are among the top sellers, since...forever it seems.
Obviously a popular subject, let's take a hint...

Its been a long, long time since I made  a birdhouse, but I saw a picture of a whimsical one that I like.
so this is what we would do next as a project.
Google birdhouse with faces
A bit more involved than cutting shape with the scroll saw but why not.

So first lesson for them, how to square a board on four sides given only a piece of firewood and a dull hand plane...Kidding :-)

So I suppose, I should built one first and see how I am going to approached it with them.

I don't have a plan of course, just a picture of something that catch my eye, because it is screaming Grampa !!!! :-)


A quick doodle, a few key measurements and notes

A quick check of my left over side piece of  my 1st plane till
Should give me a few pieces, but need more

Brought a plank and my scrap pieces to the wood shop

Uses a stop for cutting all my pieces to ensure squareness
then similarly uses a stop to cut my roof angles

Perfect fit in just a few seconds of electrons munching

Back home with my piles of parts. 
Have  enough to make my first one, a  few left over parts to make two mores.
Will need more parts but had to come back home early

And before you knew it, it was time to drive the oldest to a slumber birthday party then take the youngest to the Kingston Steer BBQ and the bounce kingdom and the petting farm and etc, I was able to resume after supper

The youngest awaiting impatiently in line to get in.


First thing first, I reset the scroll saw to the leg vise position in order to set up the mitre saw.
I chose the NOBEX instead of my usual Stanley's and al because I am thinking this one should be less tiring to use. A 24 to 28 inch backsaw mitre saw is a tad heavy for the little ones, trust me!!!

Both saw stations set up

Similar set up as used at the Wood shop, we can cut both part of the roof angle
 on the mitre saw by hand, just as easily and with similar results.

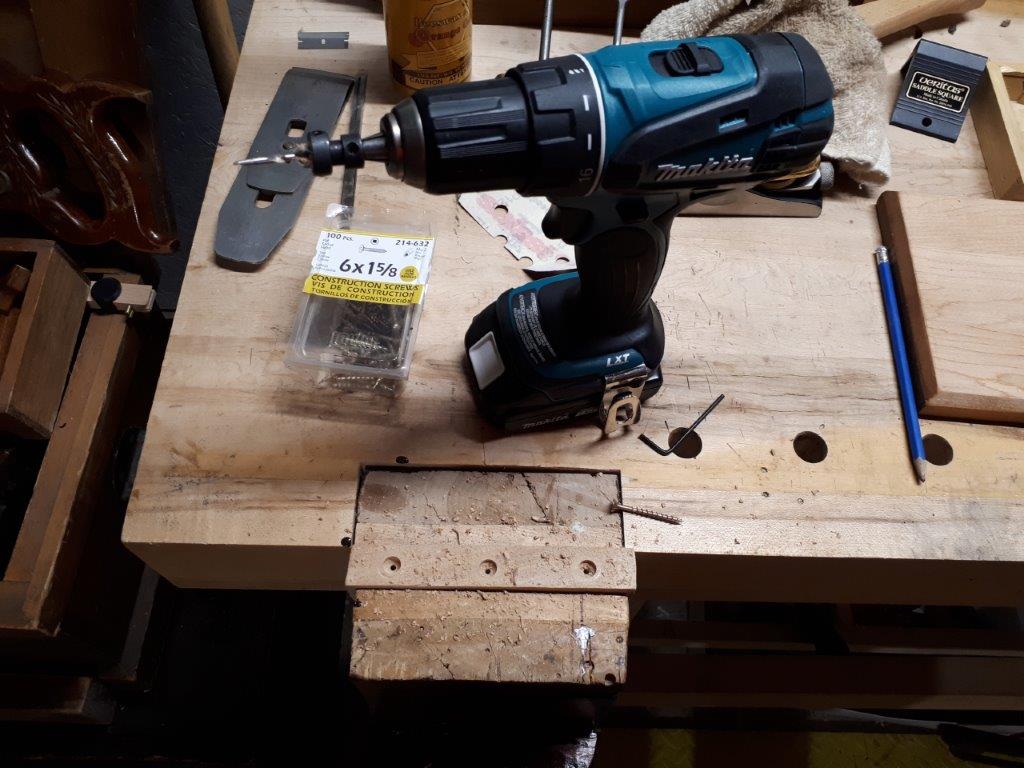
First I thought I should try drilling the hole, with a brace.
I came up with a hole of  one and a half (1-1/2 in), at that size my choices are limited to hole saws or Forstner bits

Setting up a modern hex shank Forstner bit was no problem for the brace, it locked strong and true.
But it proved pretty hard to use.  For one thing, at this size in my set, it has a saw tooth edge and because of the rather short and stubby centering pin, it want to dance all over, wherever the saw tooth grips, making a mess. A smooth rim bit would had been a better choice in this case. As were the Forstner bits made for braces, incidentally...

A regular hex shank Forstner bit fit good in a two jaw alligator brace

You need heavy down pressure to stop it from skating around, 
but then it is hard to turn and the saw tooth make a mess

So obviously, not a great idea for the kids.  Need a Plan B...
Next obvious choice, although it does says on the bit boxes; To be used only in a Drill Press, was to chuck it to my cordless drill.  A tad tricky to start, because of the previous mess left behind, but managed to recover.  Would have to come up with a Plan C for them to make the hole. Hopefully I can set up my Post drill soon, that should do it.
Meanwhile need a back up plan in my pocket (an old enduring military thinghy :-)


Using the Makita cordless.
Done, a bit of blow out on the other side, but rather minimal.
Slowed right down at the end

After that it was time for the various face features, think Mr. Potato's Head.
Change the mustache, eye brow and etc and you have a new face. I want them to make some of their own creation, so I'll have them draw them then cut them mostly myself, cause...Squirrel...

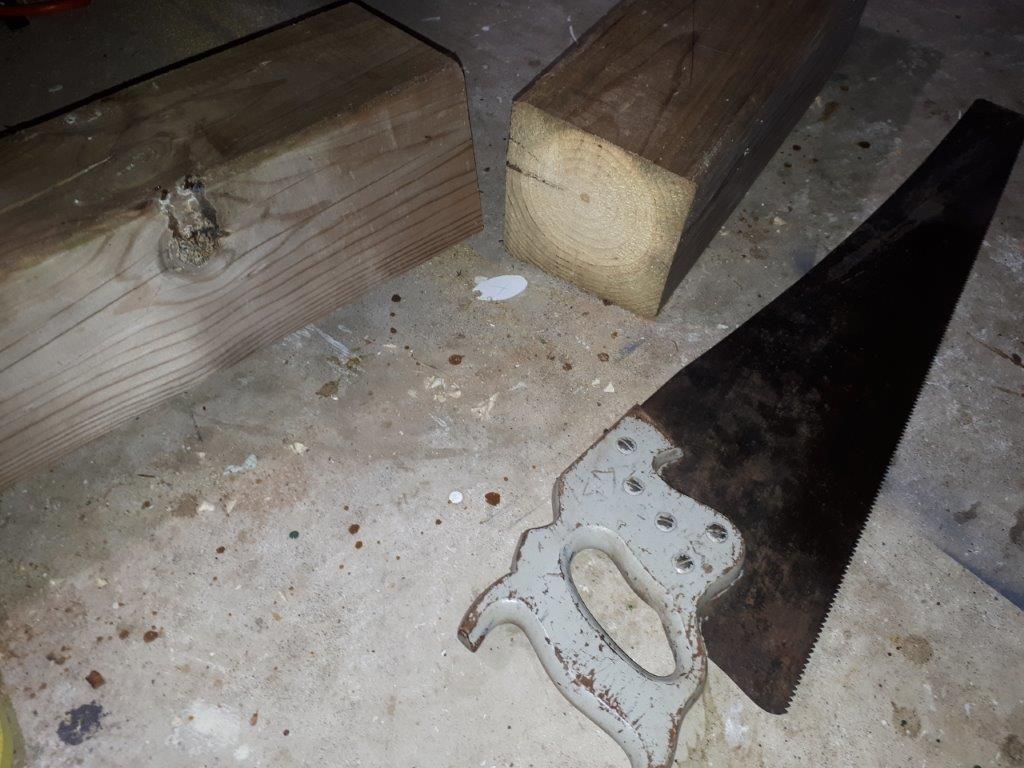
Cutting a piece off long enough for nose(s).
I used a D-7 crosscut saw on the saw bench


Then to liberate off one nose from that piece, I used the NOBEX Miter saw.
That they should be able to do at least once??


Then it's off to the scroll saw to cut the side shape out

quick work with a sharp shop knife .
Round off all the extremities and sides except the top which connect to the eye brow piece

Then draw and cut the eyebrow.
I would had been so much more proficient on a bandsaw, regardless of blade size...


I am starting to realized that this thing is not as easy to master as I first thought for the little ones.. 
It required a lot of coordination hand & eyes, feeding a piece, following a line while holding it down and cranking with your other hand. No room for squirrels (or beers) in this equation... :-)

You can ease the workload on them by providing the cranking power yourself.
I think I will try cutting the next one using either my coping  or fret saw

But that is as far as I got today...

Until the next time, keep your sticks on the ice. Heh!

Bob, the builder

Friday, July 13, 2018

And our first project together was...

I found some small pieces of 1/8 thick plywood, cut them up for the kids to draw on it to then cut the shape out on the little saw at the bench

They both wanted to draw their own shapes so sharpen pencil and out you go.
Then they quickly decided that it should also be colored.


Finally the oldest was able to cut out her shape on the saw

She needed some help with the action. mostly how to hold the piece down and feed it.
But she got the hang of it

The youngest one has the attention span of a squirrel presently, so it is a bit more of a challenge :-)

Besides she has yet to finished her masterpiece

And by the time she was ready to cut, Jean mentioned maybe we should go to the beach.
The kids quickly turned that into lets go swimming, so the other masterpiece has not been cut, she decided to leave it as is and go swimming now.
So packed a lunch and off they went. I stayed behind with Rudy to get some yard work done.

So this is what we ended up with today.
Its going to be a long way before we built our first Applewhite chairs together :-)

Quick intro to the shop, but I got to learned a few things about them.
Next, we will be making a Grampa birdhouse, stay tuned :-)
I think Ill pre cut some of the pieces and they will assembled them then paint them of course …

Bob, the learning Grampa

Thursday, July 12, 2018

The first project coming out of Grampa's workshop

The first thing I wanted to set up was my small Delta scroll saw, the American boy .  Yeah, I know, there are Canadian girls but I'm sure they will like it too :-)

To do that I wanted to make some sort of portable base to fasten the saw on the bench or table.
Were we last left off, I had roughly saw a board made up of laminated maple boards.

My plan was to finished it by hand, but them Jean said she was coming home with them one day earlier. For me to finished that and still made progress in the yard, I figured better bring out the big toys.
So a quick trip to the wood shop on base, run my board thru the drum sander, rip the other edge on the table saw, then cross cut both ends on the Radial Arm Saw and done.
Took me longer to signed the keys in/out and clean up than doing the deed :-)

There is something that this bench have not seen in a long time... A board ready for planning.

Back home, I gave the board a chamfer on the top side, knocked off all  the sharp edges with a light sanding.

Figured may as well set up a 1/4 inch line all around to guide my chamfers.
Set up the gauge then score lines all around top surface and the sides

My board  had a tendency to flip up a bit in use so I immobilized it with a holdfast 

Did the ends first to removed the blow out at the edges

Gave it a quick taper to minimize blow out

Almost done my taper on all four edges

I'm using my LN No 65-1/2 block plane, set for a coarse cut

How coarse? I had no problems with either end grain or long grain, 
except that you quickly finds out which way it prefers to be planed :-)

Once done, I gave it a coat of my new favourite: Howard Restore-A-Finish


I know, It's not a stain, but a finish restorer, but I was curious to see how much colour it will impart on a raw piece of wood. I have both Golden Oak and Cherry, I used the cherry one on my maple board. Happy with the results.

Later on I gave it a coat of Howard Feed & Wax to somewhat protect it and make it look nice.

Drilled and countersunk three holes in my cross batten to act as a stop (think bench hook)
Screw the piece down by hand (Robertson) after drilling clearance holes in the board to avoid any splitting and also make it a lot easier to screw into hard maple....

A quick trim on the saw bench for the batten


Drilled and countersunk

Fasten down.
No, I did not finished the underside of the board
nor did I glue the batten

Drilled four (4) clearance holes for the saw

Fasten it down in the vise

I wanted some flat round head slot screw, but only had Robertson tapered head.
Robertson are from 1909 so period correct for the saw which is from 1923

Thinking, maybe the vise is in the way for them??


Then tried also on the bench with a holdfast.

Works good, but will need another hole for holdfast,
 too close to your hands for my liking

Tried in a 3/4 inch piece of pine.

Works good, but worked a heck of a lot faster and better after a few quick shots of WD-40.  Would need to finish  cleaning and lubricating the tool better, but for now it is ready for the little ones to use.
And that is all that matter.
Will gather up some thinner material and patterns for them to play with.

Today when they get back, we will be making some sawdust together.

Now my next project would be to figured out some sort of platform/stools for raising them at the proper height.  6 foot Grampa is a bit taller than the younger ones, now 6 and 11 :-)

Meanwhile, continued to make progress in the yard

My big pile of branches is gone

The gardens started to be harvested.
We had spinach and radish, strawberries and the blueberries are coming along fine.
Much more to come soon. Oh and a black bear has been seen in the neighbourhood.
Not to worry, Grampa is a Vet and a marksman (with an AIM-7 :-)


Figured I could also set up my GRDFW (Grampa Rapidly Deployable Field Workshop).
You know, set up the Multi Function saw bench with the saw (s) outside on the deck??

Oh, so now I need some sort of tool totes, to carry tools in and out of the shop, and, and...
More projects, Yippee :-)

Grampa Bob, tired but excited to get to play in the shop with the girls.

Friday, July 6, 2018

Setting up Grampa's workshop

Well, with all that heat wave is bringing, my yard works is really slowing down.  Time to retreat to the shop downstairs and setting it up for the grand kids.

I just need to clear the floor, tidy up and set up a few human powered machines and voila!

There you go, floor is cleared, and the beam went to..??

Another good reason to get into hand or foot operated woodworking machinery, is that it is a lot easier and safer for the kids :-)

First up to bat was that 6X6 beam lying on the floor
Took some quick measurements and cross cut both ends.  Hopefully I cut enough to get rid of some of the worse twist.

My first idea was to cross cut it using my circular saw, but I negated that because it would make quite a mess in my shop. I do not need bigger messes right now, thank you.
So I figured, lets go old school, using a Disston D7 cross cut saw

Tracking pretty good

And done. According to my phone time stamps, 
that took about 1 and a half minutes. Not bad

Cutting the other end

Nice square cuts, effortlessly.
A well sharpen and set saw is a lot easier...

And what about less messy?  Well, it may had been if I did not steps into the saw dust piles and track it everywhere… it seems... Oups!

That done, it was easy to prop up the beam by myself, my measurements paid off

First location I tried.
Too close to the door

Where it is located from previous pic, have room to move it 
on the other side of joist blocking

Where it is currently moved to.
I like the clearances around it

And it is boxed in between the floor joist and the blocking piece.
Should be plenty strong to hold on. The deep slot in the bottom cement block 
makes it pretty secured as is, but will of course fasten the top with lag bolts or something

Well, once clamped on top, the bottom of the post twisted inward to the left
But there is enough of a flat surface on the side I need (RH)
Will see when I test fit the backboard

Next up is to move the Post drill from the garage to... eventually the shop in the basement.
I would like to strip it and repaint it, lubricate it and yadi yada but I want to set it up pretty well as is, it is after all in good working condition.  So for the sake of expediency, I am simply going to take it out and address a few issues., before hanging it up

Can you see it??

Yes, that back board has developed quite a bow introducing twist

Will make a new board for it out of a piece of 2X6 or 2X8

The back board was fasten to a post by two lag bolts on top, and...

One at the bottom.  May be I'll put two at the bottom also 
to prevent or minimized further twist (??)

So for now, I will take it off its board, do a quick degunking/cleaning with Krud cutter (outside :-)
Maybe this week-end ??

I will source or make a large container to gives the parts a soaking in Evaporust later on.

Up to bat next was my little scroll saw from Delta. That should be lots of fun with the kids, but in order to use it properly, it need to be secured down.

Found a leftover piece of glued up maple of a suitable size.
Again, my first thought was to run to the base woodshop and quickly crosscut it to size on the table saw.
BUT, again, keeping with the theme :--) decided to cleared the saw bench and went at it with a Disston D8 ripping beast. Not the fastest in hard maple but it made quick work.
Did not bother with lines, just quick scribbles on the board and saw...

Well, I'm pretty sure a line would had been a good thing caused I went out in La La Land and veered off. OK no sweat (said the man in a 32C workshop), I will just comes in from the other side and a quick plane pass would erase all...

Well, not really, quite a la la land distance

OK, screw it, just split the difference :-)

I may be blind but I can follow a line blindly, without any line... all bets are off :-)

I want to screw in a batten on the underside, so I can secured it in my leg vise or on top of the bench with one holdfast

Screw to that piece of wood, it should be less prone to tip off.

Found a suitable piece of hardwood for the batten


But that is were I quitted, the humidity is getting to me and I'm running out of clean T-Shirts...

Next I would love to find a foot or hand operated mortise machine, a pedal powered scroll saw and such :-)

First project for now in Grampa's shop would be to make or find some proper stands for the little ones to stand on at the proper height at the bench and drill press and so on.

And since I made my Super HD saw bench as a mortise, drilling and  etc. bench, I should be able to let them work on it more easily. It is currently resting on removable shoes, since I have yet to settled on a "proper height for me".
Translation: When I built it, I goofed and somehow transposed the height as 16 inches instead of my planned 19 inches... Oups.  I simply add a pairs of shoes under to raised it, but I found that I can work at 16 without much problems.

Bob's Grampa workshop, opening soon