Wednesday, June 29, 2016

De-rusting and Warranted superior saws

Today for my daily one hour of shop time,  decided that I would work on combating our arch rival nemesis of tools, rust!

Now that I can walk around the garage floor, I thought it would be a good place to work since de-rusting can get some messy regardless of methods used .

So I spray liberally the jointer cast iron bed and a handsaw I'm working on.
Throw ball with Rudy while I leave it do its trick (WD-40 not Rudy :-)


Went to get a new razor scraper cause I have no idea were mine is right now..


A few scrape and see how easily it is coming off

Surface rust is no biggie, except if left unchecked for a while
 it will eventually cause pitting and that would be a bad thing.  A coat of wax later on will protect it.

The saw I'm working on is one of them I picked the other day it shows a faint etch, Im curious to see what it is.

My usual arsenal for saw plates, WD-40, safety razor scraper, and lots of paper towels. I also used a green Scotch pad, but I stay clear of the etch area with it.


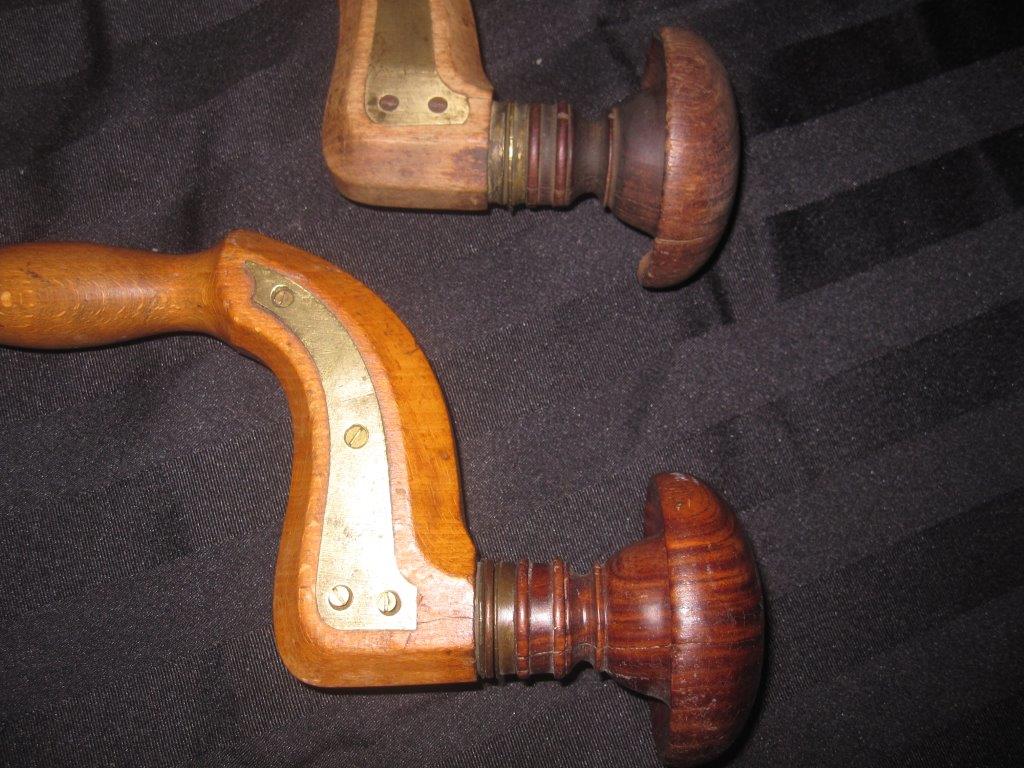
These dome screws are sometimes a bugger to remove, since the there is nothing to hold the screw in place. 3 out of 4 came out easily, the last one just spins in place. I had to resort to a piece of wood and two clamps to secured it while unscrewing.


Success

The dome screws first came out in 1876.
This design was patented by Disston on Aug 29th 1876.
The Medallion has female thread (shown on left)
The threaded stud is rather small and being brass can be twisted off...

In the 1914 catalog, you can buy replacement medallions, but only with Warranted superior, not Disston on it. Available in two sizes:
Large 1 inch and Small 13/16 inch. Notice also how the dome screws have changed. The medallions now have a thread stud


That change came about with the Glover nut patent of 1887

So what is the scoop with that saw?
after some light scraping with the razor an etch start to appear...

The etch reads:
Special saw steel     Patent taper ground
VICTOR
Made in Canada

Never heard of it, so lets look at the medallion;

Recognize the unmistakable Disston Keystone logo?
It measure 13/16 in in diameter and the rolled edge is 3/32 wide.
It is made of brass nickel plated

So what is the deal with Warranted Superior on saws?
There are two very different usage of this statement. On British saws, it denoted often a truly superior products, while ironically, on American saws, it denoted a second line product from the big makers; Namely Disston, Atkins and Simonds.

Most American saw makers were purchased by one of these three makers, listed above, and continued with their other makers saws except that they would not stamped them with their "good name" and instead put their Warranted medallion on them. Are they a lesser product? Arguably, some are as good as the major labels manufacturers, but they did not wanted to lessen their good name by putting it on a less expensive products. Brand name loyalty was (and may still is) strong in those days. Disston at their peaks easily dominated the market at about 60 % of all saws sold...Worldwide!  Ever wondered why they are so prolific out there? Now you know. So if you find any American Warranted superior saws, chances are pretty good it was made by Disston!

This Jackson backsaw (second line from Disston) from my "ahem" assortment, featured the typical Eagle first used on Warranted Superior medallions by Disston

A more modern WS American medallion

 
While this British Simpson tenon saw has a mythical slayer 

Typically, British WS medallions have a coat of arms on them.
That one from a combination saw from Adelaide saw works

These are all from my coll...err assortment of users saws :-)
Back to Disston;
Later Disston made WS medallions, have a circle of dots, star at the 3 and 9 o'clock position and with or without the eagle in the middle, then a keystone was put in the middle instead of an eagle. The 1906 catalog shows the eagle while the 1911 has the keystone showing on their replacements medallions. The 1914, and 1923 catalog shows nothing in the center (no eagle nor keystone)

This medallion is then from approx 1911. By then most small guys were now secondary lines of the big guys (Disston, Atkins, Bishop and Simonds)

This saw measured 24 in at the tooth line, making it a full size handsaw, as opposed to a panel saw (20-22 in). The rosewood handle has some wheat carving on it and fit my hand just right. Being made of special saw steel (whatever that is) and patent taper ground are all signs of a good saw. She is a keeper :-)


In case you are wondering, no I did not finish cleaning it, I was sweating buckets so I quit and retreated to the computer to research it.

Bob, who was worry I'll catch hell because I forgot to changes my clothes before making a rusty mess... old habits die hard I guess ...


Tuesday, June 28, 2016

Found some tools in my garage ...

I have spent the last two days sweating it out in the garage, trying to regain some sorely needed spaces, from the chaos it has became in the last year....

Moved stuff outside so I can walk around the table saw

Ah, there it is. Found it! I thought I had a Unisaw somewhere in there :-)

The Radial Arm Saw resides temporarily on top of it
until I decides what to do with it. The cardboard box on top? 
That's my portable spray booth :-)

Yah, I know lots of room for more downsizing/turfing...
But at least I can now walk around it, bonus

That poor jointer is starting to rust. 
Its grand time I attend to my cast iron surfaces 
in the garage and protect them. TS, RAS, Bandsaw, Jointer, DP

I think that for now, I'll just spray them with a liberal coat of WD-40 until I get "Round-To-It".
Also came across more handsaws (imagine that :-) and a few more tools I have not seen in a while.

Now I have an accumulating pile of stuff awaiting a truck for the dump, that, and a few boxes of donation and etc. Once these are gone, I will them continue with my late Spring clean up.

How warm is it around here now? My grass is turning yellow and crunchy, there is a burn ban all over Nova Scotia right now.

Bob, sweating buckets, man it is getting warm, but heh, not complaining, it could be snowing :-)

Saturday, June 25, 2016

The slowest build...

I would like to say that things are progressing on the boring till, and there are...but at a glacial pace...


I started on it in earnest on May 21st, getting down my requirements then figured out my dimensions. After a few last minutes changes, I ''finalized'' my design on the 24 of May, then two days later, I cut and machined my frame pieces.

If you look closely, you can see the knot at the end on the top piece

It was not until the 19 of June that I finally cut the pieces to final length. I previously cut them slightly longer in order to have some fudge factor for the final in situ size.

That was the maximum size I will entertain with this space.
I decided to cut it back a bit. I look a bit too large

 Once I was satisfied that my new till would fit its intend location, I could then cut the dovetail pins on the long side pieces (2), then on the 22nd I cleaned the joint half, ready to transfer my pins on the side pieces.

Me getting away using the dining room table...

I was going to finished them on the 23rd, but by then I realized I somehow missed a big knot smack on the end of one of my side board, not good...

How the heck did I miss that earlier??
Where it land would give me lots o trouble it has to go!

So yesterday, Friday,  cut off that knot, which means my final dimension would be a tad smaller than anticipated, but still close enough to my experiments sizes that I'm not worry about making it hold the tools I have in mind (always subject to last minutes changes of mind anyway :-)

It is not because I'm slacking off, I just had a myriads of things vying for my attention... besides Rudy!

Rudy helping me with my house inspection

First there was my annual walk around inspection of the house, looking at how the paint and caulking survived the winter and etc.
There always seems to be small spots here and there, and this year was no exceptions, the front get the worse of sun and wind, there are always some spots that have the beginning of paint peeling. These I scrapped then prime and paint.
 
These spots were a lot smaller before I scrapped them

We are going thru a heat wave right now, so that limit my opportunity window for painting. You should not paint when it is too cold, nor too hot.
Followed the weather forecast for a while and managed to squeeze it in, all my spots are done. And then there are the multiples flower beds that need cleaning and new plants etc, etc...

Done for another year...


Did more executor stuff, pretty well all done, the only remaining items are shopping for house and car insurance (in progress) and select a suitable headstone... After I pay for the funeral, ouch!
And I finally got my car fixed, ($521 later, I hate rodents!)
My paperwork for my veteran plate came back, got my vet plate on the car.
Some of my civilian friends asked me if I was worry about advertising my military background in the wake of all these terrorists attack.
Oct 2014, a lone gunman shot dead one of our sentry at our national war memorial in Ottawa then storm the parliament building, he was shot dead by the Sgt at arms for parliament. And shortly before that another member in uniform was run down in a parking lot in St Jean Qc.

This editorial cartoon in the Halifax Chronicle from Bruce McKinnon resonated around the country. The signed original has been given to the family of Cpl Nathan Cirillo 

Hell NO, I may be retired but I'm still dangerous.. Don't let the gray hair fools you :-)
Ever see the movie R.E.D.  with Bruce Willis ?
Thread lightly on vets :-)

This Sunday, Rudy and I are attending one of the three celebrations of life for Heather.
The first one being in Halifax, organized by the members of her African Violets society in the city.

The next one would be held right here in my house on Canada day ( Jul 1st), then the last one, still in planing stages, would be in Ottawa. So all that to say, that I am not expecting to finish this boring till this month.... Unless there are 90 plus days in June... (Inside joke about the build a chair in the month off Jun..ish)
Which reminds me, I better get off my butt and decided what I'm gonna build for that event...
I thought I had a suitable piece of pine for the seat blank, but it is not thick enough, may have to laminate some stock. So will I be able to finish that chair project this month? Well has long as this June is as long as the last one, then yes!
Right Brian? :-)

Bob, hoping to get some clearing done in the garage...

Sunday, June 19, 2016

Update on boring till and etc.

My car has now 4 new rubbers on, new springs up front and four new shocks installed.  Yes, following that pot hole from hell, last summer in Boston,  I ended up rebuilding the suspension. The shocks absorber did not needed replacement at that time, but I figured they have over 100,000 Kms lets get them done now and should be good for as long as I keep this car.
Barring anymore Massachusetts's size pot holes, that should last me till I trade the car in a few years, I would like to enjoy a few years without car payments thank you.


My car sitting on three wheels and my emergency tire on the front passenger side...


AC "complaint" was addressed, simply needed a recharge, no leaks. the car is now road worthy for long trips and Rudy is getting used to wearing his safety harness in the car.


And then the car start running like crap and when starting it tells me that my engine is overheating???? WTF, they troubleshoot and stated that my thermostat (heat sensor) in the engine head was kaput. Parts came in, left the car at the dealer drove off in a courtesy car, then they called back...
Its not the sensor, it's the wiring ... They found a large rodent nest under the engine shroud cover, the little rascal had been busy... @#^&&*$ need new parts, sigh
The car is now driveable short local distances, no engine heat indication so the computer goes in "no heat mode" meaning no AC available, crap...


My PC at home is giving me fits, with Google Chrome, if I found a rodent nest inside my PC I am going to declare war on these little rodents. And if anyone thinks that chipmunks or squirrels are cute, just remember that they are still rodents, basically a rat with a fluffy tail!
My next project??? :-)

In the mean time a good friend has suggested to me that I should set aside one hour each day to do what I enjoyed the most, woodworking. Go spend an hour each day in the shop! If nothing else, if I do that at the base woodshop, I'll also will get to meet fellows woodworkers and get the distractions I need.
So, starting Saturday, I thought, why not? Lets give this a try.


For my first time, I brought my carcass pieces for the boring till.
Although I had previously written that it was " quick work to dovetail the carcass" I did not do it yet when I started drafting that post, and I never gotten around to finish it. Today is the day, lets move on!


So I did, and in that hour-ish time I spent there with Rudy, there was nobody else, so no big bad machinery working, just me working by hand on my dovetails.
It was a tad ironic, the bench I was using still had our router's dovetail jig set up along with a photocopy of the instructions set besides... and here I am chopping mine by hand :-)


So managed to make some small progress, should be able to finish assembling that boring till carcass soon


Sorry no pics, I forgot my camera :-(


Bob and Rudy, working as a team.
Rudy does the final trim to size by chewing the ends of boards which I then true up with my shooting board :-)

Wednesday, June 15, 2016

Happy birthday Rudy

Today, the 15th of June,  Rudy is 1 year old.


Back in the last fall, when things were quickly going from bad to worse, she mentioned that we should get a small dog companion.


That was the strong hint that Heather wanted a small puppy...
That his our friend Susan's Blue Bell

So at the end of Oct this little guy "followed us home"
He was 4 months old at the time

We quickly bonded as you can see


One of his first engagement was to be a part of our Christmas photos.
What we did not knew at the time was that a new tumors had metastasised on her neck.
She felt sick and we had to cut short our photo session.  

We still managed to get it done, what a trooper...

His next photo session was for his first Christmas picture.
Oh what fun that was to line up with numerous dogs for that pic...
That is when he discovered his barking voice :-)


When I'm typing my blog, he likes to be part of the action

He was just what the doctor ordered, a faithful companion...


Until the end...


So today, Rudy is one year old. Happy birthday little guy, you have given us so much already.


Bob, who is gonna give him a bit of ice cream to celebrate :-)

Saturday, June 11, 2016

Barton Brother's Sheffield brace

In my last haul of goodies (AKA tools), there was a yet, unidentified Sheffield plated wooden brace.

They don't always have markings to be found, but when present they are usually stamped near the chuck end, before the button to release the bits.
Another place, often used prominently, is on top of the head. You will often find ornate brass disk proclaiming some virtues and of course a maker...
And lastly I have another with only a stamping filled with black ink on the side of the nose on the wood part.

As found
After a quick scrub with a plastic scrubby 
and Murphy oil soap, (full strength) for the wood.
Sponge and Twinkle for brass and copper, buffed with towel.

I am not trying to make it look new, just cleaned for close inspection and assessment. Wish I had some Kramer antique restorer to wiped it with...
Any one knows if and where available in Canada??

It is a beech brace with brass plates and a button operated chuck with a rosewood head.

Lets see if we can now find some markings on it to identify its maker.

You can barely make out ... Brothers...

See it now? With flash

No flash

So we have a name, now lets go online and google it.
Here is what I found about this company:
From Don McDonnell of Eureka Springs, AR in response to a question on a forum

Quote The Barton Brothers firm appeared in 1849 and 1852 Sheffield directories as " Merchants and Manufacturers" at 231 Glossop Road.
As far as Ken Roberts was able to determine (and in my research has come to the same result), the firm was never entered in any of the classified trade listings as edge tool makers, brace & bit makers etc. Even though the firm's name appears on braces, chisels and plane irons.

However, we do have some additional information which appears to extend the possible dates of this firm, somewhat. The principles of the firm were Edward and William Barton. In the 1849 and 1852 directories, Edward is shown as residing at East View Sheffield, while William is shown as residing in New York city.

Edward is listed as a merchant at 231 Glossop Road in the 1856 and 1857 directories, while residing at Endcliffe Vale (Edge).
He disappears by the 1862 directory. According to Ken Roberts, in _some 19th century English Woodworking tools_, the Barton Brothers firm was listed in New York through 1855, then simply as William Barton & Co from 1856 to 1860.

So it would appear that tools were being manufactured under the Barton Brothers mark from around 1849 to around 1855 - possibly until 1860 if William Barton continued using the same mark.

Roberts shows a couple of Barton Brothers braces in is mentioned book. One appears very similar to Pete's brace and mark.  The other is more elaborate and claims to be based on a patent. Robert states that the nature of the patent is unclear and opines that the brace may have been made by Henry Browns & sons of Sheffield. Unquote

Not mine

So my brace is dated from between 1849 to 1855 and possibly as far as 1860
Pretty good ball park, thanks Don :-)

So what does the head of mine look like?

NO, no ornate button on this one.
Notice the two holes on the two previous button?

These twin holes, of various spacing's, from various makers and models ad nauseam... Anyway, I am pointing them out because this is how you take the head off or just tighten it after removing the cap.

Here is a typical inside the head view, see the nut at the bottom?
That is also a Barton Brothers brace.

You take out the slack between the brace body and the head by removing the head, replacing the wear brass disks (or add spacer), OR, often just by tightening the nut down. Careful, you need some play and the head should rotate freely without wobbles.

The above pic (view inside) is not mine, it came from this auction I found on EBay.


And since we are talking about the head,,, Where was mine! How did I not noticed that before...

See it?

See it yet?

That is a big chunk missing, yet, did not noticed before...

This has happened to me before, I am aware of why and how, yet... I do it again sometimes :-)

It's the sense of anticipation rising, the adrenaline rush from about to score the deal of the century feeling. Its all these things that make you feel: Quick take my money before you changes your mind (it was only $5 remember :-)

Anyway, just wanted to share since I am sure some of my readers had similar experiences once or twice. And now you know why and how :-)

But in all seriousness, it's no biggie, seen worse, does not impact its work-ability.
It is the only apology on an otherwise good shape brace, would be even better once I fix the head play.
Maybe I'll try grafting a new piece of Rosewood sap wood in there...


Here is something I have never noticed before, or that I remember... It's not that I forget at my age, it is just that my memory banks are full.

The No 24 on the business end of the chuck.
Is it a model No? An indication of the sizes bits it will accommodate??

Wooden brace of this type do not accommodate large bits or bits that would required lots of torque. It is after all, a wooden brace, not a modern steel one.
And even then, they took the precautions of adding reinforcement plates on each sides over the short grain areas. (the bend)

The other side of the brace, 
showing the reinforcement brass plates 

See the notch filed on the 3rd center bit from the L.
A properly sharpened center bit does not require too much torque.

The next logical conclusion of this design was to do away altogether of the weak wood parts in the bend but to retain this look.

Ultimatum brace. If you look carefuly, she is bent at two locations :-( 
Pic from TFWW, link below

The results was the Ultimatum brace. That was considered more of a status symbols, like a plow plane in some circles, than a "working tool".
So they were made will all kind of very exotic, rare and expensive timbers and had often very ornate decoration on the head's button. Some were out right presentations pieces.

Essentially two cast box, stuffed with expensive timbers joined together by a metal rod with a turned wood handle over it. That juncture of the handle to the cast boxes is the Achilles heel of that design, they do bend.
Essentially a 'framed' brace vs the 'plated' brace

So these wooden, plated Sheffield brace, were truly the workhorse of their period. Until taking over by the American steel brace, a stronger design for sure.

And since there was no standard between tool makers over the location of the retaining notch on the brace bits, it is not uncommon to find bits with two different notches filed. That would had been done to accommodate a different brace at one point.

Here are my two Sheffield plated brace, side by side.

Top Barton Brothers,
Bottom William Kent
Both from Sheffield

Another place where they are sometimes marked, 
but often long worn off or hard to read.
The stamp is ink filled on the Wm Kent

The business end of the Kent. Only markings are C or O and 5.
The Barton Bros was stamped 24.

Hard to see, but Barton has a slightly bigger chuck opening 

same Irwin bit inserted as far as it will go in Wm Kent

Same bit in Barton Bros

As you can see, the heads are attached similarly, 
with wear brass discs

Bob, with inputs from Rudy... :-)