Showing posts with label Birdhouses. Show all posts

Friday, May 15, 2020

Post wind storm clean up

After having the temporary Greenhouse up for 9 days, the big bad wolf blew it down.
We had severe gust warnings for Mother's day weekend.  It literally got destroyed, the fabric has some damages, but the frame got bent.  Not sure yet if anything is salvageable.

Batten down the hatches alright!!
Strong winds came from the South and the West

Facing West, the day or so before

We even parked the truck in front to give it some protection.

Overnight it demolished itself, frame included.
And yes, that wind storm was accompanied by snow... On May 9th.
Not quite the Mother day we were hoping for :-(

That meant more work to cleaned up the site, discard some stuff, relocate what we could.
We started again, her good old portable greenhouse (one of two) is back up.  Not in the sunniest location, but tied to the shed and trees stumps, not going anywhere soon.

Yes, she had plants inside

Mostly bulbs

The plastic tap broke on the sink.  Good, now I can replace it with a real one :-)
The drain hose is pretty cheesy, the tap is plastic, but the table/sink is solid
 and real stainless steel, shows no wear or rust after being out 3 seasons.

Portable green house that was inside the larger one, relocated on the south side of the shed

The tree that broke and hung up in Feb, is now down safely :-)
Rudy being nosy, the neighbour is in his wood shed.


That tree was no match for the big bad winds

The whole idea of the temporary greenhouse 10X20 was to find the best location on our land for the upcoming and permanent one to be build later.  Even before it got demolished, she already decided that it should move location... next time :-)

Site all clean.  
We are now thinking maybe the new shed should go there?


My land has a lot of various elevations, the house is sitting high on the land, the empty land on my lot to the south side has lots of sun, but unfortunately also has the highest winds gusts :-(

Another casualty of the wind storm was a earthenware pottery that I forgot to bring inside, it got blown to smattering pieces.


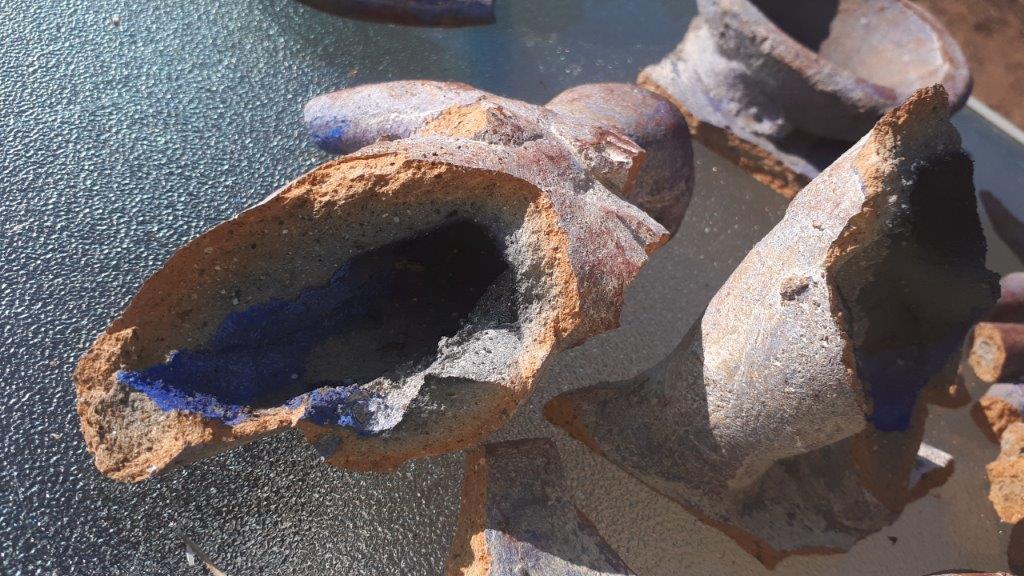
I am going to bury the pieces on my land. Can just picture some archaeologist 
years from now discovering those pieces on my land :-)
Rewriting world history, perhaps :-)

Woodworking wise did some projects...

Gather up all the chemicals, paints, caulking and etc in one spot in the house.  Amazing the duplicates one can found when all gathered together :-)


Also worked on fixing some of her decorative bird houses.  She wanted to preserved as much original as possible.  That meant replacing rotted bottom pieces, new roof in one case, gluing back some pieces.  Since this is going outside, has to be waterproof glue.  I used a lot of epoxy.  To reinforced crumbling edges, hold together split pieces etc.  Lots of small jobs waiting in between glue setting.

I got two on the go on my hobby bench

Taken apart, were broken, will discard some pieces and make new ones

Cutting new roof panels for one bird house

Tight but there is enough clearances

One of two cut

Then gave them a trim to my lines and defuzzed

OK that will work, but the remaining roof panel 
is too twisted to lay flat.  Made another one

The bottom was rotten and discarded, the sides at the bottom need reinforcement

Epoxy and clamps to the rescue

Not going anywhere, good to go


Repeat all around the bottom, put glue in between 
the delamination's and squeeze tight

Then time to make a new bottom

Quickly pare down with chisel bevel down.
Notice how you can control the depth easily with the bevel down

Stopped about there

Few strokes with my block plane, good to go

After fixing the two separate parts, it was time to reglued them together

All I need now is glue the new top pieces and make a bottom for the dual ones.

The epoxy I used.  Impressed with the twist cap, keeps it fresh
 and can be reopened months after. Good flow evenly on both parts.  Amazing :-)
Never had such results with any other already used prior.

All while making tremendous headway in our Spring clean up this year :-)

Ohhh look even made live edge shelving for the paint :-)
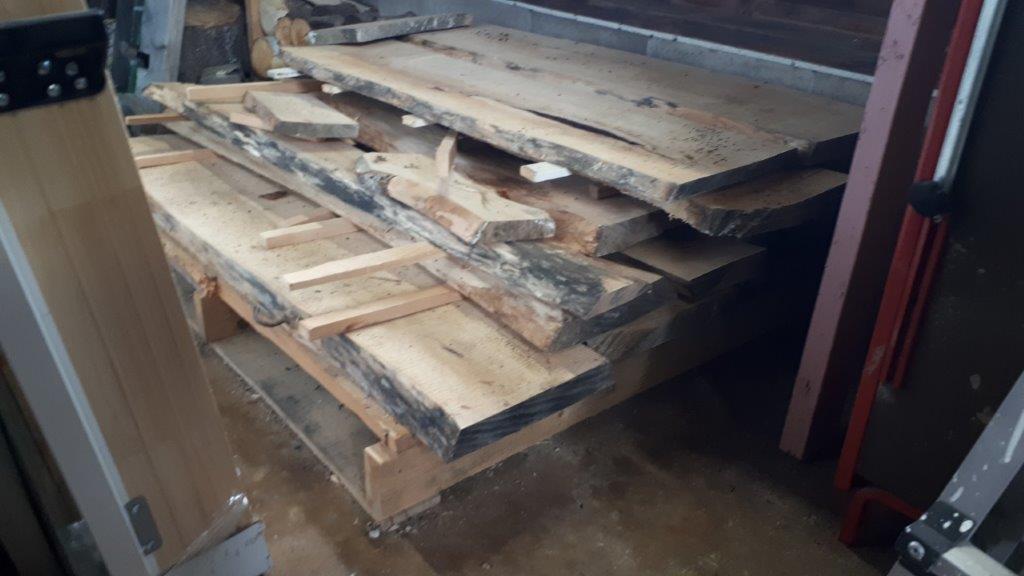
My piles of Maple slabs are now 1 and a half year dried.
Does not register anymore on my cheap moisture meter, start at 10%, I am below that.
Used some as temporary shelving's 

The small meter I used

It work, but no idea how dry it is below 10%
Those two pics taken in 2018

Still got a myriads of small projects to get done, but need time to smell the coffee


Bob, with no shortage of stuff to do to keep busy. Busy is good :-)

Wednesday, July 10, 2019

Yes, birdhouses...

Jean and I are part of the Glooscap First Nation Elders society.  Jean is the vice president and I, do whatever she asks me to do :-)
We meet once a month and are trying to revive interest in the group by showcasing various crafts as part of our gatherings.  Last month, Jean did candle making, then she volunteered me to do bird houses today.  Next month she will be making wreath.  Hopefully someone else will pick up after that, or my turn will come back fast :-)

But jokes asides, I don't mind and it is fun.
The challenge was how to pull it off in a relatively short time, while using basically very simple instruments.  Just something up my alley :-)

The nite before, I gathered my tools and supplies, read up on birdhouse, downloaded and printed some materials to pass around, etc

My original bright plan was to round up some of the decorative bird houses around my yard as example, then build one like I will be demonstrating and build it all from one board 1X6X6 ft with no power.

That's where my brilliant plan started to unraveled fast.  I got stuck in a struggle to keep my tool kit light and minimalist.  Those that knows me will understand why I struggled with minimalist intentions, so many choices :-)

The scene last night on my kitchen floor, trying to decide on what to bring

Oh, by the way, me and Rudy are left without adult supervision for two days, Jean is gone to a retreat with the grand kids.  Will try to keep out of trouble :-)  Yes Dear, I cleaned up my mess :-)

After a few (too many) iterations, this is what I got before calling it quit at 2130.
I did not build one that nite, need a longer board than I was willing to sacrifice

Part of my bright plan was to showcase a few different tools to do the job.  But not knowing my audience genders make up and interest, I had a few back up plans and parts to skip ahead :-)

Sure enough, it turns out that I had an all female audience today, so I concentrated on the technical details, read going over some of the critical features of a good bird house.  Stressing the why and no-no's.

I made some last minutes changes to my tool kit, of course, but still managed to forget to bring some stuff like screws, nails, drivers bits, square, pencil... So much for last minutes preparations.
OH, and I forgot to bring some example of decorative birdhouses with me.

No biggie, had to make a stop on my way to buy a 1X6X6 ft long Eastern white pine board and a box of Hot Dipped Galvanized (HDG) finish nails.

Thankfully I had my tape measure, which I temporarily misplaced last nite in between two beers.
At one point I even text her asking if she has seen my tape lately?  I'll abbreviate the answer to just NO :-)

So armed with my trusty Disston D7 cross cut saw I proceed to cut my board into 6 pieces.  I was going to bring my saw horse, but nixed that quickly last nite, it would had entailed moving around too much stuff.  I made do using two foot rest from one of the couch.  That worked well until my board became too short and was impossible to keep straight on the upholstered saw horse.  Switched to a regular chair to finish my last cuts.

This is where I got my dimensions and most of my data on bird houses
http://www.birdwatching-bliss.com/making-bird-houses.html

After going over the requirements of a proper bird house, explaining the dimensions and hole size and location etc, etc. Came time to drill a  1-1/2 inch hole.

Shown the options: Brought a corded electric drill, mounted in a small portable drill press attachment.  That was because of one choice option for the bits, the Forstner.  By hand you risk to mess up or break your wrist, especially with the larger sizes with saw tooth edges.
Then shown the cordless drill with two types of paddle bits (skipped the lecture on bits geometry) and the brace.  I of course choose the brace, a Spofford brace with a big center bit.  I tried it last nite and it was more chewing than cutting, so I gave it a quick touch up sharpening and big difference.

Came from both sides as soon as the center pin goes thru, to minimize splinters.
At this point realized that I forgot both sand papers and rasp,  but discussed the importance of a smooth entrance hole and some of the way to guard against predators or other bully bird species.
Putting a double layer of wood around the hole or putting a metal ring, piece of flat metal stock etc.  All to prevent them from chewing the hole bigger

Then one more important detail, we need to makes some sort of scratches with saw blade or a small gouge, on the inside surface of the entrance hole board to give the bird a way to climb his way out.

For assembly I used no glue (unnecessary) but if I was using one, it would need to be outdoor rated.
Shown them the differences between regular shiny finish  nails and HDG ones.  The irregular surface texture helps them grip better.  For added strength I shown them how to dovetailed the nails.

One side panel is not nailed in but is held only by the two top nails acting as a pivot hinge.  For cleaning and inspection.

The intended recipient of my bird house

I was purposely wearing a Toronto Blue Jays T-shirt, asking them to guess what type of birdhouse I will be building?  Apparently, not many of these ladies, if any, follows much Major League Baseball, Toronto MLB team are the Blue Jays :-)

After about 1/2 hour, I had this rough but serviceable bird house to show.

I changed the plans on the fly, I angled down the roof instead of straight across.
Yes, the bird house is resting on top of my upholstered saw bench :-)

The left side opened up for inspection and cleaning.
The bottom floor has its four corners cut off.  That is for drainage and air ventilation.
Yes, sandpapers would had been nice, oh well.


I ended up with a 19 inches piece left over from my 6 ft board.
5 straight crosscuts cuts with the D7
One angled cut (yielding two match angled sides) with the D7
One hole with a brace and center bit
Cut the corners on floor piece (4 cuts) and made a few saw cuts inside the front piece with a tenon saw, crosscut
Assembled with regular claw hammer and HDG finish nails 1-1/2 in long and voila!

Of course having forgotten my screws, it is missing a small crucial detail.  You must secure the side against predators opening it.  That's why the side opening is a better option than a top opening.  Also makes its easier to clean.  Important in between residents to not transmit diseases among them.

I would add one screw at the bottom to secure it down.  Yes, you need to open it with a screwdriver, but it is very secure.
Small inconvenience for us, peace of mind for the residents.

Then a clean up and make ready for a special birthday girl, Patty Smith, who is or is one of the older elder on the reservation.

The birthday girl is blowing her candles.
It was successful :-)

We had some special visitors dropping in to wish her happy birthday.
L-R Chief Sidney Peters of the Glooscap reserve, Patty Smith and Canadian Senator Dan Christmas

And Rudy during all of this, you ask? I left him with his doggy girl friend at Jean's Mom place, whom I picked up for the gathering.  The two of them, Rudy and Eva, gets along very well and keep each other company.

Back home later had a nap then supper.

Rudy photo bombing my latest pick at my recent chocolate run (Tm)

Long day but an interesting one, we both learned a lot more about bird houses.

Bob, and Rudy still unsupervised for one more nite :-)

Saturday, July 14, 2018

The Grampa birdhouse, 2018 edition

I read from Chris Schwarz years ago that in woodworking book publishing, bird houses books are among the top sellers, since...forever it seems.
Obviously a popular subject, let's take a hint...

Its been a long, long time since I made  a birdhouse, but I saw a picture of a whimsical one that I like.
so this is what we would do next as a project.
Google birdhouse with faces
A bit more involved than cutting shape with the scroll saw but why not.

So first lesson for them, how to square a board on four sides given only a piece of firewood and a dull hand plane...Kidding :-)

So I suppose, I should built one first and see how I am going to approached it with them.

I don't have a plan of course, just a picture of something that catch my eye, because it is screaming Grampa !!!! :-)


A quick doodle, a few key measurements and notes

A quick check of my left over side piece of  my 1st plane till
Should give me a few pieces, but need more

Brought a plank and my scrap pieces to the wood shop

Uses a stop for cutting all my pieces to ensure squareness
then similarly uses a stop to cut my roof angles

Perfect fit in just a few seconds of electrons munching

Back home with my piles of parts. 
Have  enough to make my first one, a  few left over parts to make two mores.
Will need more parts but had to come back home early

And before you knew it, it was time to drive the oldest to a slumber birthday party then take the youngest to the Kingston Steer BBQ and the bounce kingdom and the petting farm and etc, I was able to resume after supper

The youngest awaiting impatiently in line to get in.


First thing first, I reset the scroll saw to the leg vise position in order to set up the mitre saw.
I chose the NOBEX instead of my usual Stanley's and al because I am thinking this one should be less tiring to use. A 24 to 28 inch backsaw mitre saw is a tad heavy for the little ones, trust me!!!

Both saw stations set up

Similar set up as used at the Wood shop, we can cut both part of the roof angle
 on the mitre saw by hand, just as easily and with similar results.

First I thought I should try drilling the hole, with a brace.
I came up with a hole of  one and a half (1-1/2 in), at that size my choices are limited to hole saws or Forstner bits

Setting up a modern hex shank Forstner bit was no problem for the brace, it locked strong and true.
But it proved pretty hard to use.  For one thing, at this size in my set, it has a saw tooth edge and because of the rather short and stubby centering pin, it want to dance all over, wherever the saw tooth grips, making a mess. A smooth rim bit would had been a better choice in this case. As were the Forstner bits made for braces, incidentally...

A regular hex shank Forstner bit fit good in a two jaw alligator brace

You need heavy down pressure to stop it from skating around, 
but then it is hard to turn and the saw tooth make a mess

So obviously, not a great idea for the kids.  Need a Plan B...
Next obvious choice, although it does says on the bit boxes; To be used only in a Drill Press, was to chuck it to my cordless drill.  A tad tricky to start, because of the previous mess left behind, but managed to recover.  Would have to come up with a Plan C for them to make the hole. Hopefully I can set up my Post drill soon, that should do it.
Meanwhile need a back up plan in my pocket (an old enduring military thinghy :-)


Using the Makita cordless.
Done, a bit of blow out on the other side, but rather minimal.
Slowed right down at the end

After that it was time for the various face features, think Mr. Potato's Head.
Change the mustache, eye brow and etc and you have a new face. I want them to make some of their own creation, so I'll have them draw them then cut them mostly myself, cause...Squirrel...

Cutting a piece off long enough for nose(s).
I used a D-7 crosscut saw on the saw bench


Then to liberate off one nose from that piece, I used the NOBEX Miter saw.
That they should be able to do at least once??


Then it's off to the scroll saw to cut the side shape out

quick work with a sharp shop knife .
Round off all the extremities and sides except the top which connect to the eye brow piece

Then draw and cut the eyebrow.
I would had been so much more proficient on a bandsaw, regardless of blade size...


I am starting to realized that this thing is not as easy to master as I first thought for the little ones.. 
It required a lot of coordination hand & eyes, feeding a piece, following a line while holding it down and cranking with your other hand. No room for squirrels (or beers) in this equation... :-)

You can ease the workload on them by providing the cranking power yourself.
I think I will try cutting the next one using either my coping  or fret saw

But that is as far as I got today...

Until the next time, keep your sticks on the ice. Heh!

Bob, the builder