Showing posts with label Plane till. Show all posts

Thursday, March 26, 2015

Plane till officially done

Got my piano hinge, I splurged and got a brass plated one :-)


Spokeshave tray is now hinged and I tried my hold up arrangement.  Oups! Really did not think that through for the holder. I wanted to not interfered with the ramp, but unless I bend my stick it does not meet nowhere near :-) Fixed that by carving a shallow through on the side piece, that was fun with the tray loaded, holding it with my head while I carved.


I'm using the space to keep my spare blades for the planes in the till. Some NOS Stanley, some Veritas blade and matching cap iron, and of course some of various angle for my Veritas Low Angle plane.

Yes, its a lousy stain job on the holder, lesson learned, buy fresh stuff next time. 
Can has been chucked.

The plane tray is also fastened, and decided on how I am going to put my dividers in.

I could squeeze them in closer and fit a small plane at the end like a Stanley No 130, but I decided instead to go for wider spacer to be able to screw them in, no glue so  I could rearrange them later 

Machined the divider strips

Before I screw them in, I decided to check the fit of my No 8. 
Lo and behold, it does fit flat, the nose just clear the end


So it look like I can fit at least one more plane securely, as long as it it skinny. 
Stanley rabbet plane No 191 shown

I got the RH side pretty well all spoken for with my plane tools, card brush for files, bench brush, strop and a small parts cleaning brush which I use to clean the planes before storing them back in.


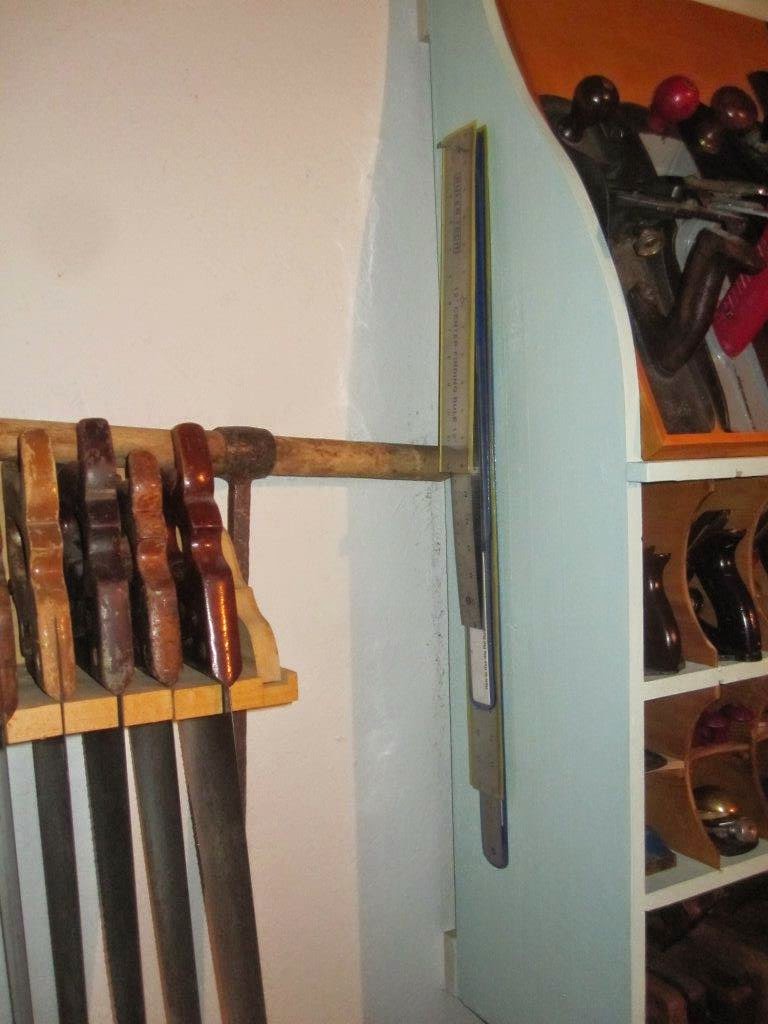
On the other side, still lots of room. All I got so far is various steel rulers.


All I got left is to wait for the dividers to dry and screw them in.
I think, I can officially call this Plane till project finished and time to move on to the next project.
What will it be? Don't know, have a few on my list :-)

Bob, planning away his next bright ideas.

Thursday, March 19, 2015

Slow snow day

We got totally clobbered with snow...Again!  And Spring is starting in a couple of days???
We were snow bound all day yesterday, could not go anywhere. Emergency services were telling people to stay off the roads, they were getting stuck themselves trying to reach stranded motorists.
Did not see much point doing my driveway while it kept snowing the whole day with blowing snow in between. Satellite TV was off all evening, came back on this AM, suspect part of the problem was the snow load on the dish.

As soon as I clear the deck, I'm going to BBQ that little rodent that forecasted 6 more weeks of this white shit!


Made it to the road side

Now we go back up...

Still have to clear the back deck...later

So, this is what my car would look like if Lincoln made station wagon :-)

Done. Time to get out and get gas for my snowblower, next storm is Saturday...Oh and need restocking on storm beers and chips.


So last nite spend some time downstairs working on what I could
First up were the spokeshave holders.  I refined the template measurements and layout on one piece only.  I could not find the double sided tape, if we have any left ?? So I simply tacked the two pieces together with a small air pin.
Drilling took place on my drill press table


Followed by a short stop at the bandsaw.
They were refined by a variety of rasps, files and a light sanding, then separated.


As much as I looked, could not find my stash of piano hinges?? And I'm out of finishing supplies to finish the small details left, the spokeshave holders, the tray holding stick and the new height divider

Not going anywhere tonite, as if the stores are even opened? Sooooo...
Done! Cracked open a beer and try to figured out which planes I am going to add to it??
This one is for you Ralph.
He was commenting on the lack of beer holder on my plane till :-)

No need Ralph, my beer till is designed to hold 2 bottles per cubicles (44), or 3 cans (66) plus 18 per lower sides (another 36). So in total 102 max. Should be enough to get me through a small projects :-)


Then curl up and read a book

Took me so long, my beard turned all white on me :-)

Bob, back from clearing his driveway this morning, we have a lull in the snow until the next one Saturday #@^&*$#

Wednesday, March 18, 2015

Plane till, the small stuff

Finally got back on this project long enough to finish it.
All the joints were cleaned up with block plane and jack plane. The Ogees were fair with a wooden low angle spokeshave, and I fixed a couple spots that were annoying me.


Some wood putty was used to hide the screws holes and fixed some of the defects in the wood.

There was a wall cabinet over the spot I wanted to put this plane till, after trying to figured how I could fit it in, I decided that it would be better to just relocate that cabinet. This opened up that whole wall for better storage, youpee! And since I had an blank canvas I decided it was a good time to painted the walls prior to putting up the plane till.


After a thorough sanding, the till was primed and painted.

I bet you would have never guess the name of that colour?

All the dividers and the trays were given 3 coats of Polyurethane with a light sanding in between. Exception was the big tray, the big flat section was NOT sanded in between coats, the dust nibs gives it a bit more friction (think fine traction sand).

You can see the differences between the bare wood dividers (spares)
 and the poly, waxed ones

So finally, here is the final cabinet; Plane till fully loaded and hanging and screwed on French cleats, I'm not worry about the weight at all :-)

It is holding 58 planes right now and there is room for a few more, I'm happy with the results but I will still build another till for the remainder of the herd


Depending how I divide the big tray, I could add 2 or 3 more. The wooden molders below have room for a few more, depending on size. So in all, although designed to hold 52, I am going to squeeze in more than 60. Its a good thing :-)

Some of the block planes cubicles (4) received an horizontal divider to double the storage space. I think that worked out good.
Detail of the double space block planes cubicles. I reproduced the same curvature on the narrow shelves, strictly for look but it is making it easier to retrieve the planes, I think?

How stable are they? I lifted the toe of each planes about an inch, and they all slam back down.  The additions of the dividing strips will also make them more secured, many have rounded heel.

The quite essentially Canadian IPA beers: Keiths brew in Halifax NS since 1820, and Labbat's blue who been brewing in Montreal Qc since 1847. Yes Labbats is an English name, and so is Molson also from Quebec. A few were consumed in the making of this project :-)

Still need to finish my spokeshave holders in maple, hang the trays, one to be screwed, the other hinged and finish the spokeshave tray holding mechanism. Oh and have to make & install the dividers for the long planes on the big tray. Its the small stuff that seemingly takes forever :-)

I forgot, well almost, to add a height divider on the left hand side of the till interior for the 4th height dividers, which also happened to be a bit wider than 3 in, so I need to make a new one...

Support is a small strip of 1/4 plywood, did not took chances and pre-drilled with my Millers-Falls No 100 Buck Rogers push drill before nailing it on the side. 


Next I need to work some sort of storage for my boring tools, and then there are still the scorps and the drawknife and hatchet etc. Oh and my current saw till is only temporary, I already out grew it, that make the second saw till that I outgrew. Good news is I don't think I need anymore saws, actually I could probably do with less and better sharpened saws. Saw sharpening, hum another project


Bob, making slow progress in his hand tool shop reorganization, and then there is the power tool shop (garage) yet to tackle

Tuesday, March 17, 2015

Finishing news

Why no updates lately?
Spent the last few days finishing all the trays and dividers, spread on every flat surfaces I could find


3 coats later on each sides, I am done and so is my can of polyurethane

Oh look, more drops on my clean floor :-)

This was a left over can from my days making Shadow boxes for retiring members, it had a skin over the finish, poked thru and stirred, every time I had to used it these last days. The cover is too gummed up to close good, and besides, it would have trap air inside. I think all the shiny bits must have evaporated from that can LOL, it took at least three coats to get somewhat good coverage, either that or my wood was some thirsty!

I suppose I should have transferred the contents to a glass jar with no airspace and filtered the goop out, but this is shop furniture, not fine furniture, I just want to get going.

After a quick burnishing with 000 steel wool, I will give it a coat of creamy polish to brighten it up evenly. Then I can go back and do some more woodworking down there!

Bob, poly-saturated


Thursday, March 12, 2015

Double-Decker dividers and Spokeshaves holders

Have yet to decided on a finish (oil/wax) or (stain/paint) for the trays & dividers, but I have to design/fabricate those holders ASAP, it's holding me up :-)

Likewise, those dividers that need to be modified for the double-decker spaces, have to be done.

Time to make some mock ups to figure it out.
First up, the double-decker dividers.
The height spacing of 6-1/4 in works great for all the smoothers and special planes I can find.  But for the block planes, there is a lot of dead spaces. Enough to hold another plane on top, the Double-Decker idea. Mocking it up I could see that I have lots of room, but strickly for looks, I am going to divided them in half.  It is easier to mark out also, using a special center-finder ruler (remember my thoughts about measurements?). I checked all my small planes up to a Stanley No 107.


These new flooring pieces have the same arc cut out at the showing end, strickly a design decision.  They are pretty well friction fit and will be resting on glued 1/4 pieces ripped from same material. Plenty strong, I tried holding up a small plane with stricly a friction fit, good to go!

As you can see it would be a shame to waste that empty space,
meaning I can put in more planes :-)

Next the spokeshave holders.
What I had in mind was something like I did years ago to hold 2 braces.  I dusted it out and checked the various spokeshaves in one of the end. That holder is too narrow for the spokeshaves but found that the hole shape work for them all.


Mock up the tray with the two maple pieces that will become the holders.

My required dimensions turned out to be 20 in long (max would be 21-3/4) x 1-1/2 high.
The spacing between both holders is 5 in.  
As figured out, it will hold 9 spokeshaves (I have more of course :-)
I could make it a tighter fit, but I want room for my grabby fingers. I will do a quick test with scrap pine before committing to the maple, making sure that it hold the spokeshaves securely while the tray is open/closed.
Which reminds me, better get those hinges ready and finalize the tray holder fittings


One thing that I should clarify, the tools on racks in front of bench rotate in/out from storage depending on the job at hand. Only the planes and saws in the tills stays put. Only reason you see all those chisels out is that I'm making sure they would fit in my holders.

My small tool chest is about the right height, but it need something's more dignified than a Rubbermaid container, another project for another day.

Bob, and his convoluted mind :-)

Monday, March 9, 2015

Slow progress but progress

Between fixing up the wall and painting, I have not made much progress on my plane till.
But managed to add a piece up front to support the trays bottom trim. Till is primed and I gave it the first coat of paint. The main back panel is also primed/painted. In addition I tried a stain color on one of the dividers.

Once finished painting I will have to cut 10 small dadoes on the bottom of the front piece I added, otherwise the dividers would only go in from the back before I put the back on.
After that, once all the dividers are stained, they will go on, the main tray will be afixed and the small one will be hinged and its support to keep it up, will be re-installed.

Im still on the fence about the final finish, I think I would have like a darker color? If so I may add a Amber shellac coat, will see once it is fully dry.

I cut the French cleats pieces, they should go up on the wall shorthly and on the till after the back is on.  Still have to figured out and cut my spokeshaves holders

My bench is back in front of the window, I'm still figuring out what to put where around it.

Bob, watching paint dry

Saturday, February 28, 2015

Plane till 3 the small details

Having assembled the carcasse, I can now load her up and check my plane's fit


Not bad, but my Japanese plane is a tad tight fit. It will not either accept, my plow planes, router planes etc. No worry, I can remove spacers to have them fit, or build that other till for my longest jointers (30 in) remember? :-)

Decided to have the top open and instead I fastened that part behind with one large dovetail , screwed & glued.  A lot of the cabinet weight will be supported on a French cleat attached to this part.


Detail of bottom dovetails, note the joinery has not been cleaned up yet, and the Ogee still need clean up too. And YES the carcase joinery was all done by hand.


The angled sides are screwed, no glue, so I can removed them if I change my mind.


You may noticed that the middle part for the large tray (LH side) is not all the way up. That is because it is an offcut from one of the sides, the angle just happened to worked out nicely.
It won't show and it will still be strong enough to do its part.

The doubled side ones has a small notch because I cut the wrong part before gluing them. Oops! Again no big whoop. And while I am confessing my bloopers, I initially cut one of the side Ogee piece on the wrong side, so I ended up with two left sides. Oops :-)

Who says you cannot drink beer and woodwork! (Kidding)

The dividers have an arc cut into them. It makes for a cleaner look and facilitates the planes removal.
The trays being trimmed with Dadoes pieces for rigidity.
I had to add a small spacer strips behind to ensure solid contact with the angled parts. It also added some rigidity.


The big tray will be glued and screwed to them. The small one will be hinged for access behind, giving me additional storage.  Here is a detail of how I will hold the small tray up. Still need to figured out the pointy end and its receiver on the tray.


Also a small holder on the side for my dedicated plane tools: Screwdrivers, plane hammer and winding sticks.


The end is in sight. Need to attach the trays, one fixed the other hinged.
Which probably means a piece to be added on top and since my trays ended up flushed with the top shelf, the trim is now sticking out, hence I'm worried about the weight of the planes pushing against it.  I will then add some support under it.

If I was to redo it, I would ensure the tray lip is resting on top of the shelf instead.
I ended up like this in order to get at least 22 in of length for the planes, because of my stock limitations.
  
OK, well, I'm making this up as I go, sort of a prototype.  The next one would be nicer :-)
Next and last part will be the final look. Probably in a few days. That is where I am today.

Bob