This is something I long put away purchasing but lately I decided that I needed reinforcements in my sharpening regiment.
Full disclosures, I have two (2) hand grinders, two (2) 6 inches 3450 RPMs grinders with a bunch of accessories and a full complements of most hand sharpening systems known to man. So why add this one?
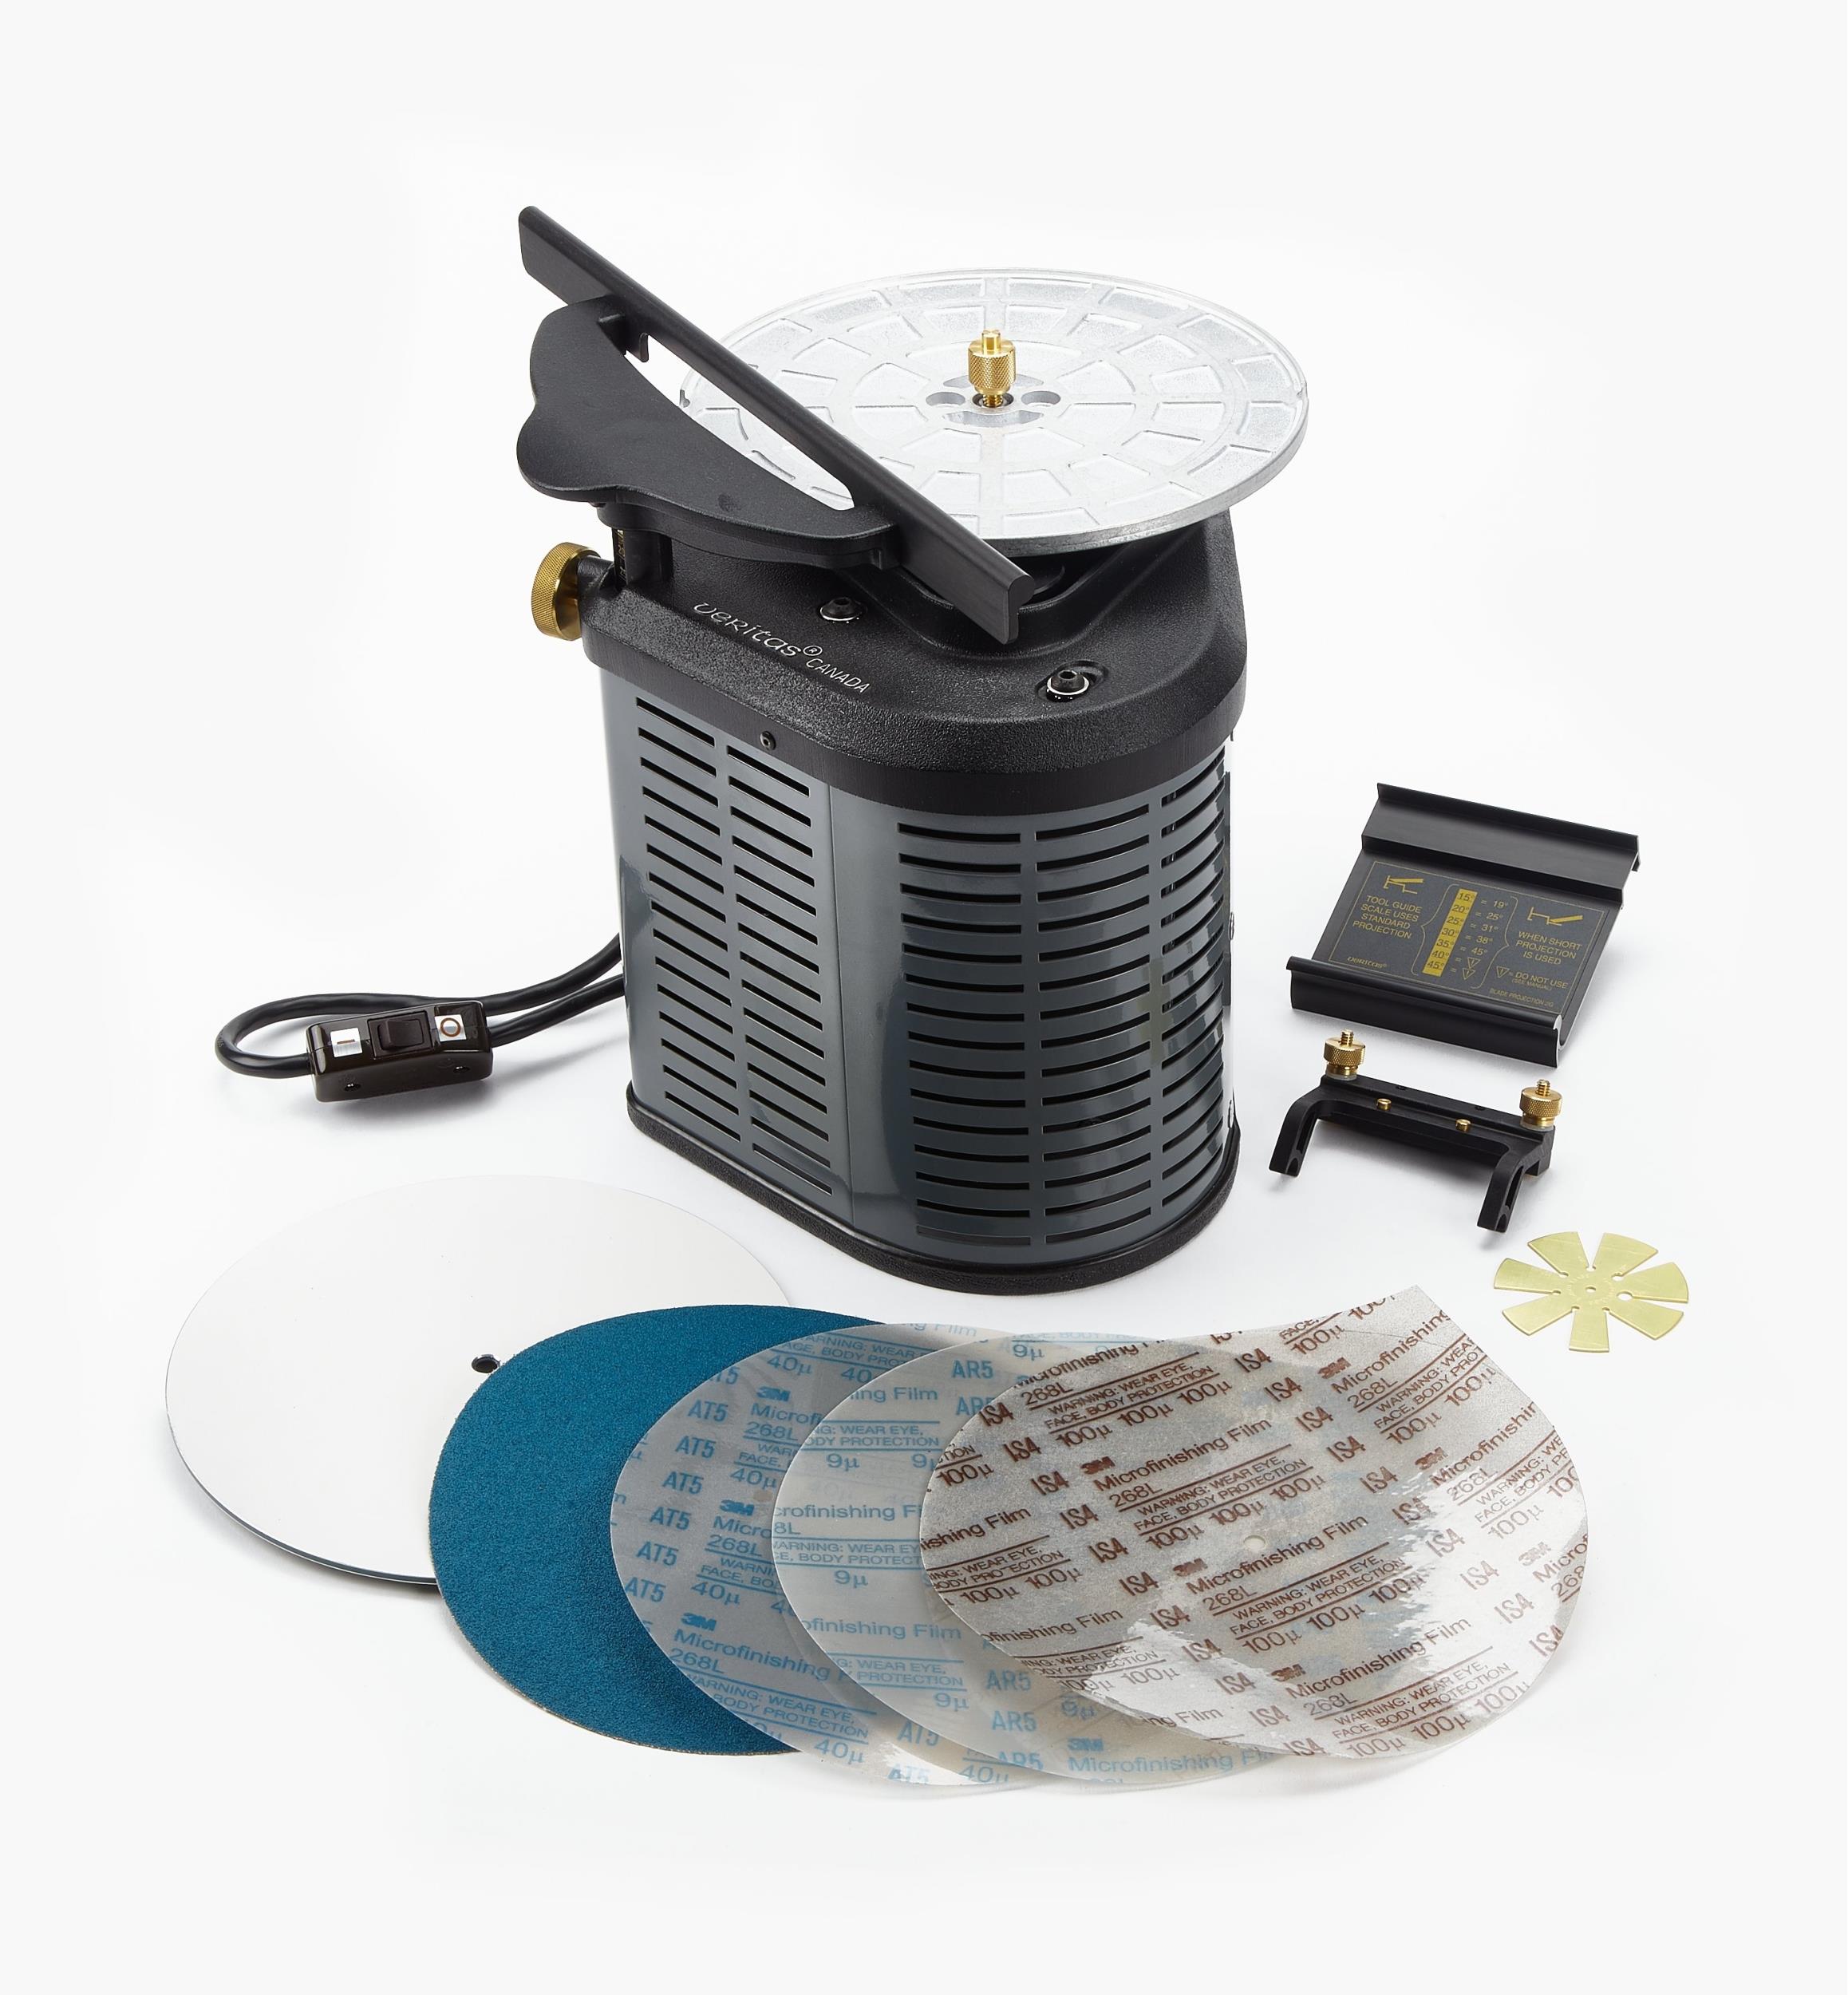
Comes complete with two glass platens and a selection of 4 grits PSA sanding disks
plus the see thru platen and grits and a piece of crepe block to cleaned the abrasives disks.
Conveniences and speed. I have never been a fan of hollow grinding on a grinder. Much prefer a flat bevel. Then there is the flattening of the back.
Normally I do all that by hands, using my flat granite runway or a piece of tempered glass or a flat stone tile. Problem is I have this small problem with tools. You see, my magnetic personality tend to attract rusty tools of every kind and after all these years, I have a "pile" of tools that need sharpening :-)
I have two such drawers in my Snap On tool box (yes overcrowded)
plus a few more spread around the shop in racks.
47 chisels in all :-)
So I long looked at various powered sharpening system to give me a hand.
Like I said, I am not a fan of hollow grind, so wanted something flat. I have used my belt sander in the past to flatten my chisel's backs and yes, sharpen. Years ago there was a few Japanese waterstones machines, that used a flat revolving stone, but if you ever used waterstones you know they are messy and they wear fast, requiring constant flattening.
And if you thought that a vertical wet grinding wheel was messy??? :-)
Uses a 7-7/8 inch grinding wheel
Pic from Makita
Since then, another kind of flat sharpener has arrived using a flat platen with PSA adhesives sand paper disks.
That leaves me with two options: the Veritas sharpener and the Worksharp 3000.
It uses an 8 inch platen.
Pic from LV
The Worksharp 3000
Uses a 6 inch platter.
Pic from Amazon
Both machines works very well, I have sharpen a few tools on the Veritas system previously. I like it very much but it is a tad pricy for me to justify. But Dear, I have over 140 planes and 47 chisels, I need help :-)
A planned intervention to make me part with my tools is a non starter, so... :-)
Worksharp made two models, the smaller and faster spinning 2000 (discontinued) and its bigger brother, the 3000, which run slower enabling us to use interchangeable glass platen. You can also make MDF disks to use and the machine can becomes a power strop by using a leather covered glass platen.
And it also has two somewhat unique features:
A port to sharpen your chisel and iron blades at a fixed angle, adjustable in 5 degrees steps from 20 to 35 degrees in 5 degrees increments and the ability to sharpen under a slotted disk enabling you to see your edge being sharpened. Used mostly for turning gouges and carving tools. Gimmick?
Oh no, work pretty good.
My only quip with that sharpening port is that the piece of sandpaper used to removed the burr when pulling chisel back is only 400 Grit, which leaves scratches on my much higher polished back.
See the straight up/down scratches? That is from the 400 grit.
Yes, the flash makes it looks worse.
At this stage no big deal, have not finished cleaning the back.
Just need to ensure I have a flattish surface to grind the bevel.
Not a very difficult fix, just have to replaced that piece of sand paper
with something of a much higher grit. At least 1000 or so.
When you first start to sharpen your chisels, you will probably encountered a somewhat skew grinding pattern. What most people are reporting when first using. Don't panic yet.
Something like that.
Notice the grind is more pronounced on the right.
I could stop there, the grind extent all the way to the left edge.
Or you can keep on going until the whole bevel has been re-established at 25 degrees
You can adjust the port ramp up/down on one side to correct, but LEAVE IT ALONE.
It comes already adjusted square to platen. There are two main reasons for this results.
1- If you push harder on the chisel, thinking it will grind faster, all you are doing is forcing the chisel more into one side of the abrasives. Just a light touch is all you need.
2- It is very probable that your chisel was not grinded at exactly 25 degrees, or may be bellied after repeated hand sharpening. And since we touch up the back, we may have introduced a slight angle vis a vis the other side. Keep on grinding and it will come out sharp and square. IF NOT, THEN you can touch up that adjustment.
Yes, it does comes out square in the end.
That edge is very sharp, but not up to my standard.
A light honing by hand is about all that I need now.
The flash has highlighted the fine scratch pattern, but can still be improved.
There are no light reflecting off the very edge, we are indeed sharp
But did they we came out at 25 degrees as expected?
Yes, bang on the money.
That gauge was made for me by my friend Chris Gorman from the
OWA years ago.
Yes, we are dead flat at 25
At this point, all these chisels are ready for
their final hand honing to be called done.
Soon, I shall have ALL my chisels sharpened for probably the first time in my life :-)
The down side, if there is one, is that you spend a lot of time swapping platen.
I put down a different grits on each sides, so two grits per platen. Whichever grit I'm sharpening in the underside port, I have, half the time, a higher grit on top to touch up my back. The machine comes with 4 grits: P120, P400, P1000, P3600 and 2 platen.
Being Pressure Sensitive Adhesive (PSA), you need to clean the glass platen prior to sticking the abrasive disks to ensure good adhesion all over. I used Isopropyl alcohol 99%, but I'm sure the more common 90% would work just as good.
Being sanding disk, used dry, they will load up quickly with metallic swarf. They must be kept clean often by using the crepe block.
Before
Notice the larger outer ring is where the bottom port is putting the chisel edge at.
After.
Yes, I'm wearing out some of my disks faster. But they saw a lot of chisels :-)
Since I have to flip the platen after to get to the finer grit,
the face I was using, being now exposed, I give it a cleaning.
Then flip again to clean the other side I just used before putting that wheel away.
All that action results in a lot of "flipping disks" :-)
Interestingly, the grits provided are from Norton and they have both Ceramic oxide and Aluminum oxide disks. The Ceramic oxide, if you can find them are to be preferred over Aluminum oxide. Because they do not load up as fast and last longer and yes cost more, but still a good deal. I do not think everyone would have to sharpen that many chisels as I have, all at once, often, if ever :-)
Since my coarsest grit is 120 and I have lots of vintage that need a good "work out", I need something coarser to go faster. 80 grits or so for metal removal, not wood. Wood sandpapers works but they will load up and wear much faster.
Been looking around to see where I can find suitable abrasives disks, besides from Worksharp, and curiously, the better deal happened to be from Busy Bee Tools (where I bought my machine) and the OEM disks package from Worksharp. They worked out at about Can $2 each, not cheap but very good abrasives. Some aluminum oxides, but lots of Ceramic oxides ones also in their packages.
There were once a bunch of promising attachments that came out to increase the WS3000 versatility:
A flat outrigger platen to use a hand sharpening guide, a removable higher guide bar to used Tormek accessories, a knife belt sander attachment etc.
Sadly all of these are now long discontinued :-(
The only remaining accessories left are the leather honing wheel and various other grits, not provided with the machine.
The leather honing wheel comes with a white paste, used to charge the leather
before applying the green honing compound.
Since it comes attached to a glass platen, you have one more side to stick sandpaper.
Pic from Worksharp
BUT, wait, there is more...
By now, you are probably thinking: Man, that must be a popular machine?
And you would be right so a few shop made build have returned those earlier lost advantages.
I believed it all started with the original Stumpy Nubs Worksharp station.
His plans are available for US $5.
You may want to check out his other one of a kind designs
I like it and I am going to build something like that, but I would flip the design around, something like that
Screen shot from Youtube
Why flip it around?
The RHS of the machine has the power switch, the sharpening port and behind it the see thru disk port.
The other side was use for the flat platen originally
If you Google it, you will find all kinds of variations on Stumpy original design. I will probably end up with something incorporating a few features of each and maybe add my own twists to satisfy my needs.
Something else that is very promising, is the ability to used the Tormek accessories by adding a suitable horizontal guide bar.
For those that do not know, Tormek is a Swedish based manufacturer of a very good and expensive wet wheel sharpening system. It uses a 10 inch wheel (T7 and T8)
Prices shown in Canadian dollars.
The whole system will run you over Can $2000
Very good and versatile system but very expensive :-(
But all I need is the bar, plus some of the accessories.
The bar itself is available as an add on accessory to be used on other grinders. But you guess it, being from Sweden, not cheap, Can $93 LV
Notice it feature a thread rod and wheel nut on one side.
That is to give you a fine tuning of the height above the grinding wheel
to fine tune the sharpening angle.
I do not know if the Tormek patents recently ran out, but there seems to be no shortage of similar cheaper machines, all coming out of China on our stores shelves. While all similar look alike to the Tormek they have two (2) major differences with the Original, besides the obvious quality differences in construction, especially the cheaper plastic wheel for the honing side.
1- They all sport a reversible switch for the motor. Smart thing when going from grinding to honing on a leather surface.
2- For some idiotic reasons, they do not all sport the same sizes diameter spindles for the stones and leather hones as the original Tormek. When they do, they open the door to a large variety of options like various grits, waterstones, CBN wheels etc., when they don't, you may get by with shims or not depending if under or over size spindle.
One of the first clone to come out and still the cheapest, is the Wen machine
You can see it being reviewed here , here in Canada at our local Canadian Tire hardware stores, they have their own version but the best one I found so far AND fit the the correct sizes for the Tormek is the King Canada machine which is also well priced, along with its own version of the Tormek adapter's.
Its only minus is that it does not featured the threaded rod and nut on one of its post. Notice in the above picture, the Wen does.
The biggest problem with these types of wet wheel sharpener is the water bath. You must soak the wheel before using and you should never leave the wheel wet in the water bath for long period of time or it will unbalanced the wheel, the wet part becoming heavier, abrade faster and... Other than that they work fine.
Coming over the top of the large 10 inch wheel also open the door to many creative attachment to handle practically anything, from scissor to axes, drawknifes you name it.
So by combining the bar and the various guides we can do a lot more on the Worksharp 3000, but curved blades like an axe would still be problematic since we are using a wide flat surface versus about one to two inch short surfaces of the 10 in vertical wheel in the Tormek.
Finally you can also get CBN wheels for both the Tormek and the Worksharp. That tell you that these two sharpening systems are popular.
https://woodturnerswonders.com/products/cbn-discs-for-work-sharp-set-of-3 may seems expensive, but you never have to buy sandpapers again.
In the mean time, for me its back to the drawing board to finalized my proper sharpening workstation(s).
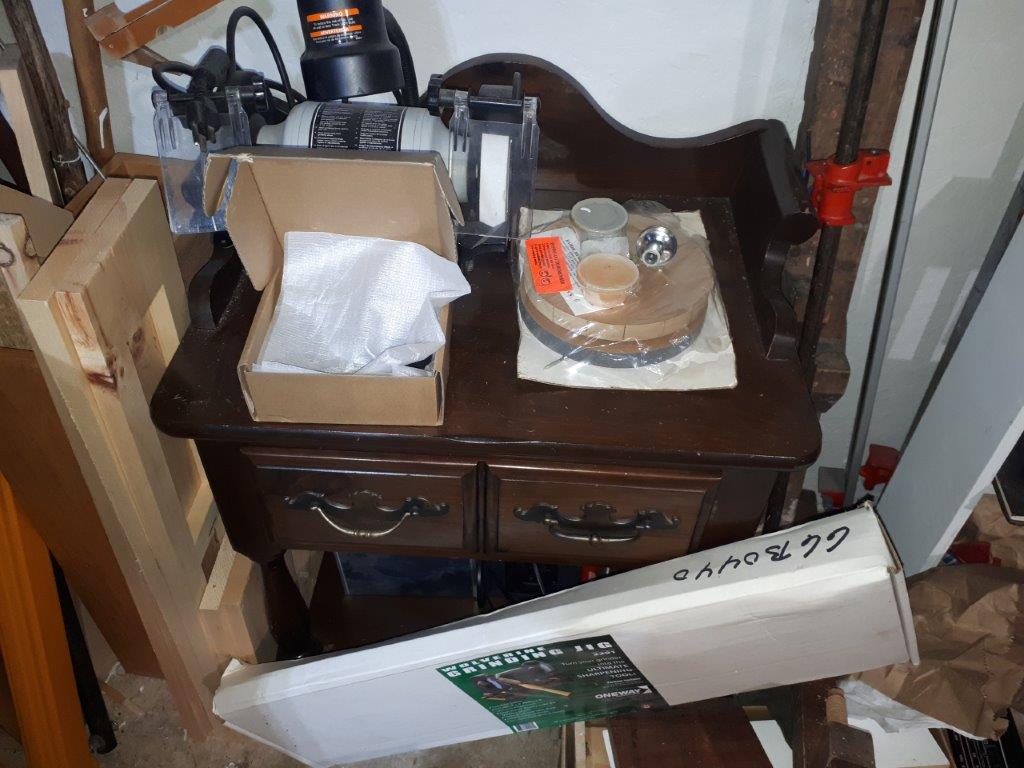
I am currently using my interim sharpening workstation.
Its a good height standing up to use the top, but I have to knell to use the port comfortably.

Then I got a few more things to incorporate.
I will ended up with at least two sharpening stations. One in my garage (Power tools shop) to handle primarily my turning gouges using a dedicated bench grinder and the Wolverine system.
Another in my hand tool shop (basement) with the Worksharp and another grinder with buffing wheels and razor sharp system (Paper disks you see besides the grinder) and maybe a Tormek clone??
That would make such a station a tad on the large side and I still need a place to set up my sharpening board for the final honing and touch up as I work.
And in case that was not obvious, that is the real downside of having so many tools, it takes a lot of various systems to properly and efficiently care for them all :-)
HI, my name is Bob and I have a problem with...Nothing to see here, move along :-)