Sunday, August 30, 2020

Times is flying fast

About 1 month and a half before our wedding, things are starting to move fast :-)
Because of Covid 19, we had to make a lot of last minutes changes with no doubts more to come as we approach our date of Oct the 14th.

Currently, as it stand if our family members comes from Quebec or Ontario (or anywhere else if allowed), they would have to self isolate for 14 days upon arrival.  Not very practical, so that entails changing a few things, not to mention venue, catering etc.  Oh and maximum 50 people in church or venue after...
You may now kiss the bride thru your mask... Yah, should be a wedding to remember :-)

Accordingly, lots of small stuff to finish around the house and yard.
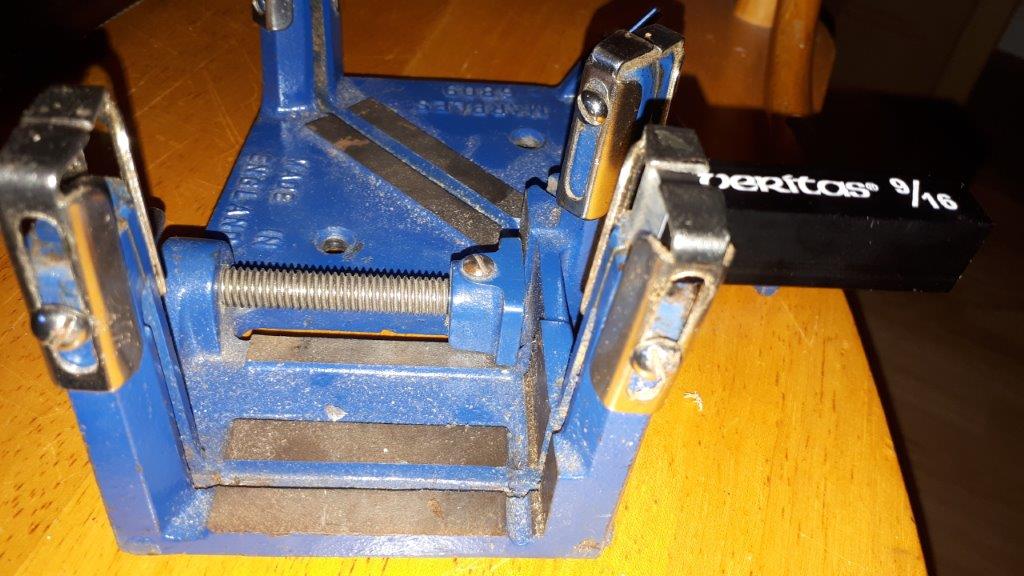
Also made time to deliver to my son his stitching saddle and small portable vise.


I was going to make one, but at this rate, it was faster to buy him one from Tandy Leather.
Took some measurements, will make another someday...
Our plans is to make some of those three legged campaign stool, with the hardware from LV.
Should be fun, then maybe try some Rorrkee chairs??


In the yard dept, finally made a new door for my gardening tool station in the back.
That door being one single panel of wide pine (both sides of the hearth), it did not took long to take on a banana shape affair.  I removed it months ago to fix, but it keep slipping.   Time to clean up the yard :-)

Was debating ripping it in smaller pieces, alternate them add a few more piece, or simply make  batten door.  Then I came across this piece of plywood, about the right size...hummm
And that way I don't have to recut the hinges gains.

NO problemo, will just rip pieces on both sides of door and insert my piece of plywood in between.

Surface cut left my my ripping monster, Disston D8 4.5 TPI

Quick clean up on vise, then shooting board

Both half reunited, flush, flat etc, good to go, except for one small misguessing 

Door sandwich, to be trimmed after

Oopsie, the first saw I grabbed from the till was this one awaiting to have new teeth recut.
Does not cut whatsoever, but start very smoothly :-)

That one yielded better faster results.

 Then as I went to fitted in place, planing as needed, I quickly realized that the fudge factor I gave myself in width was quickly goobled up by my enthusiastic planing, and now door is too narrow.

OK, no sweat add a larger than first guesstimated piece by adding in more fudge factorials


After all that, planing new door even and fitting, she wants it painted, so I gave it a coat of primer, and sealed/painted the roof black.  Waiting for her to paint it before it goes back up

And then I need to make two more of these.  After....later...


Next was to fix the Muskoka chairs in the yard.  One need a new back piece made, so I made one quickly with a ripping saw and a chisel

Made some rough angle cuts with the ripping saw, then carved the circle with a chisel bevel up

The left over piece.  Yes I purposely put the only knot on my piece.

Just need to secured it to the side of my cross cut fence on my multi purpose saw bench.
Does not need much force to keep it there while working.

Oh that? Yeah still have some work to finish post my inventory :-)
I seriously need another plane till.  Coming sometimes post wedding :-)

The other side had to much to chisel out

So did some more carving cuts with the rip saw

After quick work with the chisel, time to check for length.

Cleaned up cuts on the shooting board, then off to
 the paint station outside for its coat of white primer


Next I need to make some wood patches (3) on the chair I'm working on, because of rot.
Not making another new piece at this time, patch, scrape repaint will do.
The other chair need to fix one armrest.  Should be done shorthly.

Also finally got the cement mixer going, was poorly machined, did lots of filing to get it going easier, better, quieter :-)  It is a direct drive from a gear on motor turning stamped out rough openings in the drum rim.
Exchanged it? It would had probably be just as bad, screw that, I just fixed it.
It's just that it has been low on my a list for a while.  It pop back up, she is making flowers for the wedding.

Bring in the ingredients for Jean's recipe soil mix.
Now that I think of it, that is probably when I hurt my back.  Moving slowly today :-(

The mixing augers

I figured will try a soil mix first so if I ran into problems, 
I won't be stuck with a cement mess on my hands. 
 Work great, and will see more soil mixing in the Spring.

A few more projects in the house, long overdue, so... Just to pretty-fy the house to receive people at home :-)

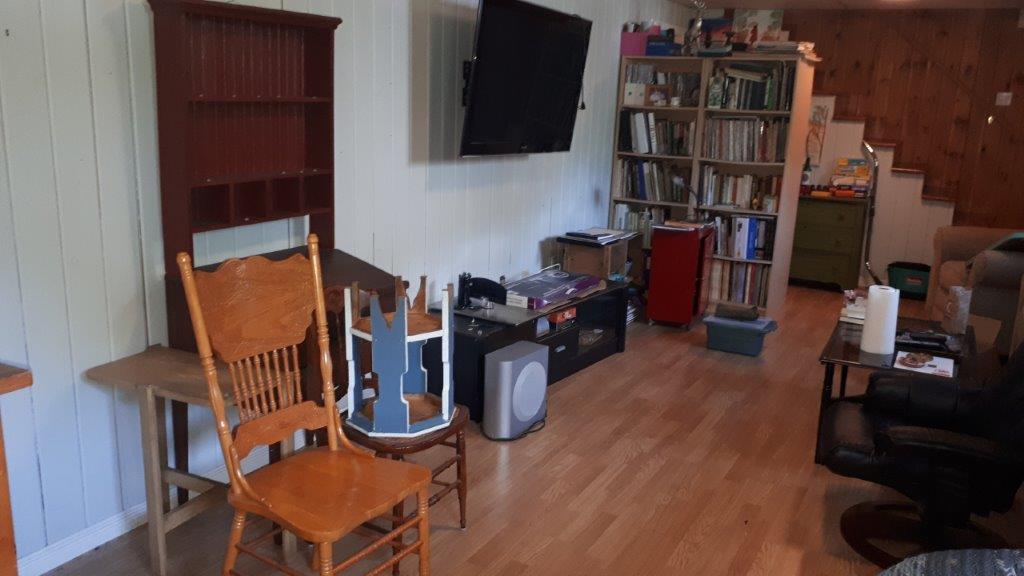
Clearing out the man cave to do some work and relocate the TV.
 Put back in storage my life that was sprawled all over the wall :-)

Those? Yeah, still need to find them a home.
In the foreseable future... after honey moon, don't think I will get to it before


But my next project is the gates outside.

I need to hang them up.

Will gather material for it tomorrow, just finished planing
my bright plans :-)

Bob, nursing a bad back today

Monday, August 17, 2020

The Marples No 6809 Combination square and miter cutter

A recent find that spurred my previous posts on small work holders, it came along  some of those :-)

It is a combination cramp and mitre box for cutting 90 or 45 degrees cuts.
It was targeted to the picture frame shop works.
It will handle up to 2 in wide pieces and up to 1-3/4 in thick pieces

Came complete with original box and papers.

The recommended crosscut saw is a 12 inch Tenon saw.

Instruction are for both the No 6808 Jr and 6809.
The difference? 6808, sometimes referred to as the Junior,  only did 45 degrees cut

Top illustration is 6808 (2 posts), bottom is 6809 (4 posts)

Hum, did the silica packet and Rust preventive paper worked??

The top is remarkably in good shape.
Those metal sliders (2) on each post are to set the maximum depth of cut.
They are adjusted to touch the back bar on your backsaw.
You can then do lap joinery, cut small dadoes etc.

The bottom having bare machined surface on the casting got some rust.
This were the rust stain comes from on the papers inside.
For a tool about 60 years old, not bad at all.


How accurate is it?

Lets find out.
The tools used in this experiment:
Stanley miter square No 16 Type 3
Groz 6 in Machinist square grade B
Veritas set up blocks set
Flat screwdriver and measuring tape  

Notice the differences in width for the saw slot?
NEVER insert or remove the saw from the top.
ALWAYS from the side.  The larger area is to protect the saw set on the blade.
I seems to notice that on later models the slot is larger.

The saw I'm using is a Jackson Warranted Superior, 
a Disston second line, 12 X almost 3 in small crosscut saw.
Yes was probably 3 in new.  That plate fit well.

The saw resting on its back spline.
Maximum stated capacity is 1-3/4 in, so you need a 3 to 4 in saw.

Just barely clear the bottom kerf in the casting.
But if it was, should adjust the stops up a bit to cleared, or you will damages the teeth

I thought of using a setup block for ease of adjustments.  
Two issues: When screwed in, the guide toe in, grabbing the block, and...

Of course at rest the saw being slightly below the deck, 
we loose some height, barely half inch left of our 9/16 in.
Not very precise measurements but you get the idea.

Adjusting the saw stops, the saw spline is resting snugly on it.
Pushing down it stay put, with no tendency to jump.
Getting to line them up just so, could be a tad finicky, so I would dedicate one saw to it.


Here is a nice touch.  The Tommy bar is secured in place, 
meaning that you can rotate it while the jig is flat on the bench

Lets cut some wood

That saw I'm using has practically zero set, not cutting thru it, 
just establishing a kerf,  two 45s and one 90

Bang on, according to Mr Stanley


Bang on

Yes, make a nice 90

and the 90 also pretty well bang on


The obvious question now becomes: How old is it??
Truth is, researching Marples history can get a tad confusing, so many name permutations, mergers and etc not to mentioned Williams Marples and Joseph Marples both made tools, both are related but ran different companies.  A good place to wrap your head around this is found here 

An earlier Green Shamrock version...
When did they start and stop making green tools??
My current guesses are 1959-196XX
Pic from Ebay

... and its box
Pic from Ebay

On this later version (Record) they stopped machining the top surfaces.
I have seen examples with no machining on the bottom also, mostly Record Ridgway.
This example is missing one guide on rear 90 degrees post.
Good luck finding replacement...
Pic from Ebay

From 1958 catalog.

From 1959 catalog
Showing 6806 and 6807 which is a 14 in tenon saw to be used with 6806
and 6808 Jr for which they recommended a 12 in backsaw No 2526
Extracted from Internet archives

The 6806 was bigger, why it use a 14 in saw, and had reversible jaws to accommodate sprung moulding.  If you ever tried to cut crown mouldings on the flat, you know what I mean. 
The steps allows the moulding to be held at the correct angle, enabling it to cut precise 45 miters.
Jaws are shown reversed to the flat side.  There are no provisions to adjust the saw out of the groove if it is too tall for the top posts.  No 6808, later replaced by MR6807 are smaller hence were called Jr. 
pics from  Antique tooltique

1961 catalog

1962-64 catalog

1965 catalog, new logo
These catalog covers pics are from a reference site

Interestingly, the logo on the box looks like the logo on the 62-64 catalog, while the logo on the inside instruction sheet looks like the new one introduced in 1965.
That would seems to indicate a mid 60s tool.

The No 6808, seems to have been replaced by the MR 6807 (MR as in Marples Record or Marples Ridgway) which was manufactured in later years under Record.  They could not called it 6807 since that was already in use for a backsaw.
Again, only cut 45 degrees


Looks early 80s
Notice the depth stop are long gone.
All three above pics from  Antique tooltique

Marples Ridgway version of same tool, MR6807
Pic from Ebay

Marples Ridgway Bahco Record tools Ltd. 
Irwin who are you?? Cue music :-)


But wait there is more!!
It also came with another tool in its box, the seller telling me that they went together (Huuh??)
Well not with that tool, but for the next step when you have cut your frame pieces and are assembling them, with a cramp.  Got both for $20 so sure, why not.

The Elwood multi purpose cramp (British for Clamp)

The instruction sheet is pasted on the box cover

How I figured it is to be used.
Mine is missing the steel cable that came with it

Different packaging

Shown complete with the cable, about 5 or 6 ft long
Pic from Ebay


Since mine still has the patent No on it, lets look it up
GB 798851 on espace.net

There it is, patented on 30 Jul 1958.
You can see how the cable is pulled, tightening the frame as you screw it in.
Screen shot.

Since my seller believed that they went together, it is very possible that they came to him together since whomever bought it years ago probably did bought the mitre guide and frame cramp about the same time frame.  Everything seems to point to early to mid 60s for the pair.


So how good are those mitre gizmos?  Well honestly, if they get me close, that is good enough cause they go next on my shooting board.  You need a clean surface, no saw fuzz to check for 90 and 45 anyway, so yeah, awesome :-)

Bob, with yet another mitre cutting tool.

PS I read somewhere on line in a forum discussing this tool that they were garbage, broke it trying to put the saw in, only good as a corner clamp.  Really? NO, it's a real precision tool when used correctly with a proper real saw well tuned.  Oh and the operator, fired yourself and get someone that known something about tools :-)