Showing posts with label Wall shelf. Show all posts

Wednesday, October 11, 2017

Progress on a few fronts

Last nite, I went back to the Wood shop, to work some more on my son's project.
applied wood filler and gave it a thorough sanding.
After, I moved it to the paint room.


Since I was in the prep phase, I thought may as well bring my infamous boring till, which has been sitting idle downstairs for quite a while, awaiting its joinery to be cleaned up. Cleaned up my dovetails then gave it a good sanding all over.

This morning went back to glue and nail (air nailer) the back to the boring till and gave the first coat of primer to Matt's shelf.

Matt shelf has its first coat of primer


Boring till got its back installed and a good sanding all over.
Back piece is sitting inside a 1/4 in rabbet all around

Once that was done, wiped up the boring till with a damp rag then proceed to give it its first coat of primer also.

Dovetails dissapearing.
Now you see them...
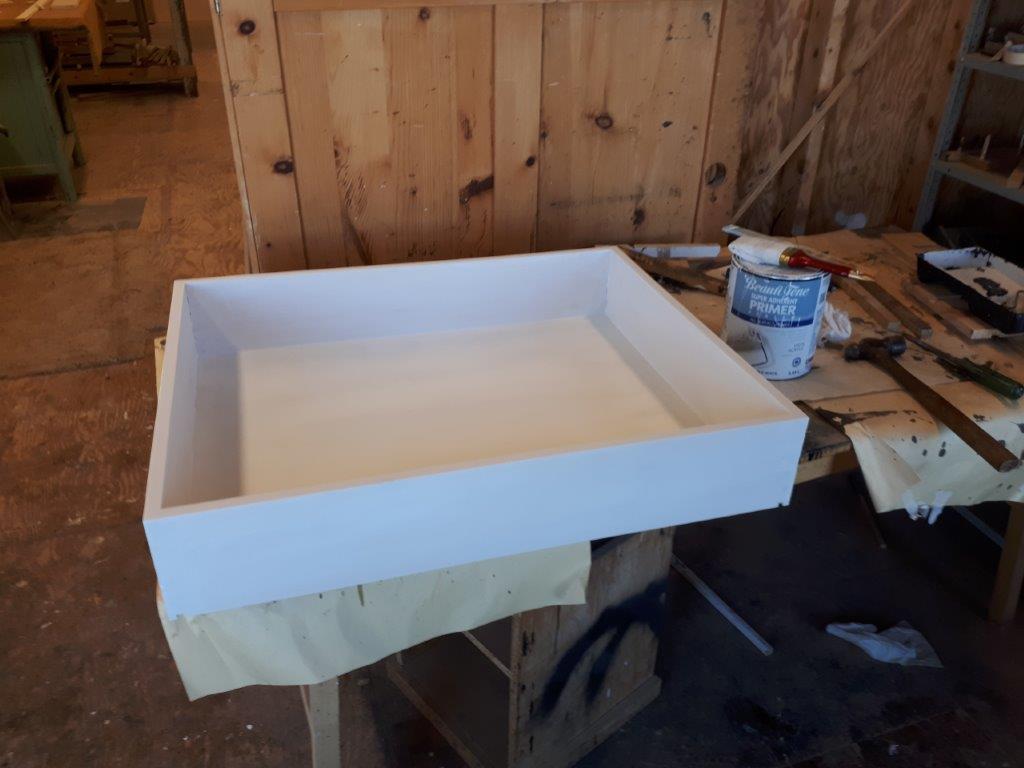
Now you don't... :-)

Need at least 4 hours drying time before next coat, will go back tonite to give both pieces a light sanding and another coat. Should be both ready for painting tomorrow morning.

My shop has also seen some modest progress, I can now walk around the floor. There was a floor under all that stuff, who knew?? :-)

Still need a lot more work, but heh, progress is progress!

Meanwhile, also experienced some setback in older projects.

Remember my temporary sharpening bench? A nite dresser re-purposed as a work station. When I first worked on it, the drawer was stuck pretty tight, so I had to planed it for a better fit.  We had a pretty humid summer and my dehumidifier does not appear to be doing much, its been running for a while and no water in the bucket, sigh...

Well, that wooden drawer is now stuck pretty damn tight!.
Whenever I managed to free it, it would required more planing for sure :-)
So much for a piston fit drawer, hum, more like I need some hydraulics to move it, now :-)

It is binding pretty tight on both sides in height.

But my most spectacular failure is with my recently re-glued rocking chair sitting outside. It is not far from our bedroom window, and its been hot and muggy for a while, so we have been sleeping with our bedroom windows open for the draft.

A few nites ago, there was a loud crack outside, did not think much of it, but when I went to put the chair away for the winter, this is what I found...
The chair had literally exploded...

What is wrong with that picture, 
solar lamp is knock over and lower. Lower??

It failed at the old glue line, not the one I reglued

On the other side, the glue line survived but 
it developed a new crack nonetheless.
Must had been the loud cracking noise I heard

It even pulled out a few spindles on the way down...

Huh, back to square one, may need to re-inforce the seat from under, there is a tremendous amount of pressure at play here. When it want to go, it goes...with a bang! It did not even lasted 2 months out there, oh well back to the drawing board. In its defense it was left unsupervised for a while :-)

This time I may take it apart some more to fix it, will see. I the mean time it is back in the garage, ready for me to trip in it, just like in recent memories :-)

The irrigation systems have all been removed, the garden hoses drained and stored, the yard is ready for winter. We will keep some of the garden going with frost covers and see how far we can extend our growing season. Tomatoes, cucumbers and Zucchinis are still coming up. Most of our spices and herbs are still going strong also. We are in the process of setting up an indoor garden for them, re-purposing one of Heather's three tiers light stands she used for her African Violets.

And talking of failures, the only crop that did not take this summer was my yellow and green beans, neither came up, and sowed them twice, go figure!

The carrots are also a failure, but that was my fault, they quickly got over shadowed by the leaf lettuce and never saw much light all summer, oups.

 Once I harvested all the lettuce, I found the poor forgotten carrots. Tried to re-transplant some, to see what would happens. Everyone told me that you cannot easily transplant such root vegetable. Well you can, but don't expect much :-)

On the left, the original ones that spent the summer ligth deprived.
On the right the ones I transplanted

Not even big enough to qualify as baby carrots :-)
Funny how they tried to put down more roots
 instead of continuing with the main one

So there you have it, some progress, some setback. Win some, loose some, oh well.

But it won't stop me, I now feel re-energized and firing on all cylinders

Bob, the old flat head 8 cylinders (For you youngsters, that was before the V8. Yes, I know, I'm old :-)

Tuesday, October 10, 2017

First woodworking project in a while...

This past long weekend, Thanksgiving in Canada is in October, my son Matt asked me if we could build something together. I thought sure why not, it would be fun and help me getting back on my feet so to speak :-)

The project in question was for a wall shelving unit to house his electronics under his big ass TV.

Saturday, we went over his doodle for his project, made some tweaks. Introduced him to the idea of using a French cleat system to secured it to the wall, and choosing dadoes to strengthen the build, making it much more stiffer and solid, we will be using solid pine for the whole build.

Matt original design 

Will a French cleat system be able to hold all the weight of my electronics, Dad?
(TV is already fasten to the wall)

You bet, Son !! :-)

Before going shopping for wood, we developped a cut list. Matt said everything, plus spares, should fit on a 18ft board, can we get that in 20 inch wide board?
Hum don't think it would fit inside our cars, we would have to have it rough cut at the yard :-)

Our rough initial cut list. Made some changes on the fly. 
For example, forgot about the notch on the triangular gussets, oups!

Finally we gather up materials, and headed for the woodshop on the Wing.
We rough cut a few more pieces, on the Radial Arm Saw, then we glued up four boards to make two panels to get the required width. The yard being out of 20 in wide boards :-)

Sunday we cut to size our parts using a panel cutting jig on the tablesaw, and did most of the joinery, dadoes, using the tablesaw with a dado set.

Matt cleaning up the glue line on our panels, 
after scraping most of it first

After making sure we had all our required pieces cut and ready for assembly, except for two small dadoes on the back board for the triangular gussets...

It was time to stuff our faces with the big turkey meal that Jean prepared for our family: Us, my son, her daughter and her 2 kids (our grandpeanuts :-) and Rudy of course. For some reasons I never figured out, turkey meal is the only time I overstuff myself, twice a year, at Thanksgiving and at Christmas.

Rudy feeling stuffed and sleepy, just like me :-)

Monday, we finished the last two dadoes by hands using handsaw and chisel. While assembling it, we made a few more details changes, which required more dadoes... (because we forgot the notches). Done using the table saw with its regular blade (Freud chip limiting combination blade).  Everything is glued and screwed.

The idea was for him to learn as we go along, so I introduced him to a variety of ways of doing the same operations, with power tools and by using hand tools.

For example we cut all the joinery (dadoes) using 3 different ways, two using the tablesaw and one by hand.

That meant a few trips back to my hand tools shop, to gather tools. Thankfully, I was in the process of owning it back, so we were able to walk inside :-)

Some of the dadoes should had been stopped dadoes. But it is a lot faster, easier to make thru dadoes then filled in the exposed groove with a piece of wood.
The whole unit being painted, it is irrelevant which way we went, took the easy way out :-)

Used our dado test board made while setting up the tablesaw.
Cutting off a smidgen wider piece, tweaked on the Disk Sander, 
made quick work of it

So far he has learned about, using square and marking knife, chisel work, using router plane and side rabbet plane. He cut his first dado by hand, using a First class cut (making a trench using a shop knife on the waste side of the Marking knife mark) and using the reflection on the saw plate to gauge square and plumb,  with a Small Tenon Saw after seeing me done the first one.

Learned about safely use the Radial Arm Saw, table saw (swapping blades and tweaking the dado cutter set width, how to use a panel cutter jig on the tablesaw, ripping the 45 degrees for the cleat), the bandsaw, disk sander (precaution WRT to disk rotation direction and which side to use), Random Orbit Sander, the drill press (how to properly tighthen the chuck, using ALL 3 holes), the uses of special bits to pre-drill and countersunk our screws... oh and the vacuum cleaner, air compressor and broom to clean up :-)

The ha...Rudy, move...

The hand tools we used, all mine... for now :-)

And my power tools and accessories we used
in addition to the Woodshop machinery.

The shelving unit being 5 feet long and almost 17 inch wide, did not fit in either of our cars, oh surprise :-)


No way this would fit inside our cars...
Other on the fly tweaks, included 
adding a front batten to stiffen up the top shelf
 and encasing the top part of the cleat.
The bottom spacer is attached to the unit and would be fasten to the studs

So the unit stayed inside the Wood Hobby Shop on the Wing. After doing the prep work and painting it, I will deliver it to him using Jean’s truck, a RAM 1500.

Tuesday, me and Rudy went back to filled in the screws holes and do some sanding.

Rudy on guard for me. We were alone in the shop early in the morning, 
but for his own safety (and to keep him cleaner) I keep him attached, near me.

One side done

and the other side, now we wait again...


Should be able to deliver sometimes this week after work (Jean and Matt)
Later tonite, I'll go back and sand the areas I touched up with Wood filler.
Then after a quick clean with the air blowgun, I'll transfered it to the paint area in the shop. Hoping to get its primer coat by Wednesday, then first paint coat Thursday... Hum, maybe it will be next week....

Bob, who had a good time at the woodshop and inside my own shop. We even managed to talk about Heather without crying... We are on the mend... :-)