1- I had no support for the bottom of my back boards.
Solution, I cut back the top drawer shelf a 1/2 in.
Marked 1/2 in down with the wheel gauge, then ran a pencil line in it to see.
Removed the bulk of it with a chisel, being careful to stay within my line.
I pared down with the bevel down, easier to control the cut.
Planed down to the finish line with a No 4 and a chisel plane.
Boards now fit flush with it.
2- Don't want to bury my back boards under the top French cleat part.
Solution, glued a 1/2 in board on top of upper back rail, flush with the sides. That makes up the rabbet I would have done. I will then be able to screw the boards in to be able to remove them later if I want to change my holders. As originally intended.
3- Need an air gap for drawers in the back of till, otherwise drawers may not be able to push all the way back. Need also to secure spacer bar for French cleat.
Solution, I cut the spacer board to leave a gap between the ends of the back boards. Still got plenty of spaces to reach in and screw to the wall.
My two new end boards still need to have their rabbets cut down
to fit with my Rabbet plane. Hence the visible gap shown
All my back boards have been planed down to 1/2 in and got a light sanding.
They then got re-cut to 4-1/2 in wide from 5-1/2 in.
Since I went to the wood shop, to resaw them, figured it would be faster to rough out my rabbets with the stack dado. I cut them 1/2 in wide and less than 1/4 in deep. Back home, I finished the rabbets with my Stanley No 78.
First I planed them down to exactly 1/4 in, as indicated by my setting block.
Then I tweaked them all one by one until they all lay flat across the whole panel
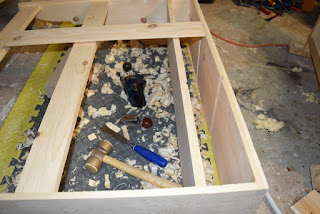
I cleaned up once between operations, that was a big pile of fluffy shavings...
My back panels all lay flat within the space.
But I'm not happy with the last panel, way too many knots in it.
New backboards (2) in place on each ends
They fit just tight, now I need to plane off on each end boards
to fit all the boards with dime spacers between each.
I spare no expenses on this build (CDN $1.80) :-)
I notched the corners of the drawers dividers by 1/2 in X 1/4 in before I glue them in.
While I went back to the woodshop to get more wood prep, I prototype my saw kerf's boards in pine, before committing to oak. Pine is too soft and would get chew up by the saw teeth in no time. I also cut my saw handle board.
Last nite I muck up my saw handle board. My first intention was to run a board along the whole length, but after playing with the saws, I think it would be better to split that board in two in order to change the distance from the back.
I tried to see if I could fit my fret saw on top of the backsaws.
They don't all clear the fret saw, perhaps if I hang it differently?
That is about the minimum height for the back saw.
Getting there. Only thing left are to prime & paint the till.
Cut the beads and a small chamfer on the back boards. I haven't decided yet if they are going to get painted or not.
Cut my pieces for the 3 drawers and assembled them. I picked the hardware for them already.
Then mock up my saw kerfs boards and saw handle board temporarily to check on fit and arrangements.
It should be going up on the wall to join the two plane tills shortly...
Bob, finalizing his bottom tool chest panels dimensions. Glue up is about to start for it.


Down here, south of you, we use a dime spacer at the top and a nickel on the width.
ReplyDeleteLike I said, I'm sparing no expenses :-)
ReplyDeleteI'm guessing that my wood is about as humid as it will get in my shop right now, so I reckon dimes should be sufficient? Time will tell, fingers crossed!
Anytime I should start running the dehumidifier in my shop...
Bob, asking, "Brother, can you spare a dime? " :-)