Showing posts with label Woodworking bench. Show all posts

Saturday, October 3, 2015

Back in the shop....

But my heart is not into it.   Hence I am not about to start any new projects, but will just puttering on small stuff.   So why bother and keep blogging?   Because I so need the distractions right now :-(

So then I'll just try to keep myself occupied as best I can while I try to keep it together, and be there for her...
God I hate cancer, such a nasty sneaky disease!!

So for now, I'll concentrate on finishing that infamous sewing machine cabinet.
I could also use to regain some space in my shop.

First up is to glue in the last piece on the top

I'm doing the same thing as previously.
Glued in a small piece whittled to fit.

Bring it down to size, then a light sanding of all the areas I touch up

The original opening in the top had a darker colour finish than the top itself.
That's a good thing, it will hide my big patch in the original hinges location.

Next, another light sanding to knock off some of the dark colour spots that made it to the top.

And then the fun part, how to best blend the new with the old on the show surface of the top

Since I have lots of maple in the shop, left over from my days of making shadow boxes for retiring service members, it would probably be a good idea to experiment with stains concoctions on scrap maple pieces.

The "Boss" Then, LCol, now Col Thauberger teasing me about my shadow box, he knows I made it myself. Me, telling him; Be careful Sir, the varnish is not quite dry yet! :-)

Worst case scenario, I will simply sand the whole top and refinished it, but I want to try if I can blend in my repairs first.

Next up, finish my display area in my shop.


I picked up the glass shelves a while back, just need to pick up a few support pins and sleeves, along with the sleeves setting punch tool.

Glass shelves, pins, sleeves and sleeve setting tool.

I like this design better than the original fixed pin one from LV.
Fit more comfortably in the palm of the hand while pushing sleeves in.

Need to make some sort of face frame to be able to put doors on them... maybe.

Also need to rout my cabling and hook it up to a switched outlet.
Next, finish cleaning, tidying the area behind the built in bench.
Take down the patch work of wood panels and replace it with something nicer.

The last time we visited a friend, I noticed that her small stool on her deck was broken, so I picked it up to fix it.

Got a dowel to fit.

She previously glued it back with Polyurethane glue but it fail... of course
It need a dowel to reinforce that junction.

It cut surprisingly easy.  It also look like expanding foam, but it was glue. 
So there you have it, when they say polyurethane glue has no structural strength, they are not kidding!

Jigged the leg for drilling.

Done

Cut dowel to size, then glued using epoxy, since that 
little stool resides on her front porch outside.

Next, work on my corner storage, it is somewhat functional, but it surely could be better organized!!


And that leave only one wall to tackle, the one with shelves besides the saw till.

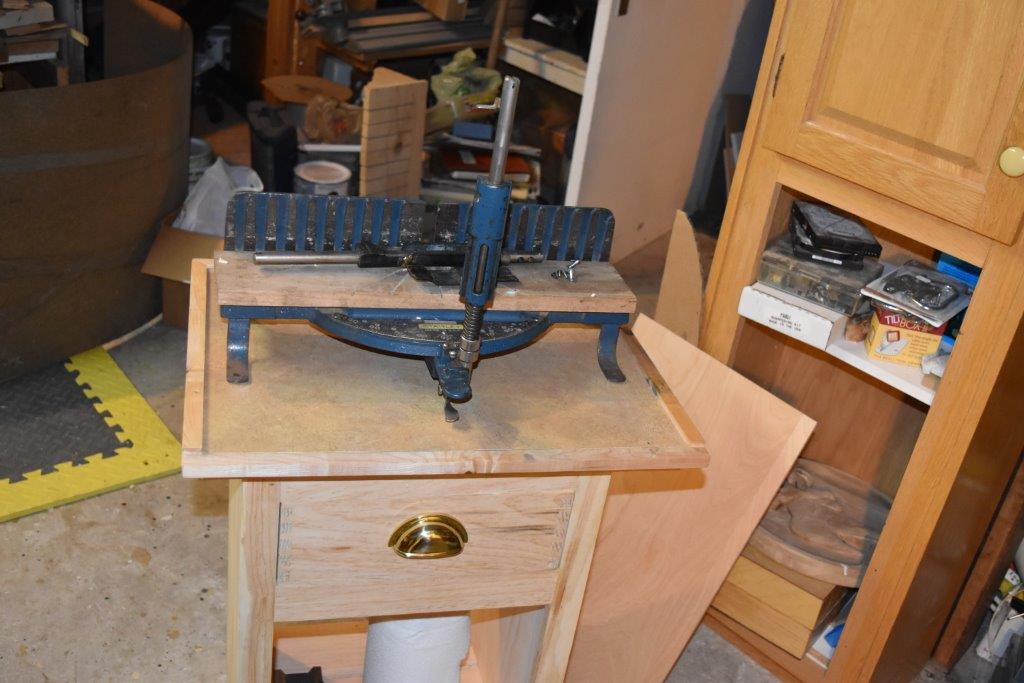
I want to mount my miter boxes on a board to store them and used them on the bench.
I previously made a trial with my current sharpening board.
All three of my Miter Box fit on the same size platform:

Craftsman Miter Box

Stanley No 61 Miter Box

Stanley No 150 Miter Box

Same platform with a bench hook can be used on the bench,
or used on a dedicated station.

It would be a similar construction that I made for the sharpening board except that it would be banded with a lip on all four sides.

And then there is my main bench, which was restored last Spring,


it has been recently thru a period of heavy humidity, until I later started the dehumidifier, so it should be done with its stupid wood tricks by now.  Time to have a look and correct if required, lets get the winding sticks out!

I'm happy to believe that it must have, surely (are you sure?) stabilized by now and the bench top is ready for a tune up.

I do not want to reduce the top thickness much, so instead of traversing, I will simply take a pass on the high spot.


That should bring closer to level without removing much material.
It's wood, it is going to keep on moving, but it is now relatively stable.

That should keep me occupied for a little while, like I said, I sorely need the distractions...

Bob, working with a heavy heart.
Sometimes I just want to cry...


Friday, July 10, 2015

Bench mutterings

You may remember that a few months ago, I went over my small joiner bench to addressed some issues.
There was a perceptible dip in the middle of the bench, both ends were standing slightly proud of the frame. I carried out some maintenance and made sure everything was tight and square. Took apart the vintage leg vise and it also got straighten some and applied a quick finish to blend in the repairs.


I was planing to resurface the top, after waiting a few months for it to adapt itself to its environment (translation, wait for it to do its stupid wood trick) Well it has NOW been a few months from the dry winter months to the cool but humid summer months in the basement. Any time now, I should be running my dehumidifier, but I was waiting to see how the top would fare after "moving" about as much has it would never be allowed again, since I will now run the dehumidifier. Once it stabilized itself, I will recheck the top flatness.

I think I have seen enough from the bench, 
time to restarted it for the season!

Currently there are not much visual indication that it is not flat.
A long jointer plane sitting on it doesn't show like it used to.


A quick test with my Stanley No 8 joiner plane reveal a maximum of .008 not bad, barely worth fixing, I have worked on much worse :-)


let's see if it move and in which direction as I bring down the humidity in my shop.

And really most of it is due to a small ridge running along the front of the bench

It look really worse with the strong light but it is only showing 0.008


While I was going over the bench, I was pondering about the usefulness of my current vises attached to it.

First let's review the leg vise

It is a very old vintage vise that I found about 30+ years ago, no idea how old it actually is, nor is there any visible maker's marks.
I installed it to be used. I figured I have it, let's used it...
It has some issues... Both halves were somewhat curved in opposite directions, some planing took most of it out where it mattered. In an effort to keep the faces mating tight, I refaced them about 25 years ago with pieces of hardwood glued cross grain.
It probably created lots of stress, cause the faces finally gave in a bit to the curving effect, the glued joint held tight, but some the wood pieces shows cracks.

Took a long while but they finally gave in and curved

The cross grain glue connection is holding tight.
Stronger than wood itself as they said


That was an easy fix, I just had to tweaked it with a rasp until it secured a piece of paper across the length of the face. The bottom pin that adjust the pin board is a replacement I whittle from a piece of maple years ago, still no signs of damages, and secured to bench with a small leather lanyard. Probably the only reason why I did not lost it yet :-)
The vise handle was missing, I made my own. The half knobs on each ends are threaded using my wood threader kit. I used whatever pieces of wood I had on hand, the handle is made of three different species. The long handle piece is oak, the end knobs are walnut and mahogany

The front casting is broken in a few places. I kinda glued it back together with epoxy, did not worked well, so now it is epoxied to a thin aluminum spacer and I drilled a few more holes to fasten it.

And, YES, I know, Robertson screw heads look out of places, 
should be slot screws, preferably with  some sort of patina :-)


That work, but there is too much play, making the main screw to move around when operating, creating some annoying binding if not careful.

So how does it work?
Great, it had been doing the job without much complaints for the past 10 years.
I really like that design in front of my bench, better than using the ubiquitous Record metal vise. That one, I reserved for the end of the bench.


The small gripes I have about my leg vise could easily be addressed, by simply making a new one.
I have spare antique vise mechanism of a much bigger diameter mind you.

That thing is huge and heavy.
Not sure what I am going to used it on.
A 8 footer Roubo bench??

I could easily make my own, or buy one of the new ones. Either the wood screws or the Bencrafted incarnations. But has long has it earned its keep, its a keeper. I had thought of lining the faces with leather, but...won't be necessary.

It can hold a piece of paper very tight
 without going gorilla on the handle...


The end vise

At the bench end I installed a Record No 7 clone (Mastercraft) , because I had been carrying around that vise like forever because that's the only thing I ever saw on a bench up front, before I built this joinery bench. I have long converted to leg vise with no foreseeable coming back. Even with my cranky antique. I can only dream how nice it must be with a Benchcrafted one...Must be like heavenly :-)
Anyway, had it, used it. That's why it is installed at the end.


I never did completed its installation. I was suppose to make wood chops to bury the metal faces inside and have two bench dogs, one at either ends and a corresponding rows of bench dog holes...never did happened, and never did I missed it.

Once in a blue moon I used the built in bench dog, 
may be twice in 10 years...

As you can see the one and only row of bench holes was supposed to be joined by another parallel one about the same distance from the end of the vise face in provision for a wooden face equipped with two bench dogs.
Never happened, never had a need for it.

In fact I am seriously questioning, why I ever put it up in the first place. Cannot see much uses for it. Not the way I work anyway.
And right now, its in the way for crosscutting large pieces like says...pieces for bottom tool chest cabinet??

I suppose I could always go to the woodshop and...but what's the fun in that? :-)

So why don't I miss it?
I used the whole front of the bench as a large flat surface, the whole surface is co-planar with the vise rear jaw face
I can clamp whatever with my holdfast, or rest on its shaft if I want to pound on the piece.
On the top, there are not much bench holes, but I have yet to run into a situation where I would need another one. If I did, I would just drill one!
I use Veritas bench dogs and pups system, and use various planing stops and a pied de biche (Doe's foot) and a holdfast. I only have two blacksmith made holdfast and never wished for more.

So I guess I can spare that vise for another application??
Hummm more muttering at my bench is required, need a cold one

Meanwhile soon it would be time to fine tuned the top one more time and install a proper blacksmith made, antique bench planing stop into it


Bob, muttering at his bench...


Friday, April 17, 2015

Bench troubleshooting

Now that the leg vise is ready to go back on, it is grand time to look into the growing gap issue on the top.


The leg vise normally sit into a let in surface on the front leg, and although I flatten the back of the leg vise, there is rocking on the bed surface. Near the top of the leg, the front maple apron has been re-attached flush with the pine leg. The top is now also flush with the framing members. Whatever gap remains between the vise rear jaw and the top is due to shrinkage movements, mostly.


And sure enough we have a gap left. The leg has twisted a bit, remember it was detaching from the front apron before? She is now tight again, so cannot move any closer. That may have pulled that end a bit lower. The bench framing itself could be out of square a bit, but cannot be by much, everything is tight and square.


There is also some dip at the other end of the leg, the unsupported bit sticking out. Bolting the solid hardwood of the vise to the pine leg will take up much of that gap, but we can do better.


So how much are we talking about?
The bench is currently lying on its side on the cement floor. It is by no means level, but close enough. The legs would be also be pointing lower. All I have to do is to zero my gauge on the front apron.
Why Zeroed? Because it is a lot easier than to try to remember numbers, making it Bob's fool proof

It was about 0.10 degrees off horizontal before I zeroed it. Damn! My cement floor is probably off :-)

The front of the mortise is 0.20 off . And it is not consistent, that is about the worst spot.

The rear of the leg is off even more, 1.30  

As it is visible

The end of the side rail sticking out is off also. 

And finally, the other side of the apron is obviously in line (level with) the long part of the apron.

That only tested the front of the vise/top interface. I did similar checks on the length of the leg.
Note absolute readings here, I'm referencing on too short a surface to get good readings. But nonetheless, they gives me the information I need to quantify, hence confirm, what my eyes are telling me. I now know what to do to address my problems:
- Reduce gap between rear jaw of leg vise and top.
- Make rear vise leg sit without rocking on the inset leg.
- Correct skew of vise's jaws. make parallel with front apron.
Solution, plane the bottom of the inset leg. Pretty well all the worst movements that could have taken places is now done and fairly stabilized, as long as kept in this room. Yes, I will expose fresh surfaces and cause a bit more Relative Humidity transfer but I don't expect much physical movement.
Who could have predicted that construction lumber cup and twist? :-)

Again, I do not have to make it perfectly flat, just flat enough to do the things mentioned above. It only has to accept the back of the similarly made flat enough, leg vise, leg.

Almost there

I'm happy with that, the leg need some breathing room around the top mortise, because that is one big hunk of solid Sugar maple, it moves!...Go figure :-)

In the end I touched up flattening the back of the vise leg and the mating surface on the bench frame, until everything fit right and flush where it count.

This morning I finished fastening the top more securely to the framing, it is now as tight to the frame as I can make it.

I drill deep holes with a Forstner bit then put in a No 8, 2 in screw with a washer in a big enough hole to give room for expansion. There are now 3 such screws on the rear rail. 

Was

That really tighten the top to the frame and took care of the curl of the top in the corner.
Once back up on its feet I checked the hollow on my top and it is now much less. Oh surprise! That is why I wanted to go over the bench before attempting to re-flatten the top.

I used my Shinto rasp on both jaws surfaces to fine tuned the closure. It now hold a piece of paper very tight, I'll call that success. Much improved, and would even be better when I put in a piece of leather on the jaws.

In preparation for the top leveling job, I left the vise slightly below the top.
I will leave it do its stupid wood tricks for about a week, before I plane it flat again.

The tools I used to assessed the problem. To fixed it I used a 1 inch wood chisel with a mallet, as low angle block plane, a jack plane, long jointer etc.

This is one area where using a longer plane, really make fast work of this problem. Unfortunately, in this case we also had to deal with an end grain piece of wood sticking out. It took me more than one plane to tackle it. No problems, I just happen to have pretty well one of everything to throw at it :-)

I'll call this re-hab a success and move on to the next thing on my list, hint you may have spotted the pieces on the bench...

Bob, the bench detective looking for Jessica (from Rogers Rabbit :-) with music from Casablanca in the background.