Showing posts with label Sewing Machines. Show all posts

Tuesday, October 13, 2015

Done with the sewing machine cabinet swap

Got to finished the top repairs; on three spots,

Beside each new hinge location 

And in front by the small swinging door

I am happy the way they turned out. The only thing I missed was on the hinges patches, I was so focused on matching the glue line that I did not pay enough attention to the grain direction.  As a result, on both pieces, the grain runs slightly askew to the panel.  I did better on the last patch, I think I nailed it on that one :-)

Next the coloring, staining, matching start.
The inside rim was a lot easier since it is darker than the top.

In progress, 1st coat.

I'm not crazy about my attempt at matching the patch area, I need to do some more practice with stains, and then I realized (well actually Heather is the one that pointed it out me :-) I wasn't using stains I was using Stain varnish, no wonder I had a hard time to color the wood...
Anyway, the top could use a good sanding and to be re-finished, so that would have to do for now. That is also what I was considering, would have been lot easier, but did not have the time right now, have much bigger preoccupations.

And in the end, my friend is happy, I'm happy, everybody is happy.

Cabinet closed

Cabinet open


Cabinet fully open


And out she goes...

Thinking back on the trouble I had with my "stains" on the plane till project, I obviously need to get the right stuff and get some practice under my belt.
Like a lot of woodworkers, the finishing is what I dread the most.
So must suck it up and practice, practice

Bob, with a stain on this job

Wednesday, September 30, 2015

Working on the top for the cabinet swapping

I was planning on practicing my veneering techniques on it, but it was not very practical, as the depth of the repair areas are more than the paper thin veneer you get today.

I thought about making 2 or 3 layers, but thought this could be tricky to ensure it lays flat and what if I punch thru one layer?

So I decided instead to glue in a chunk of maple I splitted from a small piece.
Figured, as long as I have one flat face to glue, I could then leveled off the chunk without worrying about punching thru.

Chunk of split maple "cooking".

Next batter up after I do initial trimming with my trusty German No 8 knife.

The next tricky part would be to minimize the damages to the adjacent surfaces so I don't end up having to sand the whole top and refinished it.
But if that does not pan out, no big deal. I just want to try if I can make localized repairs, in prevision of doing just that on her big parlor cabinet, which she doesn't want to be refinished, just fixed up.

After a few minutes with the knife and the block plane,
it is almost flush, scraper is next to finish it.
I'm happy with the tight glue line.
BTW they are both same color, it is just the flash changing the colors

Had a closer look at the cabinet construction, it is made of glued up narrow maple boards then sandwiched with a layer of softwood, and finally a maple veneer on each side.

Slice of wood I cut to enlarged the opening for the sewing machine.
That cut surface is off my Bosh jigsaw with a special tooth geometry blade, 
darn good if you ask me. 

On this close up you can see what I was describing.
When I recessed the hinges, I went down to the solid wood part.
You can also guess the thickness of the outer layer, much thicker than today veneer for sure. The patches I'm making are the thickness of the two outer layers.

The blade I used was a BOSCH T101BR clean cut.
It is a High Carbon Steel blade with very clean milled teeth. 
10 TPI reverse pitch for clean cuts, and it sure deliver as promised!

The whole cabinet is made as such. 
All laminated hardwood construction with face veneer on both sides.

 I guess I should not be surprised.  Knowing the large demands for sewing machine cabinetry, this makes lot of sense.  They are not wasting much wood with this construction method and the results are a strong and stable cabinet.
Very clever these sewing machine cabinet makers :-)

I do not know if this is in fact a Singer cabinet, but judging from the quality of its construction, I believed it is.

Now the only remaining patch to put in is the small one by the small flip board up front.  It may sound a tad too fussy, but cannot have the fabric catch in that spot, hence the top should be as smooth as possible.

Then more butt scratching to figure out how to blend in the repairs on the top :-)

Bob, finding little shop time lately, but making some progress nonetheless.

Thursday, September 24, 2015

Meanwhile, back to the cabinet swapping...

I have  been working at it for the past few days here and there.

I was debating with myself how I was going to cut the long stopped groove for the machine hinges (2). Should I excavate them by hand or power? Router or drill press? In the end being solid maple I opted to go with power :-)

Since I long got rid of my Sears fixed router, I currently only have a small 1/4 Bosch Colt trim router. Plenty powerful, but I do not have many bits for it and the size required would have necessitated numerous pass to cut a wide enough and deep enough groove. Noisy, noisy, so I went with the drill press and a Forstner bit. Much faster and quieter :-)
Why a Forster bit? Because it is one of the few bits that can cut overlapping holes, even at an angle.


Sizing up the proper bit.
1/2 inch it is.

After setting the depth stop on the quill...

a series of holes are drilled.
The fence interfered with the drill's column, so I free handed it

A quick clean up with a chisel. Then cut the opening wider at the 
mouth to allow the hinge to swing fully up.

Once one hinge was installed, I doubled checked my spacing 
with the machine, then cut the other one.

  After both hinges were fastened, using the previous holes on one side of the old groove, I marked and drilled pilot holes for the remainder screws.

Using a small gimlet I predrilled for the screws

One last check with the sewing machine, everything OK, but it doesn't fit right in the large opening on the top, since I now need to trim it a bit.

More markings and more trimming later, everything fit as it should.
Including the smaller flip board up front.  I had to cut a rabbet deeper on the front flip panel front edge to sink the machine lower up front.


Then realized that the back was sitting a bit lower than the top?
Checked the older top, it was a bit thinner, cut a recess for the hinges, that lowered the hinges in the top low enough to raise the back of the machine up.


Now need to fill the previous holes, and


Then do some veneer patching, near the hinges and by the small flip up board.


Reattach the top and fix the top surface.

Not done yet. Now need to ensure there is some support holding the machine in the lowered position.  Otherwise, the machine is hanging only by two pins secured by a set screw on the pin's shaft of the hinges. I would not put all my trust in that.

Not sure what I can do, most cabinet I looked at seems to only hang the machine by these 2 posts ? Whatever I do must not interfered with the sewer's legs under the cabinet. And if there is room, maybe a drip guard for the machine oil...

Machine flipped down

View from under, I want to put some thing to restrict it.
It is only holding by a set screw on the rear posts (2).

Although the top is solid wood, I put in  couple of solid wood patch to hide a couple boo-boos on the top. Good practice for later work on a few more of my wife cabinets :-)

Need to sand the top and refinished.
Then deliver to happy friend.

Bob, modding sewing machine cabinet

Monday, September 14, 2015

Small modification on her parlour cabinet

While I was fixing the hinges on the drop leaf, I thought it would be a good time to address a small annoyance I noticed, while taking the machine head on and off her cabinet.

Conveniently there is an electrical outlet behind, just in case
 she runs out of pedal power :-)

Like I said previously, that vertical lift is spring loaded and you really have to hold it back on the way up, you don't want to let her spring up on her own..... Humm, would make a great squirrel catapult launcher (click on text) :-)

Most of these machines required some sort of base to operate in, be it a small tray to hold the bentwood case cover or set inside a cabinet held by two hinge pins.  That one is no different.  But the way it hold the machine in this cabinet is really different.  There are two standard size of old Singers, the full size machine (like this one) and the 3/4 size ( such as No 28, 128 and  99 )

Typical Singer small portable case, full size, with both hinged pins showing

Hinge mechanism from Singer is more compact and simpler.

Lo and behold this one can accommodate both! It simply use the hinge to pined the machine as usual and secure that on the lift tray with an appropriately sized adapter plate to fill the hole around the lift tray opening.  Very clever and standardize their cabinet construction.  It even has a metal drip tray in the bottom, so you don't splash sewing machine oil on your legs inside the cabinet, nice touch...

Removing the full size machine adapter plate.
Metal thing in the bottom is drip tray.
Plate need some work in the front, small thin piece is missing.

So the Missus can wear her finest and not worry about getting dirty while sewing.
Here's why according to a Singer's literature of the days:
Modified to reflect today' s reality :-)

I shit you not, the text on the left, is real vintage.
Modified to reflect today's reality :-)
As usual, like any of my pics, click on it to enlarge.

On Heather machine, the adapter tray is loose and if it shift, the machine won't be able to come out flush with the top. Investigating the problem, I realized that the hinges which normally hold the machine in the bottom case or cabinet are missing on both the tray and the machine.  There is also two holes under the hinges which lined up with the lift tray.  Found out that a piece of 5/16 in hardwood dowel fit perfectly and hold everything secure and in alignment. Problem solved!

Round hinge cavity and a thru hole in it, corresponding 
with a same size hole on the lift tray.

Piece of dowel fit just right.

Since these dowels are just friction fit, I can easily reverse my temporary repair once I figure out how they were originally secured and find a pair of those hinge. May be hard to find, but you never know...

Adapter tray now held securely in correct position.
I got the belt stuck between the lifting tray and adapter plate in this pic.
The metal drip pan is showing at the bottom, dark part on left of the bottom 
is the treadle showing, without the drip tray you could get splash on.

I then had a quick look at the bottom RH door, it's top hinge is loose.  Tighten the screws but there is still too much play. It's better, but not perfect.  That hinge will have to come out, be straighten and I may have to plug the screw holes and make new holes?  Other than that, only has a couple of spot that would requires veneer patches to finish its restoration then gently clean the whole cabinet.  We have no intentions of refinishing the cabinet and make it look like new, it is after all almost 110 years old.  Machine serial number tell me she was made in St-Jean, Quebec in 1906.

Bent and loose door hinge on top RHS.

That spot bear a previous repair but a piece is missing. 
I will remove the whole patch and put a new one in instead 
of adding a third patch.

We both have a love and respect of antiques (like each other :-), so preserving its character is important to us.
But it also have to be a working machine, which she would be after a good cleaning and lubrication.
These old gal are all cast iron and steel gears, heavy duty and last forever.

Handling that newer Kenmore machine around right now in the shop, I'm amazed at how light she is compared to all the old Singers I have lug around, big difference!  That Kenmore is aluminum cast. Newer machines, including crappy new Singers are plastic case and gears, probably very light after manhandling a cast iron behemoth ;-)

Bob, going down his list of sewing machine related jobs on my to do list.


Sunday, September 13, 2015

Swapping sewing machine in cabinets

A good friend of ours ask me to swap her Kenmore sewing machine into a different cabinet. She found a real hardwood cabinet, and would prefer to use that one instead of the termite barf one which came originally with the Kenmore.

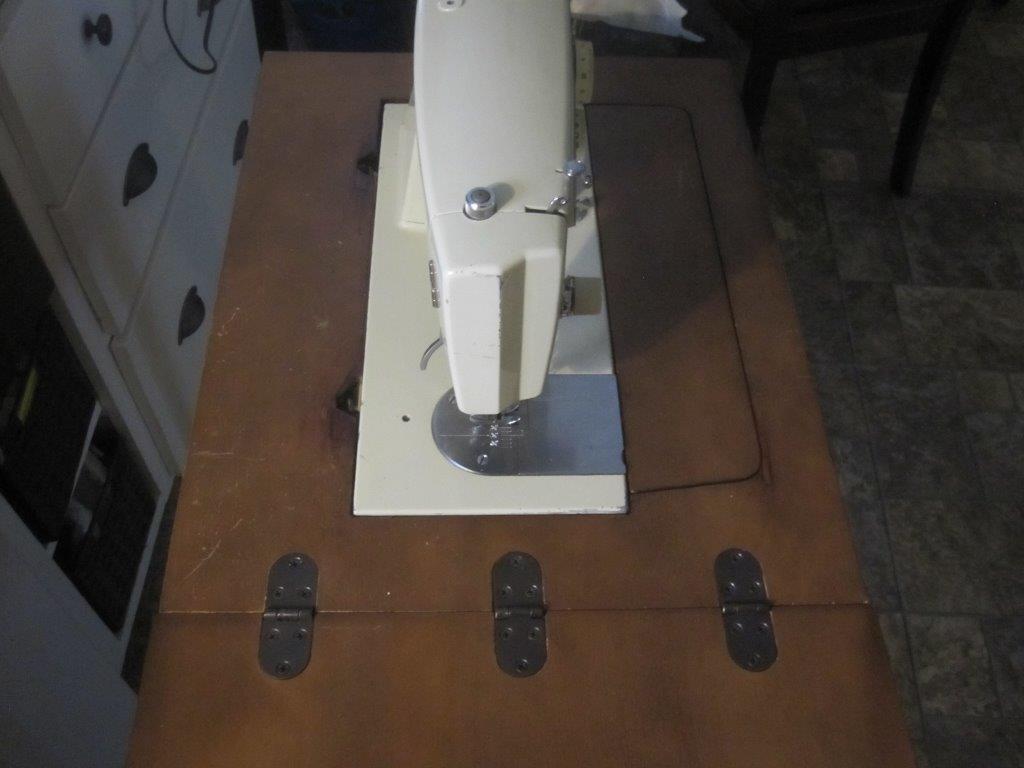
Sewing machine removed from termite barf cabinet on the left 
to be installed in the one on the right, made of solid maple.

Should be easy, most sewing machines have the same standard 9-1/2 in spacing between the hinge pins, right? Well Singers anyway, but this Kenmore is slightly different, same spacing alright but not located in the same spot and used a rather convoluted piece of hardware to hold the pins... And the size of its base is also slightly wider, bigger so cutout opening on the top would need to be enlarged. Well so much for standard... I firmly believe that the word "Standard" should be banned from our language, there is no such thing....


So, some surgery would need to be perform to accommodate it.
First I need to see how the machine fit within its own cabinet.

Then, I'll use the old top to mark the other one for the various cutout and spacing's etc. To do that, I need to take the tops out of the cabinets.

Son of a Diddley, they used Roberston (square drive) everywhere
except on the drop leaf hinges, it used Phillips!

The uses of Roberston screws indicated that the cabinet was made in Canada, so why on earth did they used Phillips only for the hinges! I hated it when you need to fetch various screwdrivers to work on the same thing in the middle of a job... Annoying! Grrrr...

So now lets line up both tops and see what need to change.

Doesn't look to much off, I tried the machine in the opening and its a tad tight.
so I will have to enlarge slightly the opening on the side 

and cut the corners more square.

Funky cutout for the machine hinges

Maple cabinet cutout, used different hinge mechanism.
But a similar contraption.

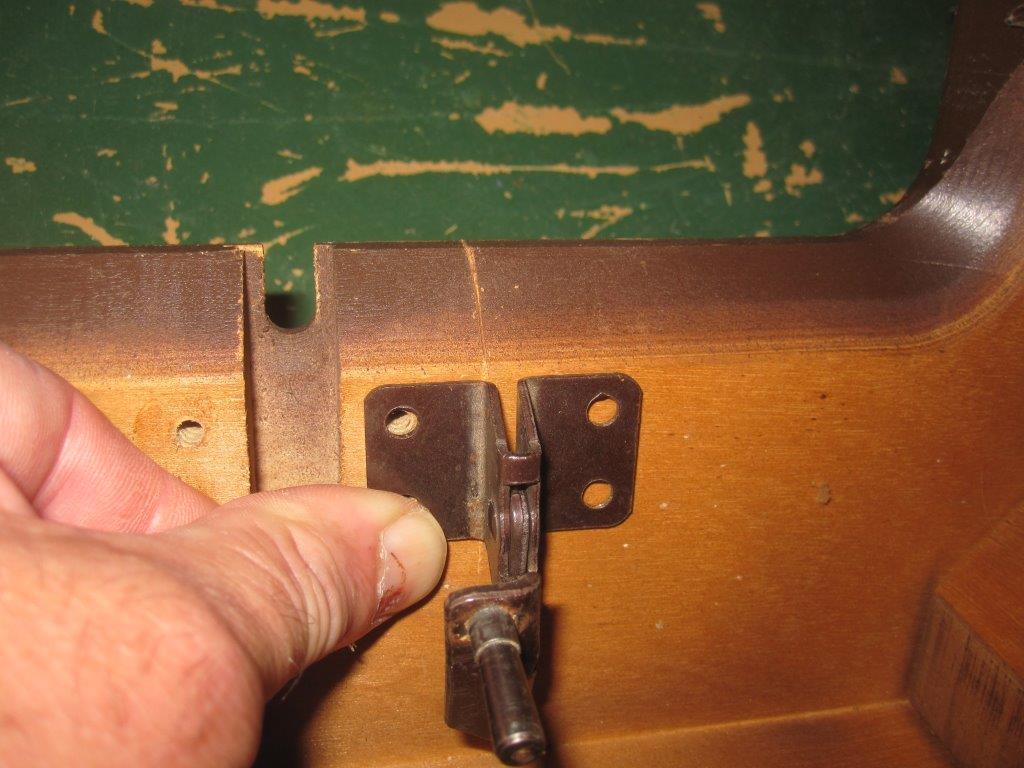
Top hinge from maple cabinet
Bottom hinge for the Kenmore machine.

They look similar (standard pins size?) Not quite, get serious!...

The one removed from the maple cabinet are slightly fatter 
and does not fit her machine.

The other fit of course :-)

Well, I'm glad I checked first cause they both required slightly different mortise to fit them. Now the fun part, I must retrofit those hinges into the maple top at the right distance and hopefully be able to avoid the big gaping hole left behind.
I will filled in those holes, but before I make any cuts to the opening on the top, I better get those hinges right, since it may shift the machine a smidgen left or right once installed.

Transferring my marks around, it look like I could reused the 
hinges holes on the right hand-side.

Not bad. Hummm I wonder?

Temporarily screw in the hinges using the existing holes
Pretty close, it fits. I like that.

So now the plan (C) is to fit one hinge in its cutout, and offset the other one from it to ensure it fit correctly and once the machine is in, I'll see what need to be widened where for it to drop down.

While I was in the drop leaf removal business, I took off the hinges from my wife new parlor cabinet to fixed them. The poor drop leaf has been bend out of shape, on the hinges. Someone sat on it???

Poor hinges are really bent out of shape.

That was a quick fix, squeezed tight in the metal vise then gently tapped with a ball peen hammer to straighten them on the anvil face.

Got to use an old Record Panavise No 74 that came in the garage
 when we bought the house, how cool is that! :-)

Then re-installed. I even used my old London pattern screwdriver on the screws, fitted like a charm :-)


Playing on three different cabinets and I had to used: Roberston Green, Robertson Red, Phillips No 2, and two sizes of flat screwdrivers... Seessh. I think it is a conspiracy from the cabinetmakers and the screwdrivers people to make us buy more screwdrivers, and just when you thought we had them all, another type shows up and you buy it, never to see that one and only fastener it works on.

Psst Anyone want to buy this Cluthe screwdriver?
Very little use, its an Xcelite Model G-3164

Now I have to do some butt scratching while I figure out how I'm going to cut those hinges recess in the maple top...

Bob, fixing sewing machines cabinetry.