Thursday, March 24, 2022

The Post drill is finally hanging up in my shop

This week we have the visit of our son Levi and family.  With our daughter coming over with her two kids, we had a total of 2 kids (Son and daughter), 5 grandkids and 3 dogs.  Yes, the house is alive with laughter :-)

While he is here, I enlisted him to help me with my Post drill project.  Been getting ready...almost... for a while.  But low on my various priorities lists and definitively need some muscle to help.

The biggest hold up being the potato pretzel shape the back board took on.  Started to plane it by hand, but it is a dense hardwood and needs a lot removed to remove twist so need power.

Before they showed up, I made a planning sled and hot glued shims and board somewhat level and not rocking.  Ran thru planer until there was no twist showing on my winding sticks, then remove from sled and ran the other side to take twist on back side.   Of course that was a lot to take off if I was to make the board perfectly flat and twist free on both side.  In addition the post is not without twist also.

Open garage door, set up planer and chip collection.

Made a quick planer sled to secured the board without rocking.
Shimmed and glued with hot glue.

Once twist is gone, STOP.
Trying to keep it as thick as I can.

Unstick board from sled, turn over and run thru planer without the sled.

You do not need much hot glue to secure board
solidly to sled, just need to shim so board cannot rock.

Sooo I quit the planing early when I was satisfied it was flat enough and twist free enough to mate it to the post.

Lays flat on the bench with no rocking.
Now trying to line up holes and figuring how to mount.

I stained the board to blend the planed area with the rest, a tad prematurely, cause I spend about 2 days hand planing the post and the board to match, flat and in same plane. 

Glamour pic of shavings as I am sweeping :-)
The greenish ones are from the PT post

Finally came to the obvious conclusion that the board sit flatter better on its show side.

So decided to mount the board with old back facing up.  So...plane a quick chamfer on all sides and... Stained areas   

Then I realized there was some insect damages on that side of the board, so I dug it out.  That damages was not visible from the surface before being planed.  Filled with JB Weld wood epoxy, then once dry, stained board one last time :-) 


Then sanded and you guessed it; Stained hopefully for last time :-)


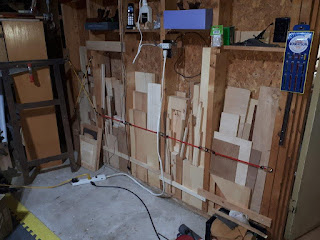
Then It was figuring out how best to approach this monstrosity to hang it up.

Once board is fasten to the beam, I no longer have access to the bolts or nuts behind it.  These must lay flat with the board not to interfere with the fitting on the post.

Another annoyance to be fixed soon.
How to easily raise and lower that big heavy table on the drill press.

After many trips to the hardware store, cause I keep changing my plans on how to best secured drill on post after board is up.  I finally had to... Ugh.. go with metric fasteners. The only frigging bolts of the right size and threads all the way to secured it.  Of course I do not have any Metric sockets whatsoever, only a basic set of Metric wrenches, I had to but a metric 13 mm socket that fit a 3/8 drive ratchet.


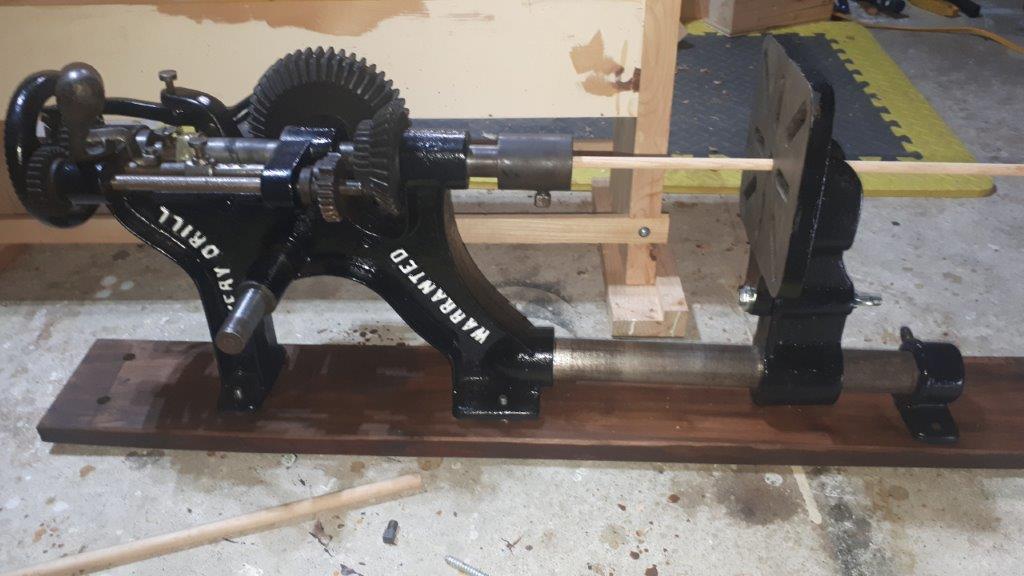
The bolts are ran from the back inside a shallow round mortise from Forstner bit with a washer and on show side, I tighten jamming nut (thinner nuts) until they bite in the wood and recessed.  Not going anywhere.  Followed by some testing on the ground, making sure all 4 bolts lined up with the drill.  A bit of tweaking and we were successful and confident it should work, so re-stained what was the back which is now the front.

Next day after stain was dry,  figured out how it will be possible to attach the solid post and table under the drill.   Quickly apparent that pre-mounting the studs up like we did for the drill is not going to work.

So instead recycled one previous attempts, using different bolts (SAE) and T-Nuts under the board so we could simply screw it in from the front.

Checked alignment to make sure everything will line up correctly with some play I will need for final alignment once up.

Using a dowel to verify alignment.

Once everything was tested to my satisfaction, time to screw in the board. 

That went pretty good. Only needed two washers spacers at the top corner and everything lined up pretty good, flat and level.


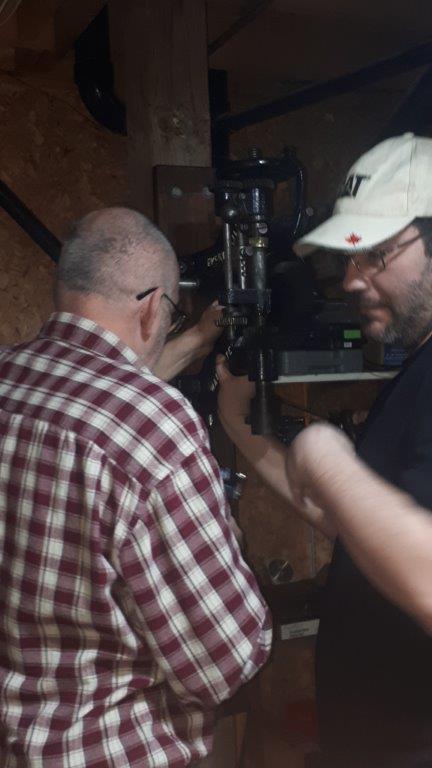
Then it was finally time to hooked up the drill to the post.

Following pics from my grandson Bentley.


And then install the missing bits, flywheel, column and table, crank handle.


And finally a test drilling.  Success!.. 


Need some lubrication, all the gears are scraped and cleaned of old dirty lube. work as is but will be a lot smoother once properly lubed.

Some mechanical alignment and maybe some timing adjustment and should be all cleared for going back to work.


But for now, it is off my floor and hanging on its post.  I am very happy.

Thank you Levi and Bentley for all your help, could not had done it by myself 


Sunday, March 13, 2022

And from chaos the shops rise again

Been spending lots of time organizing and building custom solutions.  I got so much self involved, everything else falls off my radar.  Oups, missed a few Zoom committee meetings.  Sorry.

With the platform and grid in use inside the garage, I was able to quickly organize most of the garage content. 

Moving the two AC units off the floor was a big plus.  
I now got access all around the Unisaw.
And it needs some works in  preparation for being powered up soon... this year

Would be a lot easier to remove and store back 
the AC units, and not in the way.

Before they finished demolishing themselves, I should removed the two extension wings and make better solid ones Would also greatly facilitate storing both side by side 😁

My solution for the railings, turned into garbage and recycling corner.  Posts are very secured not going anywhere.  Will add another board lower


Power Tools Shop getting ship shape

After a quick clean and purge was happy with progress.  Next is purging wood stashes everywhere, garage and hand tool shop.


Need more sorting, purging

That occupied most of my day 😁


From big pieces to small ones, they all got a look and sort/purge

Wood hoarding inside the shop was really taking lots of spaces. 

I like the way it fit but more importantly I can see it.

That big Rubbermaid container contains my carving blanks 
and some pieces in progress

Next would be to figured out axes storage

The current catch all corner...

Still lots of work to do, but space is getting functional again.

That corner will have some electrical work.  
Add outlets and install transfer switch for generator, 
run 220V to garage

I  can see room for a shaving horse, a chopping block 
and a Moravian bench.

We raise again...

Bob, lost in his head space, so much room 😁😂


Saturday, March 12, 2022

Garage storage area almost completed

 Need a bunch of small stuff done, but useable.

Finished Thursday by assembling the frames for the grid.  Glued and nailed ( 2 at each connections)  half lap inside dadoes.  Probably a tad overkill :-)

Being my last task of the day I was getting a bit tired.  I had to remember to cut shorth one side of the half lapped pieces to clear the dadoes up front of grid frame.

First I layout carefully all my pieces of frames on the man cave floor then piled them up in order to be taken to garage for a trim.  I was worried about mixing my piles.  Not that it would had matter, they all fit everywhere...

Took two piles up, cut one, then for some reason brought back down both piles and proceed to assemble first frame. Work great, move on to next one... Took me until the third piece to realized I forgot to trim that pile.  Was tired, my story, sticking to it :-)

First two being already glued and nailed, I left them alone, the third one I trimmed first and trimmed all the others at same time. Finished all 4 frame and resolved to fixed booboo next day.

By Thursday nite I had finished the platform,
making room inside garage and 
 assembled all the grid  frames.

First order of business was moving the frames to garage and seeing how it fit and how much room I will need to assemble.

That would work but I need more space to work

Then figured out how to fix last night booboo.

Mark depth then cut a series of  slots.

Then chisel out, staying away from baseline, then pare to it.
Repeat for the other one.

Then we get to the fun part.  How am I going to assemble that by myself in that space???

Made two spacer gauges (20 inches) to ensure I am keeping everything square, 
nailed a few temporary strips to help.
That was a lot of contortions in and out of that frame to measure and secure.

I was going to cut my French cleats pieces (2) but instead used those boards
 to secured the rear of frame from the inside in order to give it 
the rigidity needed to flip it up.

Tried to pull it up, quickly gave up that idea and waited for Jean to return :-)
With her help we pulled it up on the platform.
Stands flat, no rocking and level. 

 It will eventually be secured to wall, but it will need to be moved to paint wall in back.
Cannot paint now, temps inside garage oscillate between minus 10 C to plus 5C.

Checked the old stairs for fit.  Better fit than the stairs risers I bought.
Was going to cut them shorter, but Jean want to keep that size.
Will simply reinforced, but they have lasted since 1976, so....
They are technically wider than 36 inch so requires middle support.


Put on a few scrap boards to load it.  
Desperately need more space around garage :-)
This side will be covered in plywood to becomes usable storage space.

Now to figured out the railings.

The recycling boxes are in the way and need relocating higher.

Used my left over boards to start framing it.
have not decided on what I'll do yet, but safe for now.
Garbage can will go in that corner.

Where I quitted last night.

Left to do: 
- Reinforced and finish installing the stairs.
- Cut and install trim under plywood edge of platform
- Cut and install boards inside grid cubicles.  Did not installed cleats, have a new plan.
- Figured out and finish railings.  Was thinking make it removable for ease of loading inside house??
- Figured out what to do with platform flooring.  Maybe wait until I do office floor  and buy extra??

But first badly need another round of cleaning, downsizing and turfing.  Garbage/recyclable pick up is next Tuesday.


Bob, seeing the light at the end of that tunnel.  Should see more of the garage floor soon :-)