Been working slowly, my damn thumb keep getting in the way :-)
Finally bite the bullet and went to get a sheet of spruce sheathing 3/4 plywood 4X8.
Ouch, Cdn $90 plus tax (15%)
This is what $90 of plywood looks like, not too impressive :-(
In this case, it will be trimmed off to fit, but still...
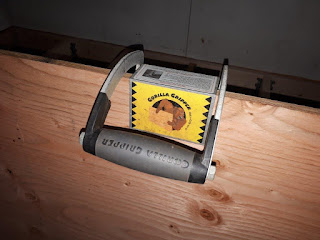
The easy way to move all kinds of sheets good by yourself.
Not cheap, but works great.
At these prices, don't want to waste much, so took me a bit to decide on my cutting list.
I also had 2 pieces left over from previous project, one 42X 48, the other 19X48.
But first, had to finish installing the other post blocked in the framing.
Don't remember how I came up with a length of 128 inches, but I came out an inch or two short by the door. If I inset my corner post in the frame corner, I am encroaching on the door opening space.
Solution? Notch post to fit above the corner of frame, so it's in line with corner.
Yesterday, I finished framing (blocking) one post
then ran out of structural screws.
Along with plywood, bought more screws and three stairs risers.
Will that weaken it too much? I don't think so, it is solidly anchored and blocked
Forgot to account for door trim and was pushing down on sheet toward the posts uppers.
Now to figured out the stairs. The location is a no brainer, to the left of first post.
Marked, then follow the line with a handsaw (crosscut)
Quick works with a chisel and mallet to split the wood.
Cleaned up surface, 1-1/2 in deep, leave 2 in thick tongue.
Not quite seating right, more fine tuning.
You can see part of my line remaining and then there are
the fastener heads in the corner that push it off slightly.
Both were then accounted for.
Once that was done to my liking, both, the posts anchoring and the plywood sequences on platform, it was time to notch my sheet to fit around posts
Having decided on using the full sheet length, to land on a joist,
I clamped it in place against the post to mark their locations.
Less chances of errors than trying to simply measured and transfer measurements.
After measuring the depth of the slots, used my favorite jig saw
to cut them.
Why favorite? Had a cheap cast aluminum casing B&D in the seventies, then a Craftsman Best, scroll saw (pissed oil and never stayed locked for long) Borrowed a Dewalt from the club, every time I took it home for a project (sink cut out) I could never remember how to secure the blade properly and it would fall off during a cut. Had to look it up on line (anything but intuitive system). That Bosh is a dream, easy blade lock/unlock, stabilizer roller guide, cut straight, powerful, well balanced, does not vibrate like a cheap sex toy (Lionel Tm :-). Good German engineering.
Then it was only a matter of a slip fit into position...
... after some judicious rasping of the slots edges...if only ...
Thigh fit but slipped without much persuasions. It was only then that I realized my mistake....Oops.
Forgot to account for the door trim, sheet is stuck between the door trim and the posts.
After some choices French Canadian swear words: Calisse d'Ostie de Tabarnac de Calvaire %$#@
resigned to cut around the trim on the sheet instead of cutting off the door trim :-)
Only tool I could come up with was my small Japanese carving saw. Sort of a miniature compass saw, but with a thin Japanese blade that cut on the pull. Bend so easily...Sigh.
Good thing I did not resorted to cut the door trim, because, after I notched the sheet she drop and stopped on the metal door threshold, more expletive's, but in both official language this time. :-)
Pushed sheet back up at an angle to clear the door threshold push under door frame drop back the sheet around post, Voila, that was too easy, pass me the Scotch now Bro :-).
Cut to size both pieces, screwed down to platform,
then trimmed to final dimension leaving it sticking out 1 inch all around.
Cement block for posts are still drying, were stored outside at the lumberyard, covered in snow.
Straight ahead, you run into one garage door opener.
Turn left, you will run into the garage door when opened.
Go East young man :-)
There is a weathered 2X4 sitting on the edge of platform.
Why I had to notch the post to line it up with door frame, the railings.
One last detail, there would be one or two piece of wood to support and cover plywood overhang.
That is the only unobstructed path up a set of stairs and can only be pushed left so far, there is a 66 inches grid going on top of platform. Therefore stairs must be between the storage grid and the first post. That also work great with the Unisaw, but may still pushed her back a bit, will see.
But first I have clean spaces around, it's a bit crowded until the grid goes up. Temporary steps (white stool) will do until.
Landing spot for my stairs.
Yeah, its a tad messy right now :-)
Something like that. And Yup, will need a deeper skirt at that location.
Stairs won't go up until the grid is installed and loaded.
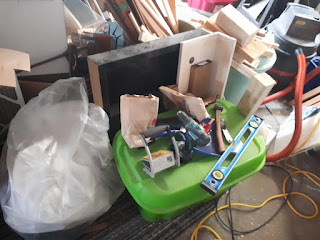
The left over from all my three plywood pieces.
The bigger one in the back (19 in) was not cut, only used a full sheet and the other bigger one.
On today's agenda, finished screwing down plywood.
Was planning to mark the center of my joists on the wall
BEFORE putting down the sheet, but...
Now I have to measure.
After that finish assembling my grid frames, install stupid cleats inside, rip my French cleats, cut to size boards that would tie the grid together, install, mount on platform, clean around, load grid, more cleaning and Tada... Almost done I'll say :-)
Last night had a fire to burn my growing pile of wood off cuts, that and lots of branches around the yard. Just in time before we got snow again...

Fire interruptus.
Fire got snuffed out by the snow before burning down
It got hit by a cordless drill I dropped.
My nail catched it first, tool is unharmed, nail not so much.
That was the following morning, Monday.
So I just bandaged it so I could work without fear of catching
my nail inside my pockets.
Were I stored pencils, nails, screws etc. :-)
Pretty sure if I was to take the bandage off, nail will come off with it. I'll just let it fall off by itself for now.
The trickiest so far was using chisels, but I quickly adapted, without much pain.


Looks like you are really making progress!
ReplyDeleteThe nail looks terribly sore and painful.
Speedy recovery.
Brgds
Jonas
The nail is no longer painful... until it drop then its somewhat sensitive 😁. Got a few more things cross off my list, should be done soon 🤔
ReplyDeleteBob, who went out with friends for supper tonite