Showing posts with label References. Show all posts

Monday, November 5, 2018

If a tree could talk...

First a disclaimer.  I'm no expert on the subject, just my understanding of the science at work.
Oh, and I am an old fart... and tree do reveal secrets:-)


Ah the color and figure of a piece of wood! It is enough to send the heart of a woodworker racing and his forehead pearling with sweat... And then you go in La la Land thinking about what you could do with such a piece.

Why is that? This object of desire for a woodworker was never cheap!   Lots of labour and time between the tree standing and the boards ready to be worked on at your bench.

Yet, to this day, many still hold the common piece of wood as being cheap!
As in: Ah, it should not cost much to build that out of wood, why so much??
Because it is not made of termite barf (OSB, MDF) being solid wood and constructed solidly (No Allen keys required), it should outlast us all... would be one reason

Even if using all "Free wood" there is a lot of time and experiences that goes behind building something out of "wood".
Never mind the cost of the specialized tools required and assorted supplies to be used

But there are no such thing as "Free wood", each steps between the cutting down of the tree until being finally worked on your bench are all going to affect somewhat the final product, in both form and function and of course, its price!

To this day, the most "Dramatic" operation, remains the sawing into lumber.  That is where the sawyer can  make or break a saw mill operation, by the decisions he take about were to cut into the lumber.
Maximise yield, or waste a lot.  Yes, he was a valuable man, and the better paid in the whole crew.
You can often spot the sawyer in a group picture, by the way he is dress and were he stands, being the better paid man.

GOING BACK IN TIME

Trees are a part of the botanical family, they are a plant.
Some trees are among the oldest thing still living today on this earth. They have been around a long long time, and know a awful lot about what happened around them all these years..
Baobabs  tree over 2000 years old and still youngsters to some.
A list of the oldest known trees    Not all older trees have a large girth.

Where they grow, the climate encountered thru its living years and the ravages of Mother Nature: Strong gusting winds (produce shakes), growing on an incline (tension wood), flood (rot), forest fires (scars in tree rings) periods of draught (slow growth) etc. are all recorded inside the tree.
Similarly, the effects from man: Cutting or breaking branches, feeding it etc. are also being "recorded" inside the tree (knots, metal objects, tree rings anomalies, burning marks)

This Silver Birch had a severe lean, about 45 degrees, but was still reaching out for the sun.
The combination of yearly icy snow loads took a toll on it and how it grew.
That would results in a lot of stress built up in the tree trunk, just awaiting to get the unwary at the tablesaw. It is called reaction wood


The science behind all this is called Dendrochronology, the science of the tree rings and dating.


Knowing how the tree rings are formed, yearly, seeing the rate of growth (the demarcation between the Early wood (Spring) and Late wood (Fall)) enable us to count the number of years contained inside the tree. Because most trees around the same geographical region are impacted the same by the local weather conditions, by comparing the rate of growth in the rings to other local specimens help dating a piece of wood and establish its likely provenance.

Pretty cool heh!

This is possible because most trees have a definite differences between the early wood and late wood
That difference is in the size and density of the cells caused by the various growth rates. In the Spring the new growth on the foliage and the warmer temperatures combined to produce rapid growth.
The spacing between the rings is large.

In order to grow in both girth and height, a tree need to be fed.
Trees are nourished by the photosynthesis taking place on the green foliage by the action of the sun.
It caused water molecules to be evaporated in the day time. This in turn is pulling up water and its nutrient found around the tree roots system, via capillary action.
Hint that is why you always water/nourish a tree at his root ball (drip line around the tree), not via the foliage.

The added growth layer around the tree girth happened more like a cone shaped than a true cylinder.
The tree is larger at the trunk and smallest at the top. Layers are piling cones over cones
That is what create the familiar cathedral figure in flat sawn lumber

Maple on top, Apple on the bottom.
Both pieces of wood are oriented the same, the top of the tree is to the left,
as indicated by the grain forming cathedrals


Looking at "end grain"
My bundle of straw representing wood cells. The various colors represent the growth rings
Due to its cellular nature wood can hold water in both the "straw" inside of cell (free water) and within the cell structure of the "straw" Bound water.
These swelling and shrinking cell walls are what causes wood movements.

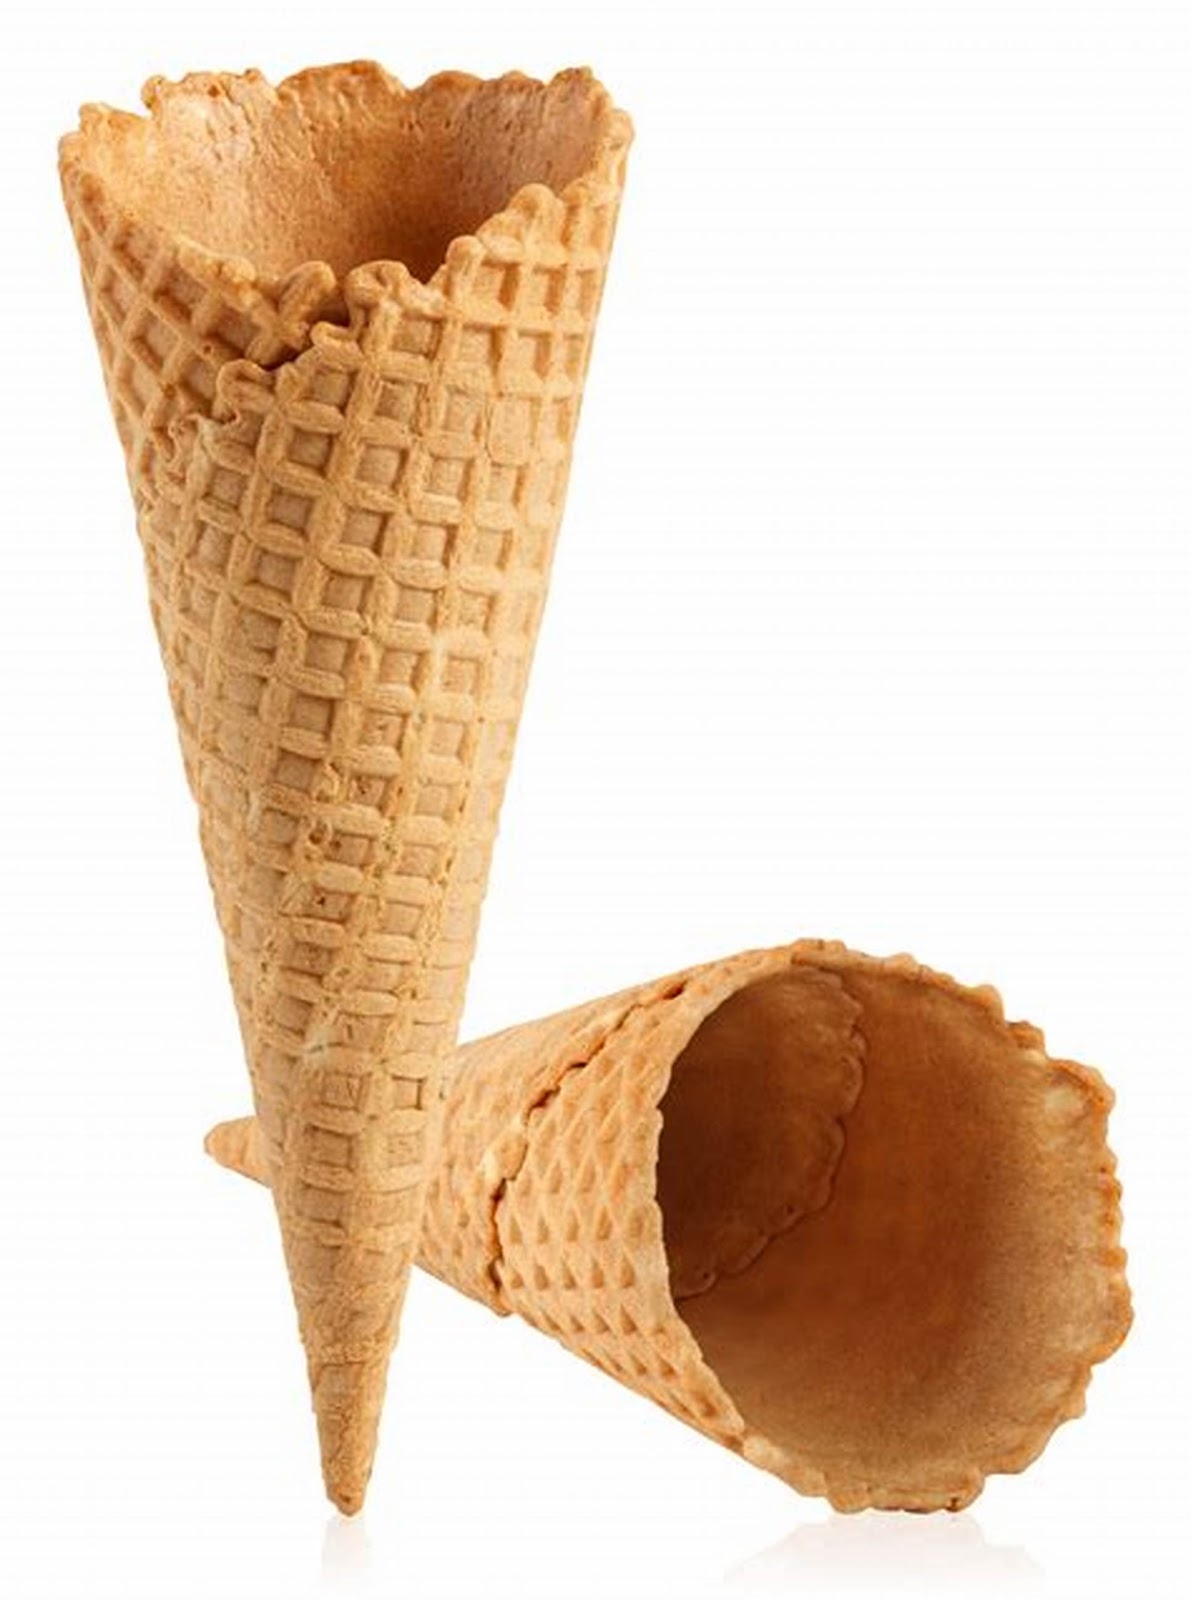
Ice cream cones give us a better representation of the true shape of the outer layers being added on 


Since they are more cone shape than a true cylinder
Not to scale obviously, but you get the idea


This rapid growth experienced in the spring leaves tell tales larger spacing between the rings.
Conversely, as the colder weather approaches in the fall, the Deciduous trees change the colors of their leaves then loose their foliage to slow down the growth activity.  The tree is dormant for the winter, experiencing little new growth.
The tree rings are smaller and closer together, hence often darker.
Our North American Deciduous trees need to drop the level of sap in the colder weather, or they will suffer frost damages.

Deciduous trees drop their foliage, while evergreen keep theirs.
The pines in the background are about 80 + feet high.
The cluster of Silver Birch in the foreground are saplings 
that grew around the tree trunk that was cut


Evergreen have "build-in antifreeze".  Pine sap extract is Turpentine, a wood alcohol, hence do not need to go dormant as fast nor as long. But they still produced clearly defined yearly rings.
The combined number of early and late growth rings produced in a year.

Harder to see on a rough surface, but you can clearly see and count some of the rings.
The space between these darker rings represent one year of growth, since these darker's one happened every fall. You can clearly see that the growth was not even around the tree.

How much sun reached the tree on what side, is enough to record a difference in the growth pattern. 


The center of the trees are darker since clogged with sap.
These being cut in June, they were saturated at the time they were cut down.
But the center, Heartwood, is naturally darker than the Sap wood on the outer layers of the tree.
That is because as the tree grows on the outwards layers, the inside one goes dead and clogged with sap residues, imparting a darker color. Very noticeable in Walnut.

Near Comox BC, late 90s
The dead wood inside, remains sounds for a long time imparting strength to the tree trunk.
But in some quick growing and long living wood like Western Red Cedar, the inside simply rot away
revealing a big hollow when cut

Of course, tropical forest Deciduous trees do not experience as much of a climate change, but they do go thru periods of dryness and wetness (monsoons) and produce yearly rings. Relatively few, such as Teak, have visible rings. The "invisible ones" can be still detected, but not by our mere eyes.

Looking at two species, domestic and exotic


This exotic wood, barely shows, but there are faint, hard to see rings

In contrast, this piece of American Walnut, shows strong late years rings.
There is about 10 years captured in this piece of wood, but which ten years??

Lets have a closer look, since we have the technology :-)
Again, both same pieces of wood, same orientation


Exotic (Honduras Mahogany??)
The darker ring is not well defined and hard to tell were it start and end??

American Black Walnut
The more defined blacker line is the late growth year.
Between it and the next one equal one year of growth

In both these high magnification snap shots, the small white lines, criss-crossing the darker lines are radial lines, radiating from the tree core. They give rise to the gleaming ray flecks on beech, depending how cut..

It is via these lines that the sap travel to feed the outer cambium layer
The big round openings dispersed throughout are resin ducts

Here is a view of the same two wood, showing theses ducts on the surface

Exotic

Walnut
These ducts are showing sap residues which has long crystallized.
They contains minerals and some woods have a high contains of silica, 
which is murder on a sharp edge

These two views, from the end grain and the top face also shows why wood glued on end grain is weak as compared to long grain to long grain glue surfaces. All the holes on the end will soak up more stain (making end grain darker) and have lots of "holes" with no glue surface


AND WHY SHOULD WE CARE AS WOODWORKERS??

Because then you can tell a lot about a piece of wood in your hands...
What it would be best as in, which orientation, problems areas, expected stability, workability with hand or power tools, you name it!!

This piece of pine is standing up the way it was inside the tree.
Notice the whiter sap on the outer edge?
See anything wrong with this board??

Now look at the grain lines.
The LH side lines are almost horizontal, while they are almost vertical on The RH side.
That tell us that the LH side will experience more change in dimension than the RH side and the board would not take an even stain.  Nor would it cup the same across the board (pun intended).
 I would probably not use this board as is and certainly not as a drawer side

Identifying a piece of wood enables us to have a look at its specifics characteristics
Besides its weight and beam strength, one of the most interest to us, are its dimensional stabilities.
That is to say, how much is it going to move in a given orientation with changes in humidity.
Wood is hygroscopic, it absorb and release water in order to achieved the same humidity level as its surroundings.

Knowing this we can account for wood movement and ensure a sound construction that will not self destruct.


This frame and panel door, I made with a cope and stick router bit set, 
fail open at one corner. 
I did not allowed enough clearances in the frame to allow for seasonal expansion.
The same reason why wooden drawers stick in their opening sometimes.
And ironically it would not had fail if my shop dehumidifier did not fail me first...
.
In case you wonder, I always stain my panel edges before putting them inside the frame.
It avoid tell tale whitish lines when the panel contract.

Armed with the knowledge of various wood species, you can select the better resistant woods for outside project, which orientation make then more stable (flatsawn versus quartersawn) and much more to better build long lasting projects.

Reading the grain directions let us anticipate with direction it will plane best without tearout.
Although I will admit that it is sometimes tricky, but you quickly find out while working it...

And this bring us to today, to my lovely pile of freshly milled lumber awaiting to dry before talking to me. Drying and storing wood, a subject for another day...


Bob, who has a busy Monday coming up
But first, were is the ice cream :-)

Monday, August 20, 2018

About wooden moulding planes

This history is an intro to an upcomming series on these planes.

In case you did not notice yet, they are everywhere, they shows up a lot on the antique tool circuit, flea markets, antique dealers, barn finds and what have you.
Yes, they are plentiful out there, ever wonder why??

The three most used types of planes were; The bench planes, the grooving planes and the rabbet planes.  Used to prepare the wood surfaces and joinery.
These relatively simple tools (all have straight blades) were made by the artisans during their apprenticeship period.
Similarly, joiners would had been making specialized tools such as moulders for their work.
Most of these tools would be found unsigned (no makers mark) but may have one or more owner’s stamp.

Moulding planes as we know them today appeared in English listings (city or business directories) towards the end of the 1600s (17th century) Hollows & Rounds, Beads, Reeds and some Ovolo and Ogees.

But of course they show up earlier, much earlier...
The Romans used moulding planes with the irons let into a tapering groove at the side of the stock, and this design persisted throughout the Middle Ages (RA Salaman).
I would venture that they lasted much longer... Albeit in a slightly modified form until the 19th century and perhaps a bit longer.

This is a so called Roubo, French type moulding plane, made by Caleb James.
So called because it shows up in Roubo works in one of his plates (illustrated page)
Its construction is similar to the description of the Roman moulding planes
Pic from Fine Wood Working article, mag No 224 April 2016.

The plane in question Roubo Plate 19.
Notice the wedge finial is sideways.
The shape of the mouth aperture and the shape at the end of the wedge throws the shaving sideways 


This type of construction is often found in older Continental planes (from mainland Europe).  Its construction is greatly simplified by using an open mortise on the side.
If you look at a typical English or North American moulding plane, there is a lot more work involved in excavating  the mortise for the wedge and the open ended slot on the side for the blade. 

A look thru my Stewart Ovolo plane, the classic English form, all excavated in the wood body. 
Not much web of wood left, now you know why they are apt to twist and curl if the wood was not chosen properly or were subjected to high humidity/dryness cycles.
Well seasoned wood was a must...

An often seen variation of the "Roubo, or Roman style", is the addition of a piece on the side to retain the wedge and add rigidity. Again some Continental tradition, but also I believed in Scandinavian countries (??)
Here are some pics found online (eBay)

A pair of French Moulding planes.
Notice how the top part look like its been added? 

Here is one clue...

And here is another


Notice also the squarish shape to the wedge, as opposed to the graceful curves found on the English style one's.  And in case anyone wonder, yes, that would be a lot more simpler to built than the traditional English method, that we are familiar with today, but should work just the same.
Here is a look at one found by fellow blogger Brian Eve 

Why are they so plentiful?

The appearance of the first professional planemakers coincided with the change in architectural and furniture styles along with the use of more ornemental mouldings.
The wood used in fine furniture evolved from oak to walnut and mahogany which were better suited to the new ornemental styles.

Shipping improved, trade expanded and a whole new prosperous middle class developped both in England and in the colonies (including North America)
As the demand for fine homes and furnitures grew accordingly, more and more types of moulding planes were required (Think “moulding du jour” :-).  The first recorded English  “plainemaker” (1660-1720) were previously listed as “Joiners” they probably started to make extra planes for others and gradually switched to full time planemaking.
For example Thomas Granford in England was first listed as a joiner then as a plainemaker and tool maker. Robert Wooding, another early English planemaker 1708-1724, apprenticed under Thomas in 1699.

As planemaking became an established trade, apprenticeship’s records started to appears, makers stamped their ware and develloped regional differences in their stylistic approach: the treatment of the upper edges of the plane body (size and type of chamfer treatment), the upper shape of the wedge (Rounded then flatter on bench planes), the size and shape of the top wedge finial on moulding planes (First it was part of a circle (round), then more of an ellipse shape).
Similar to furniture styles, some of the old-timer styles and features lingered on with the more rurals makers and those in the Colonies.

As tools became more available, slowly the customs of making one's tool set changed to buying them and made available to anyone who could afford them.

Within the North American colonies of Upper and Lower Canada (Ontario and Quebec), the New England colonies (which would becomes later States) the domestic shipping and transportation network were not as developed as in the Motherland(s).  Overseas shipping from Jolly old England was more economical, so in addition to the first tools that accompany the settlers and subsequent arrivals, lots of English tools were imported for resale in the port cities (New York, Boston, Montreal, Quebec city)
In addition there were lots of trade restrictions set up between England and their colonies, to benefit the English industries.  Surprise! Tariff and trade restrictions are nothing new!!!

Nonetheless, planemaking will become established first in the American colonies (F. Nicholson Boston (Wrentham) 1728-1752) then here in Lower Canada (Jean Baptiste Desforges Montreal, Qc 1790-1830, Sweetman, Montreal Qc 1820-1832) and Upper Canada (James Gabb Toronto On 1833-1836)
These being the earliest date I found so far...(Guide to Canadian  Plane Makers & Hardware Dealers third edition)

How many makers were making these wondrous tools?

In addition to the ones that continued to be made by the apprentices (the apprentice system here in the Colonies, was not as strict as the ones to be found overseas, due to the large and urgent needs of the Colonies) there were numerous makers that came and went during the 200 plus years that they were manufactured, from the early 1700s to the early 1900s.

Bell curve of known British planemakers from 1700
The zenith being around 1850
Compiled by WL Goodman

In addition to the peak of English makers at 140 (in one year), there were 32 Canadian planemakers identified so far.  Of these the census of 1871 found 7 in operation (6 in Quebec, 1 in Ontario) and they had a combined output of 17,000 planes that year alone

The next census of interest is in 1901 were we found that the Quebec plane production was about 700-1000 planes per workers, per year, for a combined output of 7,000 to 10,000 planes from Roxton Pond alone.

And lets not forget the Americans.  In Nov 1854, Greenfield Tool Co by itself produced 11,900 planes.

After an early start in the early 1700s, numerous apprentices turned tool makers came and went on their own, but by the second quarter of the 19th century, the introduction of machines, the use of water and steam power and the great improvements in communication (Post office, Telegraph) and transportation (water canals, more and better roads, railroads) led to the formation of  large companies aided by catalog sales and ever expanding markets

Interestingly this increase demands ended up making the use of convict labour on both side of the US-Canada border.
Auburn tools NY (US) and JP Millener Kingston On (Cdn) used prison labour contracts until banned.

Some of the largest plane factories in USA were

H. Chapin / Union Factory, New Hartford CT  1828-97
Arrowmammett, Middletown CT                      1836-57
Greenfield Tool Co, Greenfield MA                  1851-83
Auburn Tool C, Auburn NY                              1864-93
Ohio Tool Co, Columbus OH                            1851-1920
Sandusky Tool Co, Sandusky OH                     1869-1925

In the US alone there were over 5380 different imprints (makers or hardware dealers marks) identified in the 2003 edition of the Field guide to the makers of American Wooden Plane

In case you were trying to keep tab on it all, yes, that is a lot of planes that was made and is awaiting to be found out there. And not surprisingly, I do happened to have planes from each of these major manufacturers and they do turned up often in my travels for rust hunting.

Of all these planes manufactured, the ones showing up the most in records are the moulding planes. Not surprisingly since that was the high demands for the ever changing tastes in the moulding du jour that spurred the manufactures of planes on a large scale

And finally, this rather large numbers of moulding planes, required to keep up with all the changing style, became a problem looking for a solution...

A problem looking for a solution or was it the other way around?

First solution was to standardise on a given lenght of 9-1/2 inch in the early 1800s.  Earlier planes varies from 10-1/2 inches to no less than 9 inch, creating storage difficulties inside tool chest.
A problem? Well yes, you try to lug around a large quantities of plane of various sizes!
Some of the earlier planes are sometimes found truncated to fit nicely alongside their newer brethens... if they were cut on the toe, the maker stamp would be lost :-(

The other solutions were all aimed at reducing the number of specialized tools required.
Using a set of Hollows & Rounds, a Rabbet plane and a Snipe bill plane, you could reproduces just about any moulding profiles. But the number of H&Rs needed can blossom rather quickly.
A half set still numbered 18 planes, add the rabbet and the snipe bill and you are down to 20 planes, hopefully of all the same lengths.

Next solution was the introduction of the metallic combination planes.  Inspired by the Plough planes of old, by using a varieties of cutter and using skate(s) as a sole, one can make “some” of the simpler mouldings.  This solution was culminated by the introduction of the Stanley No 55 Universal plane, a Moulding mill in its own.

Ooooh look at all the profiles it can do...

 
The Masochist's dream plane, the Stanley No 55
Pic from Hans Brunner tools

This ever larger need for mouldings could not be satisfied by handplanes alone, behold the rise of the circular cutter.

First in pedal powered machines (Former or Shaper Barnes machinery 1886), and planers/moulders in line shafted machinery, then with electrification came the modern electric portable routers and the electric planers/moulders, shaper eliminating the need for all these wondrous planes... or did they??

The Barnes Foot Powered Former
A machine for making mouldings up to 7/8 in with replaceable cutters
The speed of the knife is between 20 to 25 hundreds RPMs (2500 RPM) and the machine cost $20.
Not as fast, nor has the range of a steam powered former, costing $150-200 but very versatile

Yes, today you can now make moulding run of any length all day long with CNC machines and etc, but it remains a small inconvenience, or better said, a limitation, with a circular profile cutter...
It cannot reproduce negative spaces, given the material used and the speed they are spinning, there are profiles that just cannot be executed with a circular cutter(s)

A sample variety of router's cutters purporting to replace 10 moulding planes
Not as many adjustments to tweak like on the No 55 plane, but still takes time to set up
Pic from MLCS website

Ironically, such profiles are easily executed with these wondrous moulding planes.
You can either used a close enough router bit shape and then cleaned up and modify the shape using a few judicious use of H&Rs for example, or you can simply design your own profile to suit your needs and scale, with the tools you have at your disposition... in your stash of moulding planes...

Next part: Characteristics that help identify their provenance and relative age

Bob, who survived the summer heat waves of 2018

Indeed, it could be had been much worse...


Monday, August 1, 2016

Woodworking books on E Readers

As much as I still prefer the tactile experience of a book in my hands, lately I have been looking at Kindle Ebooks to install on my IPad.

As with most E Readers, KOBO, Kindle and etc, you can download an Apps to read them on various devices, I have both installed on my IPad Air

The beauty of it is that you can quickly access loads of data off line, on your tablet or phone while cruising for tools. And you can be very discreet about referring to it while buying tools by pretending that you are playing Pokemon Go :-)

There are always loads of E books of every kinds going on sale all the time and even some free books for a limited period. It then pay to look around once in a while.

Today, as I was browsing with my morning coffee, I came across a few interesting books for very little.
Highly recommend them for the little outlay of cash required.
Note that the prices shown are in Canadian dollar, so would be slightly less on US,  guessing here that my $1.21 purchases would have been US $0.99

 The first ones I stumbled upon are small booklets that Hans Brunner published. If the name sound familiar to some of you it is because Hans is an Australian Antique tool vendor.  

I like his writing style and the detailed pictures. Got quite a lot of good info for very little money, and it is portable to booth, gotta love it :-)

Researching some of my recent Mathieson tools, I found this book


Then found this guide to Infill planes, covering: Spiers, Norris, Mathieson, Preston


This Stanley guide was a pleasant surprise, and gives you a refreshing idea of realistic prices. Most people are still using Walter's book published in 1996...
He also has an illustrated guide to the various Types of Bailey planes, in a compact form. Well worth the full asking price.
His books also have a good article about cleaning tools, good info from a knowledgeable person who has been selling tools for more than 25 years


Came across three vintage Stanley catalog reproductions. I own a few originals and reprints, so I only went for these twos: 1870 and 1914 copies


A small treatise from a museum curator on the evolution of woodworking tools styles from the 1600s to 1900s. Interesting reading. Currently reading it... 


So there you have it 6 new references to help me in my research for very little outlay of money, and you get instant gratification, no waiting for the post man,,,

Bob, scratching Rudy ears, typing on the screen and reading his Ebooks while balancing my cup of coffee...hum accident waiting to happen, better finish my cold coffee :-)

Friday, April 29, 2016

Understanding Type study's

Hand tools, unlike most power tools, do not have any serial numbers or other distinctive markings to help dated a tool

Among collectors, in an effort to help date or more correctly narrow down to a more specific time period a given tool, for years now, they have come up with Type studies.

WHAT ARE TYPE STUDY

They are the results of examining numerous examples in order to group various distinctive changes or features into categories (Type) then trying to attach specific dates as to when such changes or features took place in the tool long history of production.

PROBLEMS WITH TYPE STUDIES

Most of the current type study we see today were developed before a little thing like EBay came into being.  Suddenly, as numerous examples came to the front it had a ripple effect on type studies, price list, rarity and etc.
Some tools that were thought to be rare became more common once the collecting of tools started to become more trendy in the last decade or so and more of them became available thru sites like EBay.

Along with the larger quantity of tools being available, new features and changes became apparent Type studies had to be updated to reflect this.

Adding to the confusion is the fact that relying on catalog and advertising copies in magazines and such is often misleading because companies recycled their "wood cut" (carved block, inked to print tools outlines and such) throughout numerous years. Millers Falls for one was notorious for that, but so was Stanley and al...

You also have to realized that at the time all these tools were produced, their manufacturers had no idea that someone would be trying to pin point a date of manufacture by the various features down the road.  In addition they would used up their inventory of parts as they went. Therefore not all the tools came out with the same parts during the in-between time periods.

And then we have a more modern phenomena, since a lot of these tools are now being restored to be users, some parts are replaced to make them functional or replace missing parts and etc. The cutter blades being used up eventually are often found replaced for example.

In addition since tool collecting has become quite popular, with an increase in prices (they are after all in a limited supply) Some unscrupulous vendors will change parts or modify them to pass as more collectible and rare "types".

One of the most commonly referred Type study is probably the one covering the Stanley bench plane No 4.
It is often used indiscriminately across the whole bench planes models No 1 to 8


There are of course some caveat to doing this:
The No 1 was in short lived production and because of its diminutive size, did not had all the "new features". For example they never had corrugated sole.
It does have its own Type study BTW

The No 2 to 8, similarly, did not had all the features of the No 4, and to add confusion to the unwary, it was based strictly on the Made in USA models.

Stanley also produced most of these bench planes in Canada, England,  Australia and possibly Germany (?)
Again, not all of these will "fit" the American type studies.
All that to say, Type studies should be used with a grain of salt and not as the absolute definitive answers.

Are they still relevant? YES, as long as their limitations and usage is understood.

I will share with you my own Type studies features that I compiled thru the years with pictures (mostly collected off EBay) whenever time permits.

I did this years ago to make sense of all the sometimes confusing descriptions of the features in question.

First I must dig them out of my computer backups then clean them and "massage" them as time permit

I am currently pretty well on full time nurse duty right now.
But not to worry I have lots of support at home, from the palliative care nurses, doctors, home support workers and of course our numerous friends.

Stay tuned.

Bob, dusting his old files while waiting for Rudy to finish his "beautification program" (doggy grooming :-)

Friday, March 25, 2016

Sharpening equipment

Continuing our series on my minimalist tool list.
All the tools you have been busy acquiring since I started this series would be quickly rendered useless unless you have a meant to keep them sharp.


SHARPENING EDGE TOOLS, CHISEL, PLANE IRONS ETC.

First understand that it DOES NOT MATTER which system you use, oil stones, waterstones, diamond plates, scary sharp (sand papers) etc THEY  ALL WORKS.

If you already have some money invested into one of these system, keep it.
If you are starting from scratch, pick one any one and stick with it.

Understand also that there are three steps required to bring a tool cutting edge to be sharp.
1- Grinding
Could be done on your coarsest stones or sand paper or with a grinder, handcrank or power.
2- Honing
Must be done UNTIL a burr is formed on the other side. Most people stop before they achieve that burr across the WHOLE edge and as a result, will never achieve sharp.
That step is accomplished using your medium stone (roughly 1200 in waterstone, Black Arkansas in oil stone or roughly 320 to 600 in sandpaper)
3- Polishing
Were we cut the burr and refine the edge. Use your finest stone.  I stop at 6000 on my waterstones with a Nagura stone then I strop it.

This commercial strop has a shaped edge to handle my carving gouges

Shop made with a peel & stick micron sandpaper.
A good source is from Fiber optic technician, they never reuses their paper and there is a lot of life left in them after they just polish the end of the fiber.
Or... you can buy them :-)


In the above pic the polished ceramic tile is for using sandpaper, and setting the bevel flat on the plate.

The super flat surface (more than flat enough for our needs) is also great to set flat the bevel on our tools in the side clamping jig, if you do not have a setting jig or want to duplicate an existing odd ball angle. Spritz water put on a piece of sandpaper and go to town. I don't use spray glue.

The hand grinder is but one example and then there are my two most used waterstones, 1200 and 6000, which BTW you must use with a Nagura stone to achieve best results..

There is a lot of controversy and strong opinions when it comes to sharpening.
All I have to say about using a jig for holding your chisels and plane irons is that it will get your sharper, faster. Why? Because repeat ability and consistency wins the race...every time.
I don't see it as a crutch, and yes, I am proficient with free hand sharpening without training wheels, but I still used it to get me there faster, period!

And talking of sharpening jig, I much prefer the side clamping jigs like the Eclipse over any that clamp from the top of the blade such as the Veritas jigs.
The Lie-Nielsen appears very nice and etc. but it is way too pricey for my taste and needs, so save your money and get a cheap clone of the Eclipse, they are everywhere and all seems to come out of the same factory (?)
They are not perfect, what do you expect at that price point, but they are very serviceable and easy to tweak, see how I do it here


Such a side clamping guide benefit greatly from the use of a simple setting jig to get consistent angle set


Finally you NEED a place set up to be able to sharpen without having to clear everything to make room. The easier it is to stop and sharpen, the more often you will do it and your tools will stay sharper and your sanity will benefit also :-)
You do not need a full blown dedicated sharpening bench but make yourself as a minimum a board of some sort to hold your stones and etc.

My temporary set up on a re-purposed bedside table using 

SHARPENING SCRAPERS

You need a mill file and a burnisher. DO NOT skimp on the burnisher and forget stupid ideas about using a router bit shank, screwdriver shaft and whatever.
You NEED a proper burnisher. They come in various shape and profile, I use my Veritas ones, work great.

From T to B
Veritas small carbide burnisher
Veritas Tri-Burnisher
Home made burnisher made from an hardened rod inside a Xerox photocopier

Requirement of a good burnisher, a smooth and hard surface, harder than the steel used on the scrapers.

There are a few special holders to help you get a consistent burr angle, but I never used one, so cannot comment on their efficiency.

The mill file, about 8 in, is used to remove the old burr and dress the edge smooth and flat. A small guide either commercial or shop made (a chunk of 2X4 with a slot to hold the file) in order to hold the file at 90 degrees is a good help, but not necessarily required. You can use the same guide you use for jointing the teeth of your saws


If shop made (chunk of 2X4) you can also easily use your jig to help you hold the scraper straight while honing the edge at 90 degrees on your stones


SHARPENING SAWS

You need a saw vice, either commercial or shop made, to hold your saw plate steady while filing, a good set of triangular files to sharpen them and a suitable saw set.

A few of my antique saw vises From L-R
Sargent No 103, Unmarked, Disston No 1

Some of my sawsets, as you can see they comes in a wide variety. 
I would recommend a pistol type such as 
the Stanley 42 or Eclipse (second from Left top)

A good set of triangular files, sized to your saws tooth line.
You want the file to be twice as big as the tooth depth in order to get to use both sides of the file, which would give you 6 sides versus only three.  

You can add, a black marker (much easier than the old timey method of using a candle smoke to darken the teeth) and a good light source, a magnifier glass is also very handy.

MISCELLANEOUS

Other useful things to add would be some sort of angle checker, strong magnification and light (think those lighted magnifier bench lamp)


If you are starting with sand paper, and I highly recommend it before settling on a stones system, keep in mind that in the long run, it is not inexpensive since you are gonna go through lots of paper. Do the math and you will realize that it adds up quickly... But it is very convenient, portable and accessible anywhere you are, handy.
When rehabbing old cutters I always start with sandpapers before I finish with my stones, to avoid unnecessary wear and tear on my precious stones.

There are all kinds of jigs you can build such as Ralph's Molding iron jig


There are all kinds of specially shaped files, hones and etc to help you get into the nooks and cranny's of various moulding profile irons or carving tools.
Buy them as you have a need for them.

You can easily cut the profile of the cutters, using the actual tool, on a piece of wood then rub some honing compound into it to strop your profiled cutters.

Do not dred sharpening, it may be a necessary evil, but it is a crucial skill you need to develop early on in order to enjoy your woodworking. There is nothing more frustrating, and often dangerous, than using a dull tool! So buckle up and learn to sharpen your tools...

Bob, sharpening his mind with cold beverages :-)