Thursday, March 10, 2022

Garage storage area part 5

Been working slowly, my damn thumb keep getting in the way :-)

Finally bite the bullet and went to get a sheet of spruce sheathing 3/4 plywood 4X8.

Ouch, Cdn $90 plus tax (15%)

This is what $90 of plywood looks like, not too impressive :-(
In this case, it will be trimmed off to fit, but still...

The easy way to move all kinds of sheets good by yourself.
Not cheap, but works great.

At these prices, don't want to waste much, so took me a bit to decide on my cutting list.
I also had 2 pieces left over from previous project, one 42X 48, the other 19X48.

But first, had to finish installing the other post blocked in the framing.

Don't remember how I came up with a length of 128 inches, but I came out an inch or two short by the door.  If I inset my corner post in the frame corner, I am encroaching on the door opening space.

Solution? Notch post to fit above the corner of frame, so it's in line with corner.

Yesterday, I finished framing (blocking) one post
 then ran out of structural screws.
Along with plywood, bought more screws and three stairs risers. 

In order to line up my corner post in line with outside of door frame, I notched it to fit over last joists.
Will that weaken it too much?  I don't think so, it is solidly anchored and blocked

Marked, then follow the line with a handsaw (crosscut)

Quick works with a chisel and mallet to split the wood.

Cleaned up surface, 1-1/2 in deep, leave 2 in thick tongue.

Not quite seating right, more fine tuning.
You can see part of my line remaining and then there are 
the fastener heads in the corner that push it off slightly.
Both were then accounted for.

Once that was done to my liking, both, the posts anchoring and the plywood sequences on platform, it was time to notch my sheet to fit around posts

Having decided on using the full sheet length, to land on a joist,
I clamped it in place against the post to mark their locations.
Less chances of errors than trying to simply measured and transfer measurements.

After measuring the depth of the slots, used my favorite jig saw
to cut them.  

Why favorite?  Had a cheap cast aluminum casing B&D in the seventies, then a Craftsman Best, scroll saw (pissed oil and never stayed locked for long) Borrowed a  Dewalt from the club, every time I took it home for a project (sink cut out) I could never remember how to secure the blade properly and it would fall off during a cut.  Had to look it up on line (anything but intuitive system).  That Bosh is a dream, easy blade lock/unlock, stabilizer roller guide, cut straight, powerful, well balanced, does not vibrate like a cheap sex toy (Lionel Tm :-).  Good German engineering. 

Then it was only a matter of a slip fit into position...
... after some judicious rasping of the slots edges...if only ...

Forgot to account for door trim and was pushing down on sheet toward the posts uppers.
Thigh fit but slipped without much persuasions.  It was only then that I realized my mistake....Oops.
Forgot to account for the door trim, sheet is stuck between the door trim and the posts.

After some choices French Canadian swear words: Calisse d'Ostie de Tabarnac de Calvaire %$#@
resigned to cut around the trim on the sheet instead of cutting off the door trim :-)
Only tool I could come up with was my small Japanese carving saw.  Sort of a miniature compass saw, but with a thin Japanese blade that cut on the pull.  Bend so easily...Sigh.

Good thing I did not resorted to cut the door trim, because, after I notched the sheet she drop and stopped on the metal door threshold, more expletive's, but in both official language this time. :-)
Pushed sheet back up at an angle to clear the door threshold push under door frame drop back the sheet around post, Voila, that was too easy, pass me the Scotch now Bro :-).

Cut to size both pieces, screwed down to platform,
 then trimmed to final dimension leaving it sticking out 1 inch all around.
Cement block for posts are still drying, were stored outside at the lumberyard, covered in snow.

Straight ahead, you run into one garage door opener.
Turn left, you will run into the garage door when opened.
Go East young man :-)
There is a weathered 2X4 sitting on the edge of platform.

Why I had to notch the post to line it up with door frame, the railings.
One last detail, there would be one or two piece of wood to support and cover plywood overhang.

Now to figured out the stairs.  The location is a no brainer, to the left of first post. 
That is the only unobstructed path up a set of stairs and can only be pushed left so far, there is a 66 inches grid going on top of platform.  Therefore stairs must be between the storage grid and the first post.  That also work great with the Unisaw, but may still pushed her back a bit, will see. 
But first I have clean spaces around, it's a bit crowded until the grid goes up.  Temporary steps (white stool) will do until.

Landing spot for my stairs.
Yeah, its a tad messy right now :-)

Something like that.  And Yup, will need a deeper skirt at that location.
Stairs won't go up until the grid is installed and loaded.

The left over from all my three plywood pieces.
The bigger one in the back (19 in) was not cut, only used a full sheet and the other bigger one.

On today's agenda, finished screwing down plywood.
Was planning to mark the center of my joists on the wall 
BEFORE putting down the sheet, but...
Now I have to measure.


After that finish assembling my grid frames, install stupid cleats inside, rip my French cleats, cut to size boards that would tie the grid together, install, mount on platform, clean around, load grid, more cleaning and Tada... Almost done I'll say :-)

Last night had a fire to burn my growing pile of wood off cuts, that and lots of branches around the yard.  Just in time before we got snow again...
 

Fire interruptus.
Fire got snuffed out by the snow before burning down


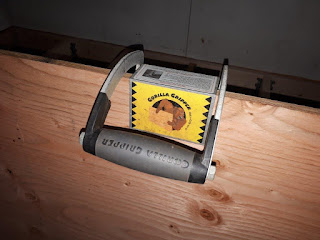
It got hit by a cordless drill I dropped.
My nail catched it first, tool is unharmed, nail not so much.
That was the following morning, Monday.
 
So I just bandaged it so I could work without fear of catching 
my nail inside my pockets.
Were I stored pencils, nails, screws etc. :-)


Pretty sure if I was to take the bandage off, nail will come off with it.  I'll just let it fall off by itself for now.
The trickiest so far was using chisels, but I quickly adapted, without much pain.

Bob, slowed down to a "nail" pace :-)


Tuesday, March 8, 2022

Garage storage area part 4

 After cutting all my joinery for the grid, all dadoes and half lap, with the Radial Arm Saw, I was left with a lot of small ridges which need to be cleaned.  

Where I left off last night.
Surface left by the RAS.

Usually quick work with a chisel and hand router (Stanley No 71), but in this case, there is a boatloads of them so, I`ll take a while.

Even probably longer since my right thumb is currently on Medical leave, sigh!

I continue to be amazed how we used our dominants hand`s thumb so much in everyday tasks, which complicates things a bit right now.  Never mind yielding a sharp chisel... :-(

My goal was to have all four frames assembled by the end of day.  Ahhh  seriously doubts that.

Took me almost all day, but I came close to my goal. In between 2 naps, lunch and diner breaks, this is where I got and how.

Managed to figured out how to use a chisel while sticking out my thumb
and using my other hand to protect it.
That worked pretty good, only banged my thumb once :-)
Probably invented a new, very long French litany of  swear words 

Surface left after a few minutes with a chisel.
Did not bother with the router, would had to make a suitable base extension to use it

 Made a quick and dirty sanding block with a piece of 2X4
 and a 80 grit sanding belt.
A few passes to ensures nothing is left standing up, done.

By 7 PM I had all my pieces cleaned up ready to go downstairs for glue ups.
Being too cold inside garage overnite.

But first, need my Voltaren and a quick nap, before proceeding

Meanwhile, during my breaks been revisiting my needs for the top of the platform.  As it stand right now, there is NO Pressure Treated  (PT) lumber anywhere on my platform or grid.  If I was to put down some 5/4 PT Decking as I was thinking, will need different fasteners finish than just Galvanized to resist corrosion due to the chemical formulation used.  Throughout the years, those formulation have changed a lot, each ones have different corrosiveness to various fasteners.  There is little chances of figuring out which variety I have on hands (left over) unless I was to buy new stock.    It will also makes the platform top surfaces uneven between the 5/4 decking and the 3/4 plywood..  Mind you, I plan on covering the open area of the platform so maybe not a concerns?
If so, may as well buy something else more suitable.

3/4 inch Spruce Plywood?   Similarly, I need to decided how I am going to cover each cubicle floor in the grid.  My first bright idea was to cut strip 66 in long in plywood, one for each row.  Problem is plywood comes in 48 X 96 inches (4X8), to cut 3 strips would required 2 sheets with lots of left over.. 

Then it finally don on me that I just gave myself a ton of work I could have avoid.  I thought I was being clever by assembling on the flat my 4 frames of 2X 4.  That way I saved a a good four inches, keeping the grid down to 66 in long. 

Instead of running 66 in long plywood strips, it would be more economical to simply makes bottoms at roughly 20X 31 in.  Problem of course becomes how am I going to attach my pieces on the inside sides?  I have inset my side supports flush with the vertical members, I would need cleats.

Guess what would have provided cleats??  What if I did not cut dadoes and half lap and instead lay the sides members on top of vertical members, instant cleats... Dang, too late, now I need to make and installs cleats.

In my defense, I had a few design changes on the fly and besides it will be stronger this way.

Besides I could had gone nutso and dovetailed the whole thing... just because... :-) 

So after my nap, I dry fitted my parts, assembling all four frames.  A few pieces are sticking up, being a tad tight, quick plane pass will fix it.  I also need to cut one side of the dividers lap joint to accommodate the front inset horizontal pieces (3).

Four frames dry assembled.
Piece on top is a scrap piece of the front horizontal dividers.
Using it to test fit dadoes and ensuring I got my two end frames 
pieces oriented correctly. 

After glue up, will need to cut my long horizontal dividers (66 in long) Qty 3.  Then the back dividers are to be cut into French cleats, the middle one is a regular flat pieces.  These will sit on top of the frame, for the French cleats to work.  Once secured by a couple screws to the cleats, the weight will be borne by the wall and the platform and be very well supported and secured.  I know, overkill :-)

All that to say, at the end of day,  got almost four frames assembled, I'm happy, times for my pills and a scotch :-)


Monday, March 7, 2022

Garage storage area part 3

Sunday spent a good three hours at the wood shop on Base.  Brought my 8 vertical pieces 72 inches long and 12 horizontal pieces 31 inches long to cut the joinery to assemble 4 frames for my storage grid.

Getting ready

I used the Radial Arm Saw with its regular blade to cut all my dadoes and half laps, all 3-1/2 in long  x 3/4 in deep.  That was 24 half laps and 24 dadoes all nibbled one by one plus 12 more dadoes on the side.  Very repetitive work hence you have to remain vigilant to be safe.  Took a few breaks.  To avoid measuring errors, I only took measurements on the first piece to set up a length stop on the table. Ran all the pieces before setting up for next cut, rinse and repeat until all done.  

I screw in a stop block on the work table, then once 
all my pieces have been cut, I moved it to next position.

When putting stuff away and cleaning up the shop, managed to drop something on my right thumb. Black bluish spot under nail and throbbing.

Yesterday, today the black spot is much bigger


It`s amazing how many ways your right thumb comes into play in everything you do, humm.

So that is where I stopped last night after bringing my pieces homes.


24 half laps and 36 dadoes, all 3-1/2 inches long.
why I choose to do it with a tailed assistant.

Why the RAS ?  Because it is easier to leave the wood steady and move the tool overhead and seeing  where you are cutting.  Mind you it would had been easier / faster with a dado head mounted in the RAS.  What I used to do at home when I had one.  With a regular saw blade it is just more cuts, a lot more cuts :-)

Next is cleaning joinery and assemble 4 frames for the grid.

Must decide soon on covering on platform surface under the grid.  Was thinking recycling decking boards but they are under snow.  Brought a few pieces inside garage will see if usable if not, plan D.


Bob, left with a throbbing thumb.  Pass me the Scotch Brother :-)

Sunday, March 6, 2022

Garage storage area part 2

 That would be the platform and the storage grid 9X9 on top with a set of stairs to the house, which is in progress.

When I left off, I had my two beams with all their joist brackets assembled.  

I am working alone inside a cramped space, accordingly due to the size of the deck assembly and weight considerations, my first plan was to screw the ledger to the wall line up the front one on its posts level with the ledger then drop in the joist one by one.  That plan quickly evaporated due to the complexity of holding up the beam level on its own and then bang away 3 inch nails into it, 4 toe nailed at each joist ends... just not happening. 

Tried my Stud scanner to pinpoint the studs in the inside garage wall.  Being technically an outside wall from the house, it is covered with 3/4 inches thick lumber. under the 1/4 inch gyprock.  Then It don on me that where I am looking at, there is plenty of wood meat all around, I`m screwing into the rim joist of the house, perfect.  Lets get screwing...

Carefully shimmed to level my ledger ready to be screwed 

But wait, how am I going to be able to nail in the two outside joist on the platform once frame is screwed to the wall? No way, so have to nail them in first.  Quickly realized that the way these special end brackets are fastened, my carefully cut pieces at 37 inches are now too long.  I cannot pound into flatness the fasteners (4) inside the brackets, so they stick out a bit pushing my frame out of square.  All the remaining joists sit perfectly flat butted to the beams, there is nothing inside to pushed them out.  Glad I catched it now, Phew..

All that to say, I assembled the whole frame on the ground, then figured out how to put it up level to screwed it to the wall.

I had slipped in a joist next to the end one to ensure I stay square when fastening ends ones.
That's when I spotted the trouble with the end length.  Both end pieces got a small trim.

Next plan stopped in its tracks quickly due to having been given the wrong size driver bit for my ledger screws. Sigh  One more trip to the store...

These special Ledger screws replace and are stronger 
than the traditional Lag bolts

It was nice of them to give me the special bit with my purchases...
NO fit, no way.
Need next size down 

Much better.
An imitation Robertson (tapered fit) 
and self supporting fasteners.   


While at the store also picked up different brackets to secure beam on top of posts.
My first plan was to sit them inside the frame, blocked them with pieces of 2X6 around and screw them to the beam.  That`s how it was done, years ago, but now code says beam must rest on top of post for maximum support.  So I thought, I will notched the post to have the beam sat on it, then screw.
But surprise, they make special brackets just for that purpose.  Part of the Simpson Strong-Tie, code compliant hardware for framing.  Simple, strong and so much easier to remain code compliant.

It`s a thick metal plate, bend to capture the beam and the post
 on opposite sides.

Brilliant.

After abandoning the idea of notching each posts to fit exactly 
(they are all slightly different height)
came up with this idea of using a T plate.
The special bracket for that purpose is much better 

Back on track, now to figured out how to lift and level in place my whole frame assembly by myself in my cramped space...hummm.

Remember I had drop my line by 1-1/2 inch, my frame top is now sitting at 28-1/2 inch hi.  Frame is 5-1/2 in thick (2x6 lumber), so need to support at 23 inch up.  Kitchen chairs are 18-19 inches high, so that is what I used with a piece of 4X4 (3-1/2 in ) on top, then shimmed 

Stand in the middle of frame lift outside edge to slip a chair under.
Slip under the metal work platform, frame is now balanced-ish.
Walk gingerly to the other end, slip in two more chairs, shim and voila.

Ensuring the ledger board is level, it is screwed down first

Next is the corner ledger which stand a bit proud of wall.
Slipped in 1/4 inch thick plywood as shims to screw it tight 
making sure frame remain square.  Wall corner was not 90, but close

Then one by one, cut the posts to sit flush under beam
 minus thickness of metal plate.  
So much easier to level the posts this way.

Once platform was all secured, 12 ledger screws and 3 4X4 posts
Throw on top my scrap pieces of plywood and put the big containers under (6), 
I have regained spaces

Each joist 16 in OC, inside their hangers are toe nailed by a 10d 3 in nail, 4 on each ends. 
Not going to move easily, nor come apart.  Should mention that you have to used the right 
material finish for the fasteners compatible with the hardware.  In my case Galvanized nails.
Otherwise you set up rust (dissimilar metals) and have a code violation.

A few more details to come. 
Bracing for posts and support under ledgers.
Overkill?  You bet :-)

Now to figured out my stairs location and guard posts.
Piece of 2X4 on platform is where the 31 inches deep grid ends.

Now I'm starting to understand why there was no platform at top of stairs by the door...

From my platform looking toward the garage doors.
When door is fully open, the garage door slab will hit you in the head, or lower.
I am a 6 footer, two of my sons are 6 foot 2 and 6 foot 3 respectively.
That is a NOGO.  
Or put up a a sign: Do not use stairs when garage door is open ? :-)

Facing out from house door to garage, you ran into the garage door opener.

I have some ideas but it will have to wait a bit, will need more room around platform yet, in order to get a sense of the spaces and clearances.  Next on my agenda is to take my grid pieces to the wood shop and do a bunch of dado joinery on them.  Once the grid goes up, it will clear more needed floor spaces.

May have to move the Unisaw, but I rather not, will see...

Bob, sore all over but happy with progress so far