This is in response to such a question a commenter left in Nov 17.
What are the differences between the Stanley Mitre Boxes 358, 2358, A, B etc
I wrote previously about Mitre Boxes Part 1 The boxes and Part 2 The saws
Which currently stands at the second place for most reads at 4317 (part 2), who knew Miter Boxes were so popular...

If there was "one" problem with researching tools
is that you end up with a few specimens... :-)
But this question is about the various Stanley's Mitre Box (MB) that came and went thru the years. I can so understand the confusion trying to navigate your way thru it, some models came and went, while others soldiered on until 1984.
Which beg the question, why so many models???
The answer to this are two fold: One - They have a range of various capacities and Two - At various price points in order to sell a MB to anyone looking for one.
Remember Stanley Motto: The Tool box of the world... They were on a quest to become Tool maker's to the world, with a product for everyone at every price points.
Today Electrons spinning mitre saws are seemingly designed to be made Cheaper, Faster, Noiser, Scream Louder and Spew saw dust everywhere...
Ahhh, the quietness of using a good old Mitre Box without having to wear a dust mask or ears defenders... Bonus !! But I digress :-)
Stanley still makes MBs, but at nowhere near the quality and precision of the older models. The 20-600, plastic old school MB with a short backsaw.
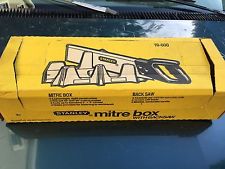
This is the slightly older No 19-600.
Same crappy plastic handled, too short backsaw
Pic from Ebay
Way too short BTW, you are nibbling away, the teeth cannot clear the kerf to expelled the sawdust Tst Tst... Just goes to show, they seems to forgot what they once knew :-(
And the, yet another variation of the frame saw MBs, No 20-800, such as the Nobex, but also nowhere near the quality and precision, helas...

No 20-800
Most everything is plastic, with the exception of
course of the reversible, induction hardened tooth blade :-)
Pic from Stanley Tools
For this entry we will concentrated on the various quality MBs they made thru the years, from 1876 to 1984.
But first, let us quickly look at the arguably, "Most desired" Stanley MBs made:
Starting in 1905 they made a series of MBs, from the 240s series of Miter Box; 240, 242, 244, 246 and the 358, 360 to the monster 460, which all share the same DNA and used the same model Nos nomenclatures;
240 means the saw is 20 inch long X 4 inch deep under the spline (20X4)
460 means the saw is 30 inch long X 6 inch deep under the spline (30X6)
The first digit; 2, 3, 4, stood for the Frame No Type.
This means that the Model Nos have the frame type and specified backsaw size incorporated into their Model Nos, clever!
This series, thus, used the frame types Nos 2, 3 and 4

Stanley mitre box No 246
Frame type No 2, backsaw 26 inch X 4 inch
Pic from DCW woodworks

Stanley mitre box No 346
Frame type No 3, backsaw 26 inch X 4 inch
Pic from Smitty Aviston on Lumberjocks

Stanley mitre box No 358
Frame type No 3, backsaw 28 inch X 5 inch
Pic from Ebay

You can clearly see the different size of two frames types.
Which ones? I do not know, they just illustrated two sizes,
while listing up to 4 different frame sizes (as per model Nos shown).
Note, the Model No tag plate location changed thru the years. In the above pics it was on the RH side of the box frame. These 3 pics are all "Sweet Heart".

On this 50-1/2 MB, also a Sweet Heart, it is up front.
Pic from Ebay

Here is a 358, and also a Sweet Heart, so go figure...
Pic from Ebay
This is also were you would find the patents Nos cast into the tool, up front by the angle indicator, on the earliest models.

Front dial on a No 246, featuring a Pat No date.
Notice the orangy colour of the replaceable wood board.
Stanley used this stain's colour scheme for a very long time.
If your box has a plain "whitish board" it is probably a replacement
Pic from Ebay

This older No 346 has more Patents on it
Same location. See Pats listing at the end of this entry.
This badly chewed up original board (stained) badly need replacement
Pic from Ebay
The Type 3 frame accommodated back saw with a 5 or 5 in depth in a 20 or 26 in long.
And the Type 4 was the biggest of them all accommodating a giant 30X6 in backsaw.
Something else to know is that they used the suffix A to denoted their first Aluminum model and the Suffix M indicated a Metal cutting MB. With two exceptions, the No 109 and No 2360 were metal cutting MBs but they never sported the suffix M. Confused yet? Lets try another riddle...
Is the 358 same as the 2358? Nope, and they co-existed for a while...
Starting in 1932, the following Models Nos made their debut:
2244, 2246, 2358. Notice the Models Nos ressemble strongly the 244, 246 and 358 with an added 2 in front? There was also a relatively short lived 2360, but it was a metal cutting saw and bear no ressemblance to the 360 which was a wood cutting MB. More on these later.
THE MITER BOXES
These first 4 models were the "VICTOR" series, a lower cost variations of their more professionals models. The 50 and 50-1/2 models were sold without a back saw. And NO, the 60 and 60-1/2 were not like the 50 and 50-1/2 with just an added saw. The 60 and 60-1/2 models had redesigned saw guides, a flat part to the saw's guides is the biggest change

The flat part in question, look like flat wings
No 60-1/2, early model
Pic from Ebay

The "flat" guides on my later No 60
Note this model never used the most often MIA trip lever on the saw

A look inside one of the saw guide on my late No 60.
NO bearings, friction fit plates. Notice the groove in one part?
Put in a small amount of lubricant in there, I used a dry grease or wax.
The top part recess capture the saw's back spline
They may have been lower priced and did not had all the bells and whistles of their other line up, but they are very good MBs. The later models, except No 50, had cast aluminum frame enameled blue instead of the earliest Black japanned cast iron frames. Regardless of colour found, their weight difference is a tell all.
50 1876-1923
50-1/2 1909-1967
60 1909-1967
60-1/2 1909-1967
These next 4 are also lower cost and smaller capacities than their bigger professional models
109 1929-1934 Metal cutting
115 1927-1984
116 1938-1980
150 1923-1969 The best of these models
THE GOOD STUFF
These remaining models were the professional models, which range from the 240, a 20X4 inch backsaw to the monster 460, which was their top of the line and had a 30X6 inch backsaw and weigh in at 51 pounds with the saw...!!
I would not called that portable !!

And now you know why all these models
used the same instruction sheet/parts list
This series, being all similar except for the various capacities, all featured the top crossbar betwen the front and rear posts,

Typical attachment on top of posts for crossbar
Pic from Lumberjock
and the little, often MIA, trip lever attached to the backsaw spline with a thumb screw to release the front guide on the post when pushed in. (missing in above pic) This action drop the saw down at an angle which release the back post guide. See it in action here as demonstrated by Ron Herman
240 1905-1942 20X4 Backsaw
242 1905-1950 22X4 Backsaw
244 1905-1967 24X4 Backsaw
246 1905-1984 26X4 Backsaw
358 1905-1972 28X5 Backsaw, 20 in long japanned cast iron
358A 1925-1941 Same as above but their first aluminum frame
360 1905-1972 20X6 Backsaw
460 1927-1947 30X6 Backsaw
Introduced in 1932, the 2xxx's series, bearing familiar Nos such as 244, 358 etc in their number, were modified guide post and saw guides series of the older ones. They features rollers bearings in the saw guides. Probably to keep up with Millers-Falls models which features roller bearings in some of their Langdon saw guides. Note that they were available for a time along with the originals 244, 246 and 358. These redesigned saw guides look a lot like the ones used in the Millers-Falls, go figure...


Gone is the top crossbar keeping both front and rear post connected. These became the "new" flagship line of MBs while some of the original series such as the 244 soldiered on alongside until 1967 and the 246 until 1984
So, short answer: NO a 2358 is not a 358 simply renumbered.

2244 1932-1984Introduced in 1932, the 2xxx's series, bearing familiar Nos such as 244, 358 etc in their number, were modified guide post and saw guides series of the older ones. They features rollers bearings in the saw guides. Probably to keep up with Millers-Falls models which features roller bearings in some of their Langdon saw guides. Note that they were available for a time along with the originals 244, 246 and 358. These redesigned saw guides look a lot like the ones used in the Millers-Falls, go figure...

Redesigned saw post and guides on the 2xxx's series.
This is a No 2246 from the back
Pic from Ebay

Notice the "Ahem" similar looking post
on this older MF Langdon No 24.
Rudy in pic for scale :-)
So, short answer: NO a 2358 is not a 358 simply renumbered.

Tag on the No 2246. Always (?) located up front on this series.
Notice the frame No is the model No.
Used same tag plate on all models
with the applicable frame, AKA model Nos
Pic from Ebay
2246 1932-1982
2358 1932-1982 20 in long frame, blue enamel or black japanning
2358M 1936-1941 Metal cutting version capacity 4-1/2 in blue enamel
2360 1939-1974 Metal cutting
Often missing parts and some solutions
CROSSBAR
The 240s series, 358, 360 and 460 ALL had a cross bar on top of the guide posts.
This bar help reinforced and secured the guide posts parallel to each other. It is of course removeable since the guide posts can be removed (break down) for storage and making it somewhat protected while moving it around the countryside as required. And being removeable it is often found...Missing In Action (MIA).
As explained earlier, this crossbar dissapeared on the 2xxx series
Good news is, there is nothing too critical about it and can be easily made or replaced using a simple file folder hanger bar, such as this

The two bars on the sides are just about the right sizes.
And NO, I cannot take credit for this idea, found that on line on some forum.
Or armed with measurements you can make your own. This link also shows you the two clamps types that secured it. Of course, the various sizes of frames required a different lenght.
STOCK GUIDES (2)
These are the two (2) guide that help holding the stock on the bed. Often used for holding the stock at various angles for cutting trim and crown moulding for example, eliminating the complex compound angle that would otherwise be required. The good news is, there is nothing too complicated about it, and replacement can be easily made. You need a piece of flat stock and a smaller piece of round stock to make these. Drill a hole in the bottom of the round stock, tap for a screw. To recessed the screw head, used a tapered head screw with a corresponding countersink hole in the bar.

Reproduction Stanley stock guides in front
original in the background
Pic from Stan Faulin at tooltrip

How they attach in the back on this No 244.
Notice a small detail missing on the above reproduction?
There is a small round piece sticking out at the end
to prevent pulling out the bar.
Pic from Ebay
And of course, you will need a corresponding slot cut into the wooden flat bed, if you replaced it, like you probably had to do because the wooden beds are often found chew up. For which there was really never any good reasons, if you just take the time to properly adjusted the depth stops Tst... Tst...
DEPTH STOPS (4)
There are four (4) small depth stop collars, two (2) on the front guide, two (2) on the back guide, which when correctly adjusted and used, prevents you from cutting into the wooden bed board.
One set is used to prevent the saw from chewing the board, the other set is for setting up stop cuts. Since they are yet another small part, removeable (because they are adjustable) they have been known to grow legs of their own....
Nothing too fancy, a round collar with a set screw to secured it would do.
Only complication would be finding such a collar of the required size ?
Note that they changed construction type thru the years.

Older No 60-1/2, the stops are cast metal with a nib sticking out
for the locking screw.

On this later No 346, they now used a simpler split cast part,
pinched by a screw to secure it

A simple round collar (red part) , such as used on the Nobex,
would work just as good.
TRIP LEVER


That elusive trip lever on a No 246
Pic from ??

Here is a better view of it
Pic from Lumberjock
This is the small cast part that release the saw holding bracket up front when the saw is pushed forward. There used to be a reproduction of that part available years ago, I do not know if they are still available and from where??
Being removeable and the saws often separated from the mitre boxes, it is most often MIA.
YES, you can still used your MB without it, just as you have to do on the No 60, it just makes it a bit easier, IE no need to touch the catch brackets, it does it all for you. So missing it is no deal killer, but it should be reflected in the price. Looking for one? Take a number and join the cue...
LEVELLING SCREWS (2)
The 240s series, 346, 358, 360 and 460 all sported a pointed tapered tip screw in the rear holes of the foot brackets.
That was to "grip" the MB to the surface and more importantly, to correct an out of square, level playing field... so to speak :-)
Of course, being adjustable (screw in/out) and having to removed them in order to simply screw the MB to a flat piece of stock (reccomended) they often long parted with the MB...

Levelling screw on an older model No 60-1/2.
The clear colour of the top board is clearly a replacement
Pic from Ebay

Levelling screw on No 244
Pic from Ebay
This is what a complete example looks like

Stanley No 246
Top cross bar, saw trip lever, depth stops, stock guides,
levelling screws, and cutting lenght stop (complete)
Pic from ??
List of relevant patents
And finally a look at the relevant patents on theses Stanley MBs, linked to the appropriate DATAMP entry were applicable or to the USPTO when not found in DATAMP
19 Jun 1877 192, 139
24 Jun 1902 703, 085
12 Jan 1904 749, 242
15 Mar 1904 754, 624
15 Mar 1904 754, 625
02 Aug 1904 766, 384
02 Aug 1904 766, 790
02 Aug 1904 766, 791
27 Sep 1904 770, 834
30 Apr 1907 851, 841
24 Nov 1908 905, 067
05 Oct 1909 935, 694
02 Jan 1912 1, 013, 319
31 Oct 1916 1, 203, 417
27 Mar 1934 1, 952, 518
This last one is for a Handyman miter box such as H114
06 Dec 1939 2, 268, 835
And that concludes this rather long explanation for his answer...
Bob, who could probably write a book on these...
Another awesome review Bob.
ReplyDeleteThanks Ralph
ReplyDeleteIm nursing a cold so got nothing but time on my hands... :-)
Now that the holidays are over, go away snow....
Bob, dreaming of a white...beach
Bob,
ReplyDeleteAs usual a good tutorial. Someday I might find a spot and place for one of those contraptions.
Just a reminder, I could be wrong but...It is in the mid 70's as I type. If it makes your cold easier to take, I'm at the end of one myself, it must have been the cold and wet of Houston, I think it got down into the 30's while we were there Burrrr.
Oh the reminder, there is always room in Casa Chaos.
ken
Nice hook Ken :-)
ReplyDeleteHere we are hunkered down as we have yet another massive Noreaster passing by...
Bob, still dreaming of a white...beach (next week ) :-)
from AZ Steve: Nice Site! I have just finished refurbishing the blade and handle from my circa 1970’s(I think, senior moment??)Stanley 116 miter saw. I finished my dad's circa 1930's(??)hand saws a few weeks ago; Diston/Philly #5 and #8, and a Spear & Jackson. I am not a collector, so my assortment of old tools is really limited > > those saws, a couple hand planes, straight slot screw drivers, a couple hammers (normal and ball peen, a Millers-Falls coping saw and some chisels. Since others have noted: weather today in mid 80's(PHX) > a lot different than old Long Island.
ReplyDeleteThanks for your comment Steve. Nice kit you got there, add brace, pushdrill, gimlets and you got a pretty good set. Watch out it is a slipery slope.....:-)
ReplyDeleteBob, where Spring seems to have sprung??
Robert,
ReplyDeleteGreat information, thanks. I have three Stanley miter boxes ( 2246, 360 and 460) and would like to know if you have any data on when the degree markings on the 360 went from cast-in markings to become a printed aluminum plate riveted to the frame.
I have just acquired my G-Grandfathers Miter Box. All the patent dates are from 1904 and the saw is complete with the saw mounted release and 30x6 H. Disston made blade. Would it be a 460? It even sports the origional unused wood deck (we always used a piece of wood on top as the cutting surface.
ReplyDeleteHi David.
ReplyDeleteNo, i do not know, but im guessing late 60 early 70s
Hi Brent
ReplyDeleteYes, if the saw came with that box, that would be a 460. Should be a plate on the side
Bob, back home
Hi,Bob. I found this posting today while looking for info on my Stanley Miter Box--a yard sale find years ago. Very helpful info, Bob. The seller's grandfather used it daily on the job. To date, it's the most sophisticated "cordless" miter saw I've used. The "Stanley Mitre Box Frame No.2358" is stamped on the up-front brass plate. It's finished with the black japanning treatment. The Pat.1952518 is present on the front guide post. Should there be an "A" at the end of that number? Only 3 parts missing... the two stock guides and the roller bearing on the left side of the front guide post. Seeking a good source for correct parts. It came with a saw etched "STANLEY MITRE BOX SAW MANUFACTURED BY E.C.ATKINS and CO...EXPRESSLY FOR STANLEY TOOLS...28"X5"" Also, decision time: total restore vs clean patina. Suggestions? Thanks!
ReplyDeletehi, I've noticed that some of the cutting length stops are stamped #2 and some #3-4. I assume that is for the box types but do you know if a #2 stop will work for a #3 box. I have a #2 lined up for my #3 box?
ReplyDeletethanks scott
The two "trees" stamped 2 and 3 are about 1/8 different in height and hole spacing, the No. 2 being the shorter of the two.So, on a No. 2 frame, the holes in the legs, that accomodate the rods, are also a shorter distance apart. So the no. 2 tree should not be used on a no. 3 frame, and vice versa.
DeleteHi Anonymous.
ReplyDeleteNo letter A at the end of patent No, that suffix A only exist in the “paper record” world, not the actual pat no. Parts sources? Good luck, is about all i can say :-(
Google is your best bet im affraid.
Complete restore versus clean patina? Totally up to you. As a minimum, i would cleaned it, remove and prevent further rust. There is enough of these boxes around, that it would not be a big loss in the collector’s circles. Collectors frown upon drastic restorations because it often obliterate small details of construction such as linished versus machined surface, removing small casting imperfections, original paint surface and etc.
Lastly, i would tuned up that saw for the box, so it cut and track true...for that box...
Bob
Hi Scott
ReplyDeleteYou are correct, the No 2, 3, 4 refer to the frame no of the box, because they all have different capacities. Hence No 2 would be shorther than no 3,4.
Therefore a no 2 fitted in a type 3 box frame would work, but wont give you the full range.
Good news is, not terribly difficult to make new ones...
How long? Take a hint from the specified max cut at 90 degrees, add some to be secured in the back.
Hope this help
Bob
Thanks Bob, Just to make sure i stated the correct parts i am talking about the cast piece which has the two long rods that slide through the holes in the box which could be used to stop the length of the board for repetitive cuts of the same length. Will the rod holes in a #2 match the holes in a #3.
Deletethanks again Scott
thanks again, scott
Ha, oups Scott, i was talking about the two pieces buried in an open dado on the sawing board.
ReplyDeleteWhat you were refering to, should fit, i dont know for sure, but it would make sense. Commonality of spare parts.
Let me know how you make out with these parts
Bob, taking a break from patents search
I own two Stanley miter boxes/ The first back was stamped Stanley.
ReplyDeleteThe 2nd has a back saw from Henry Disston. My question is did Stanley
use saws such as Henry Disston and ect.
Hi unknown
ReplyDeleteYes, Stanley never made saws. They used saws from Disston, Atkins and maybe Simonds. The one i see most are Disstons.
Bob
Yes...Simonds did at one time make a Stanley mitre box saw, but they are fairly scarce.
DeleteI have a miter box with a 22 inch disston hacksaw that is 2 5/8 deep below the cast back. It has disston stamped in the spine as well as marked on the side of the blade made exclusively for Stanley rule and level co.. The box itself looks the same as the old cast iron stanley but without patents or tag. The guides has received and raised Stanley logo. Any information to share about this? I assume it is a trim miter box with the shorter height of blade.
ReplyDeleteThat should read BACK saw. My phone changed it. It's smart after all...
DeleteHaha unknow don't get me going on smart phones :-)
ReplyDeleteSounds like a N0 242? 1905-1950 it had a 22X4 in backsaw
If so, yours has been sharpen lot in its lifetime
Bob
Yeah, the weird thing is there are no patents on it, no tag no holes for attaching a tag even. I was wondering if they made them like that extremely early or something.
ReplyDeleteInteresting on the sharpening, never thought of that. Not sure the guides would even fit a 4 inch blade. I guess I should measure that.
No patents, no holes for attaching tag, mean its a newer one, had probably a sticker long gone...
ReplyDeleteHow does the etch look like in relation to the blade width?
Centered or more toward the tooth line? As in: been sharpened a "few" times
Bob
I just finished to rehab a Stanley 246 that I found complete, lucky me. You can see it here:
ReplyDeletehttps://offgrid-woodbutcher.blogspot.com/2019/02/vintage-tools-stanley-246-miter-box.html
Well hello my fellow Canadian woodbutcher :-) what you found in this condition is indeed a very lucky find, congrats! Good job on that rehab, you didnt mention it on your blog entry but just make sure your replacement sacrificial board is not too thick or you wont be able to use the two screw points to lock the work piece in place. Other than that i would put in some wax inside the metal saw holders, make for a smoother operation and easier on the saw plate. Good work.
ReplyDeleteBob, slowly coming back to life
Indeed you are right on the spot about the sacrificial board thickness, and I found out the hard way after having finished it, silly me! I will go through this one and the next one will be of lower thickness for sure. I oiled the inside bearing and waxed the saw blade but good advice for the wax in the saw holders, thank you!
DeleteThe Wood Butcher
Interesting that I haven't ran across this discussion before. I buy, restore, resell, and collect mitre boxes, and their related parts. Mostly Stanleys, but also Goodell Pratt, Langdon, And Millers Falls. Currently have approx 30 boxes, mostly complete, as well as a number of incomplete parts boxes. Also, a large inventory of parts, including some of the harder to find parts, such as stock rests, and cut stop components. Also some parts for the exceptionally sought over small boxes, like the Langdon No. 16 1/2, and the No.15 1/2. Have quite a few parts for the Goodell Pratt "All Steel" boxes as well. Feel free to contact me, I do not monitor this site, so a response here may be missed, althougb I will try to check in occassionally.
ReplyDeleteHow can we contact you?
DeleteStanleymitrebox@gmail.com
DeleteGreat info ! Thanks. How about the little No. 150 box Any time frame for manufacture on this one? I have both a 150 and an older 246.
ReplyDeleteHi Tony
ReplyDeleteThe No 150 was manufactured between 1923 and 1969. They did not came with a saw.
Bob
Are these MB good for fitting mouldings on fine cabinetry, or were they intended for framing and house trim work? Right now, I use a shop-made miter block cut from scrap. It is accurate with zero slop for the saw, but it wears quickly and deeper ones can be fussier to cut. I'm wondering if one of these MBs would be good replacement for furniture work.
ReplyDeleteYes and no Ed.
ReplyDeleteYes, some can be darn accurate, better than most chop saws out there, but you still are left to deal with the saw cut fuzz. Yes can be minimized by the saw blade type and how sharp, but if I want bang on precision, I always finish on the shooting board, with accessories to handle angles. Your typical western miter saw came with a long backsaw (24-30 in) sharpens at 11 TPI crosscut. A good sharpening job and depending on wood species, you can go directly off the saw. And even if you still go to the shooting board, it will only require light clean up passes. In the other common style of today, I will ONLY use a NOBEX, stay away from cheap knockoffs. That one comes with various TPI and types of tooth (IDEKA or Western) blades. Pretty accurate, and yeah, I still go to shooting board...only if... I want it for a specific job were I'm going in Anal mode :-) I try not to do that often :-).
If you look around, you will find other fine craftsmen, who either used them in the past or are still using them, so yeah, they would do. And lots of framing shops (as in picture frame) used those Nobex for years. Mine, incidentally, came at auction in a lot from a picture frame shop.
Bob
can you tell me when the first model 360 came out??
ReplyDeleteWell according to what i wrote on this blog post :-)
ReplyDeleteNo 360 was made from 1905 until 1972.
Bob, in day 5
I have an older Stanley Mitre box, the numbers 12, 8, 6 and 5 appear on the scale. You have a picture of this too. What are these for? Was thinking something to do with cutting the angled boards (rafters?) on a roof? For example, 12 would mean 1 foot rise for each 12 feet of run. But the angles didn't work out.
ReplyDeleteHi Ken
ReplyDeleteFrom the earliest days, manufactured mitre boxes never shown angles on them, relying instead on a simple number which indicated if you want to make a 6 sided box, set it to 6 and etc. The "theory" being that in those early days, around 1900s or so, most mechanics (what we call woodworkers nowadays) were not schooled much and it was taught that degrees may be confusing, opting instead for the simple system described earlier, 6, 8, 10, 12 etc. I don't remember when the switch over to actual angles shown was effected, but probably around WW2 (?)
Bob
Hi Bob,
ReplyDeleteFirst time here. Just bought a No. 246 with Disston back saw from the user's son who is an old guy like me. I'm pretty far along with the refurb and doing new board, paint etc. I don't know how to japan something so I'll go with black paint. Thanks for the info above. It's very helpful.
Tim in Pittsburg, TX
You are welcome Tim
ReplyDeleteAny good quality black rust paint (preferably) would be just fine.
I prefer rust paint, as an edge for further protection, but regular paint is fine. A good primer coat (also rust proofing type Rustoleum for example) is also a good idea, and then you can use regular paint.
Many many options to replace a proper Japanning job.
Remember to tuned up the saw (correcting drift with a lite filing on the offending set teeth. Enjoy your miter box.
Bob
I have have a Stanley mitre box frame stanley #2358.
ReplyDeletelooks to be a cast Iron with blue paint.
missing saw (surprise)and a couple other pieces.
I was hoping you might have a copy of a parts sheet so I know what I am missing as to other parts and well Idea as to restoration (not full on factory fresh).
was also looking at what year this treasure is and your opinion of this model.
please and thank you
tim
Check a previous post of mine about mitre box, you will find the parts breakdown sheets for the 2358 and many others. https://thevalleywoodworker.blogspot.com/2016/02/all-about-mitre-box-part-2-saws.html./ The 2358 is the last improved series designed to compete with Millers Falls. It is a good model.
ReplyDeleteBob
Hi Bob, I read with great interest your article on the stanley mitre box family. I recently purchased a 358 that is missing the front saw guide catch. I wonder if you may have a picture and dimensions so that I can try to make one myself. Thanks!
ReplyDeletePaco
HI Paco
ReplyDeleteAre you talking about the clip on the post that is tripped by the little piece attached to the saw? Or vise versa??
As for finding parts, good luck :-(
Should not be to difficult to cut and shape a new one. I don't have a 358, so cannot be of much help here.
Take a look at these videos, it may helps you
http://www.walkemooretools.com/stanley-358-mitre-box-restoration/
https://adriftwith.me/woodworking/2011/05/14/stanley-358-mitre-box-restoration/
https://www.youtube.com/watch?v=6-FEtdhumuo
Cheers
Bob
I recently bought at 358 and a 246 from two different sellers, and I ran into a bit of a mystery. Both saws had the latch release on the back guide arm turned around, pointing toward the body of the miter so that the latch would not release when the saw back tilts against it... turned the wrong direction the operator must manually release it. If it had been on one saw only, I would have thought someone who didn’t know what they were doing just put it on the wrong way by accident. But both saws, again from different sellers, how could that happen? Was there maybe some reason these were put on in reverse? Any thoughts?
ReplyDeleteOh boy late for answering, sorry. Just happened to see it.
ReplyDeleteWhat you described is simply due to the miter box having been reassembled backwards. The odds of happening from two different sellers? Very high. I see lots of tools of all sort re assembled wrong.
Hope you see this
Bob
Thank you for the detailed break down. Now I know what to look for!
ReplyDeleteI am trying to find someone who would appreciate a Stanley #2246 mitre box and saw. It is almost new condition including the original box. My uncle bought in the late 1970s and it has been sitting since then. What is the best way to sell this saw? I am in the Seattle area.
ReplyDeleteThanks
Bruce
I have bought several miter boxes off of Ebay. I know shipping is a hassle. I am sure you will easily find a buyer for a clean 2246. I have two 2358s, one almost new with box, both from ebay.
DeleteIf you still have it let me know. Thanks Dave
Dave, I still have the clean 2246, you seem like the type of person that would appreciate it. How do I get in touch with you?
DeleteMy husband loves told tools especially that he can use. He has Stanley Mitre saw that has been passed around his family. He would like to clean it up. It is made of cast iron and has Stanley on the piece where the saw fits through. Only other writing is
ReplyDeletePatented 1-12-04 - 8-2-04 and 3-15-04 and 8-27-04.
It is quite a bit rusted and he has looked up video about cleaning it. Once he puts the saw in, he can not get it to pivot so we are thinking once he cleans and oils it, it should work. We are looking for a manual online to read up on how it is suppose to work. Do you have any suggestions on pivoting or site that might have a manual.
Thanks so much.
Marilyn Jacobs
Indianapolis, IN
While I have been typing this he use oil and was able to get it to pivot. We would still like to fin a manual if you have suggestion. Next step is he is using white vinegar to clean up rust.
DeleteHello Jacobs family
DeleteYou will find a lots of the mitre box instructions for various models Stanley and MF on this previous blog I wrote
https://thevalleywoodworker.blogspot.com/2016/02/all-about-mitre-box-part-2-saws.html
Without knowing which model you have, cannot tell you more. Good news is, as explain in this blog entry, all models from same family share same instruction sheet. Yours should be in there.
Good luck with your rehab.
Bob
Thank you so much. I think it is a 60MB and found the info on your site about it!
DeleteTake care!
I believe the third pic under the Stanley series of pics is my mitrebox pic, and is not from ebay.
ReplyDeletehttps://www.lumberjocks.com/topics/36757
Good presentation, good read!
Sorry, second pic.
DeleteThank you, credit corrected.
DeleteSome of the pictures I used have been collected a while ago and I have no idea at times where it came from. Lots came from Ebay in the early 2000s.
Always glad to give credit where credit is due.
I Apologize and thank you again.
Bob
Just bought a 358! Only missing the trip lever. Thanks for the great info
ReplyDeleteThank you for this great history write up! I have a 358 but the plate is not labeled with the SW logo. From what I've read online, the SW logo was used 1920-1935 (article was about handplanes, of course) and you have the 358 date as 1905-1972. I would imagine I have a circa 1936-1972 box, but is there anyway to tell if it's 1905-1919? thanks Jim
ReplyDeleteI have a 2246, complete (I think) except for the length stop - but in the photos I have seen online (including in this blog post), I can't see how it would work, as the entire stop is shown mounted horizontally, below the level of the board being cut. The Stanley assembly instructions show the stop mounted vertically on two rods, one above the other - but I don't see where or how the top rod fastens to the miter box, unless it's with the same clamps that hold the stock guides. Can you clear this up for me? Thanks for a great detailed post with lots of good info.
ReplyDeleteHello, I have a stanley metal mitre box model #116. Im looking for a picture of the label that is on the back! Would anyone have a legible picture. Thanks
ReplyDeleteHello my name is Ed
ReplyDeleteIn 1980 I bought a cabinet shop on one wall there was a instruction for assembling and adjusting Stanley Miter boxes nos.244, 246, 346, 358, and 360. On the other side was Don't overlook 16 features when you select a Miter Box.
This poster is 17 inches long 7 inches wide on heavy cardboard
also has Form No 265
Would you know the age of this poster?
If this gets to you would you text me your answer 360 580 7823
Thank you Ed
Hello I have a model 60 with csx c2x stamped on it how can I find out exact year of manufacturing
ReplyDeleteHow do I find the value of a 346 with the saw in working condition?
ReplyDeleteI have a No 265 cleaning it up now. was for my great grandfather. I'm 65
ReplyDeleteThanks for all the great info on these old but still usefull tools. I use mine to cut inlay material for projects, still very accurate cutting angles. I have what appears to be a Stanley cast iron box with no patent numbers, just a 477 stamped on the under side beneath the forged degree numbers. It came with a 30" x 4" Disston back saw (Medallion puts age at 1896-1917, at least the handle) but I am not sure if it is the original saw. Just wondering if you have any information on this model? Thanks
ReplyDeleteLast night I came across a Stanley No. 150 upper yoke. Any one in need of this to complete the refurbishing of thier Stanley Miter Saw. I would be glad to donate. Detroit Michigan Area.
ReplyDeleteJust wanted to keep this great and informative chat alive. Just picked up several Stanley MB’s and have been restoring to the best of my abilities. I’m in southern Oregon if Antone needs some parts or frames.
ReplyDeleteIt should have read anyone…not Antone…
ReplyDelete