Saturday, April 1, 2023

The jack of all trade sliding compound miter saw. Evolution

 As part of my current hydroculture experiments, I am using a lot of PVC piping.  And while it can be cut with regular woodworking tooling, it can be a bit brittle and crack or even explodes while cutting small pieces.  Using the right blade on any saw makes all the differences.


In addition, I need to make a series of stop cuts along a 4 inches pipe.  Yes, could be done by hand, but a sliding miter saw has the upper hand in this situation.  Quicker, repeatable, even cuts.

And yes, could also be accomplished using one of my old school miter saw boxes, but I digress :-)

These cuts are for creating the 2 inch round opening with a heat gun to install the 2 inch net cups.

While researching what kind of blade I could use, came across this Evolution which taut itself has a multi material saw.  Cuts wood, ferrous, non ferrous material, plastic and etc.

Pic source Evolution website
Its secret is the blade itself.  Material and shape

Then there was this sale at my local Canadian Tire (Hardware store and etc.) They had a sliding compound miter saw R255SMS by Evolution on sale at a good price, so... it followed me home.

This is kind of an unboxing, assembly set up and first usage report on the saw.

Spoiler alert, it tricked me but it's good.

The duo I purchased for these projects.
A new heat gun, mine long ago died in a sparking fit.
I'll review the heat gun later, after I used it.

First impression, very well packed.

Top layer upon opening box.

Removing the top layer we got this.

Removing the cutting head we are left with this

Everything seems accounted for, let the games begin.

Of course, I gave the instruction a thorough review, I glanced at them, and proceed :-)

Every thing when swimmingly well, until...

I went to install the blade.  It used yet, another kind of fastener for which I had no driver.  So I cursed the manufacturer for being so stupid for not providing this important tool with it, then....

Realized it was there all along, tucked safely on the left hand side of the saw base... Who knew?  Not me apparently :-)

The closest I found was a Torx screwdriver, fits but not quite right.
You can see the elusive  Allen wrench sticking out (I pulled it out) 
on the saw base.  

Then also realized the other power miter saw I used, also had its key stored in same place.
Humm, been meaning to change its blade for a while, but was also cursing the stupid manufacturer :-)
There you go, right there I got my money worth before I even plugged it in.

Moral of this story.  Be like Norm.  Always read and follows all the directives that came with your tool and there is nothing more important that this, safety glasses.  Yeah, especially while cutting brittle plastics. 
  
All set up ready to cut...
Until I realized, dummy I'm going to cut my front fence in half

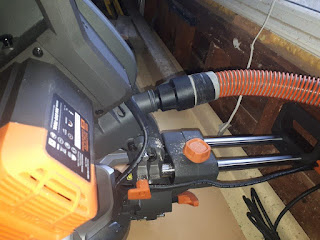
Hooking up my vacuum hose for dust collection

This is the feature I was most interested in.
The depth of cut stop.


Cutting 4 in PVC pipe

Cutting 2 inch PVC pipe.
The foot shape on the holder hold well round pipes.

The poor dust collection in the pics above was because even with hooking up the vacuum, it does not do much unless you turn it on.  I was too busy cutting my pieces to noticed.  My story, sticking to it. 

Practically all my pieces cut.  
I say practically, because I will realized later I missed one

Rudy the supervisor 

The small PVC ring to hold the 2 inch net pots.
They maybe a tad too long, may have to make new ones??


Except for the mess I made, everything went pretty well once I got used to the saw.

You see, when I first powered it up, I was greeted by a low hum and no blade rotation, so I immediately turned it off and check for any mechanical problems.  Does the blade rotate? Yes.  No wobble or anything wrong mechanically.  Electrical??  After re-reading (better) the instructions It does mentioned letting the blade spin up to speed before cutting.   Huh, I wondered?

Sure enough, keep depress the switch a few seconds before the blade start to spin up.   Everything is fine, work as advertised... Soft start for longer motor life.

One thing I noticed was to avoid or minimized chipping while cutting, Let the blade come to full speed before cutting.  Once thru, do not bring back the blade before it comes to a complete stop.  Also when cold it is more prone to chipping.  Garage shop has been hovering around zero C for a while  Was in the near 10 C when I first cut.

I currently need to cut a new 8 in piece and I had second thoughts about the reservoir made up of pipes pieces.  Could be tricky to clean.  So after much head scratching decided to go ahead but I will not glued up all the reservoir pieces, to be able to take it apart for cleaning.  I do not relish the idea of having a few gallons of water leaking all over so I will caulk the unglued pieces.

I am waiting for garage to warm up so I can cut my PVC pipes and  make my pockets in the main tower piece.  Hopefully soon.

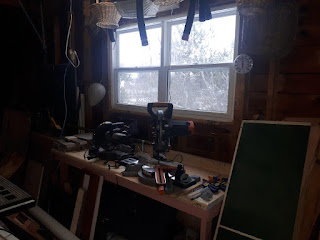
Meanwhile, I can see a future miter saw station to accommodate both powered miter saws.


Bob, awaiting impatiently better weather

Friday, March 24, 2023

Addressing food insecurity

 Yes, my blog has been quiet for a while, not because of a shortage of projects currently on the go, but rather, yah, been busy.

Part of a new project I am developing for my Rotary club to address food insecurity in our area.

In a nutshell, how to grow your own food at home easily and cheaply.  Supplemented by communal gardens and setting up gardens project at Senior residences, school etc.

A bit of a departure for my woodworking blog, but not to worry, lots of woodworking and others projects to come :-)

This project is a two part effort I am in the process of  fleshing out.

1- Growing food.  Spaces, setup, requirements, education.  Growing year round.

2- How to preserve and cook food. Its one thing to grow you must also know how to preserve and cook it.   Will rely on guest chefs from around the Valley, maybe get a foot in the door at the Devour festival to promote our project.

Both parts have some construction projects

- Seedling and cloning station TBD. in progress (will update)

- Potting station TBD, not selected yet

- Hydroculture projects.  Selected and in progress

Pic source
An example of Aeroponic tower.
Have a prototype in construction but want some changes.

An example of NFT system

Pic source
An example of Ebb & Flow system to be installed in our greenhouse

Pic from Pinterest
Example of DWC with a control bucket


Not  hydroponic systems but soil based growing in tight spaces

Pic source
Worm composting garden tower

Probably, in my opinion, the very best worm composting system


The internet sensation Larry Hall and his grow rail system and its many variations and adaptations 


The secret to its auto watering, a float valve 

I will build a two rails system, one rail for containers with 3 inch net pots, the other with fabric grow bags.

Why so many systems?  The right system depends a lot on the proposed usage, type of plants grown, how many and etc.  Want to gain experiences with a few systems to better understand them and their usage

And of course a few more woodworking projects to go along

Source unknow, from Facebook
The inspiration I used for Sub Irrigating raised beds, wheel chair accessible.
Picture these set up at senior residences, school cafeteria, community gardens etc.


Pic source  
An example of a Picnic table, wheel chair accessible

Pic from Facebook
Example of similar build, modified to be covered by bug nets or greenhouse cover.
 Enclosed raised bed 8X12 ft at home to test some of these systems.
SIP bed, Auto watering grow rail for 3 in net cups or fabric grow pots 
and NFT set up for growing strawberries.
Should alleviate problems with critters eating our berries :-)

Alongside these various projects at different stages of progress from selection, design, spec, build and uses, I am also setting up a proper grow corner in the basement besides the existing cold storage room.

In process of modifying the existing passive ventilation ducting in the cold room to bring in fresh air and exhaust air from grow tent.  Using mostly AC Infinity products for this setup.  I like their build quality, performance and price point.  Designed in California, built in China, sound familiar? :-)

And of course, the continuing improvements to bring to our greenhouses.

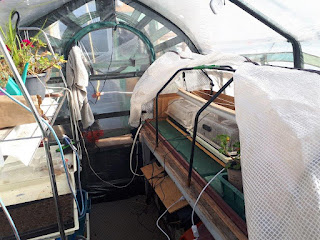
Greenhouse No1, the one that got hit by a tree, get another year of reprieve before being demolished and replaced by another design:  Chinese Passive Thermal with possibly closed system geothermal using a car radiator/fan, and glycol.  I need this one to stay up, currently used for storage until new shed goes up.

It will need some reinforcements to keep on trucking :-) 

No 2, will see more modifications.  Better insulate ends walls, fix draft bottom of rear door, more ventilation and better automation (AC Infinity No 69 WIFI controller) Make and install crank handle for opening side roll up vent and add screening.  Setup Hydro system Ebb & Flow inside along one side.  Need some electrical and water supply upgrades.  Will eventually switch it off the grid going solar. Install sink and potting table

To come as I write them :

How to design and build greenhouses

How to build the various projects I will undertake

Understanding series to help navigate around the various cryptic specifications on:

- Light requirements,  understanding the terms and the relationship between the various specifications.

How to measure correctly without breaking the bank. It's all about the PAR (PPFD, DLI)

- Temperature requirements, specifically the relationship between the trio of ambient, canopy and root temperatures.  How it affect the transpiration requirements of a plants along with proper humidity (VPD)

- The requirements of ventilation, both to control temperature swing and humidity control

- How to spec properly a water pump for various Hydroculture systems.  Lots of misleading and confusing specs out there.  What you need to know.  Similarly for air pump and air stones 

- The importance of nutrients and the differences between soil and hydroculture nutrients.  Less is always more.  How to measure PH in soil and Hydro, and balancing Nutrients and PH in Hydroculture nutrients solution.  Some of the pitfalls to avoid in Hydroponics.

And whatever else knowledge I deem important for a successful program.

May sounds a bit intimidating all these terms and acronym's, but really it is not all that complicate if you understand the relationship with each other. It is all about duplicating the plant requirements to thrive.


Well, that should keep me out of troubles for a while.  I will share with you my plans and progress as I go along.  Stay tuned...

And full disclosure: I am not a Horticultural specialist, but I did slept at a Holiday Inn express last nite :-)
I am self taught mostly and both my spouses (late and current) were/are avid gardeners.  Heather was big into African Violets and Jean is more of an outside gardener and grow up literally in a greenhouse.  Her mom had 6 greenhouses for her flower business. Learned a lot from Osmosis :-)


Bob, and his infamous never ending to do lists

Tuesday, January 10, 2023

Somethings never get old

Been a tad busy as you may have been noticed.  Not much woodworking but lots of small projects for storage and while Greenhouse No 2 is done, there is still a lot going on in the gardening front.

Greenhouses put to bed for the winter.
All buttoned up and stopped heating No 2 for the season. 

Been experimenting with various growing methods and equipment's.  My end goal is to turn on more people here in NS, into home growers to reduce food insecurities and eat better,  A Win Win scenario in my book.   So I got this inspiration from my last visit home in Montreal for Mom`s service.

That is the kind of operation I have in mind 

To that end, I am still in the research phase as we are progressing into winter.  I need the info before preparing my business plan for the project and rallying support.

I did kept heating the greenhouse No 2, not the whole greenhouse 10X20ft, but instead the doubles 6X6ft greenhouses that we installed inside.  I turned off the heat early December.  My experiment was to see how I can control the temperature inside.  All I was aiming for was to keep it above 10C (50F).  

The white square box near ceiling is my data logger: Temp, RH, Dew Point, VPD.
Near it, the black cable is the temperature sensor for heater thermostat. 
 This way, I read the temperature seen by thermostat on line

The plants we kept inside for the start of the experiment 
were the potted plants still outside before Fiona was about to hit us.
They survived and thrived.

The electric heater I used.
Kept the temperature at 10.2C plus minus 0,2C easily.
The coldest temperature recorded during this experiment was minus 10C

Meanwhile started gathering parts for the Bob-O-Matic V2.0 and cobbled something together to run some tests inside before deploying out in the greenhouse.  Every equipment I used, I keep an eye on the wattage required.  My goal being to switch the green house to solar power.  Every watts saved counts, the heating mats I am trying featured the new IR technology film versus the traditional electric heating wire elements.  A saving of 5 watts per mats, I am using 2, hence 10 watts saved.
Being an experiment, it is nice to be able to get some data to assess performance.  I am also trying to automate as much as possible the various process (Ventilation, Temperature, Humidity, Light, Water etc).   I rely on WIFI technology to accomplish all these tasks.

Dual thermostats, WIFI control, monitor, set up alarms
comes with 2 mats

Repurposing one of the three tiers light stands Heather used for her violets.
Also slated to be upgraded with LEDs fixtures.

To run my indoor experiments I set up two different scenarios 
for each mat/seedlings trays.  The bottom of the trays rest on a double sided foil insulated foam board with the heating mat sandwiched in between.  The tray on the left contain a very well insulated LV self watering foam tray, the other just a regular seedling tray.  In both case temperature probe is inserted deep into the pods (root temps).  Later I would add a timer for the lights.  All the power is going thru my wattmeter.  I monitor/control the temperature performance on my phone via an App. 

Sure enough the thick Styrofoam one took longer to reach set root temperature, but was also remaining hotter longer with heat turned off.

Since I was going to run such a test, I may as well, grow something, so we did, and then what do you do with them?  Moved them inside to finish growing since we stopped heating greenhouse.  Yeah, we eat some green already :-) 
 
Re-purposing the frame for the Veg-Trug to be able to cover it with its own greenhouse cover.
Making essentially: A greenhouse (cover on tray) inside a greenhouse (cover on frame) inside a doubled greenhouse (6X6, heated), inside a greenhouse (main greenhouse) .  The whole thing sitting on a table covered with double foil insulation. The seedling trays being heated by electric mats. 


Tried two types of grow lights, both in a fluorescent neon tube forms.
This one being a full spectrum Sun blaster T5 bulb

LED, full spectrum, T5 form factor

 Part of my experiments are geared toward finding an affordable (I`m paying for the prototyping ) technology package that could be easily deployed , setting up in schools, food banks, community gardens etc.
I am obviously not going to pay for everyone, but I am also making it a project for my Rotary club.
As part of it, my first two sites are a food cafeteria inside a college being run as a social enterprise (operate year long) and a high school (only operate from Sep to Jun).  Both sites represent a different challenge and solutions, and both sites need to operate during the winter.   A soft skin greenhouse would not be economical to run in the winter, while using grow tents inside building can cause mold problems if not ventilated correctly, outside.

So my next plans are to set up both a grow tent and an hydroponic tower in my basement.  Between these, we will have Bob-O-Matic V3.0 seedling starters/clone makers, hydroponic garden, grow tent, green house, raised beds, garden plots and orchards.  We should be able to feed ourselves, year round, and grow practically, anything, anytime :-)  Armed with this knowledge I will then specify a complete turn key package for the project.  I don't want to see this project fail, I want to try the technology hands on before I procure it for project.  An offshoot of the WIFI technology I will be using will allow me to monitors the deployed system and ensure they operate correctly.  It will also reduced the manpower required to operate them.

Part of my research in grow tents and equipment's I found this company AC Infinity that makes a complete solution package: Their UIS system control everything I need in one small affordable package. Bought the 6 in fan with UIS controller, plan to use same controller to automate more my  greenhouse next season.  Will gather remaining parts from them also, then specify a package suited for my applications.

Hydroponic wise, I believe the future is vertical. You can buy complete commercial grow tower system for $600 and more or, like me, you can make your own, because, I can, and has to afford it :-)
So far planning something like that 

So currently clearing a corner in basement, besides the cold storage room, so I can exhaust tent outside and bring in fresh air from outside.  That corner will also host the 4 growing towers. That mean clear gym equipment, more sorting, turfing stuff, demolish built in wood shelves (save long planks) and replaced by resin shelving's in a more compact and efficient footprint. Work in current progress.

The other day coming back from a friend funeral service, I stopped at an inside yard sale to cheer me up, looking for tools.  Found a box of hand brace bits, mostly Irwin, bought 4 for a buck ($1.00) each.

Never cease to amaze me and bring a smile to my face to see a tool resurrected and brought back to life as a working tool, not a decoration.

As found.  Salvageable?  You bet!

Yes rusty, but not severely.  
The main working bits, the spurs on each sides are full size, not worn or damaged.
  The two cutters (routers) are in good shape, no signs of having been ever touched up, 
Feeding screw is undamaged.

Quick metal brushing, soak in Evaporust, cleaned on drill press with metal wire wheel
They came out pretty good.
And THAT, never gets old with me 


It never cease to amazed me how well the cutting edges came out under that rust.  they will not need much touch up to cut well.  But how will they perform as is?  You know I had to try :-)

One of my favorite brace Spofford or Fray brace.
One of my favorites?  Yes, I have a few :-)


Not bad at all, I had NOS bit that performed worse out of packages.


I was so happy, I could not wait for the next day, go back and buy every ones he had left that look promising . So bought 6 more.

Oh yeah 10 more bits for my kits.

Could had probably gotten the whole 13 bits set from that dealer, but a few had the tapered ends cut, a 
real NO-NO in my book.
Not only are you destroying an artifact, but they were never designed to be run by a powered drill, they will quickly self feed too fast and jam, you are gonna need more torque to overcome jamming, not good...  Please never do that.

Meanwhile... I am so impressed by that little data logger, I got myself one for Christmas and put it in my hand tool shop to monitor temp and humidity.


Woodworking wise, not to worry, I need a new deck badly this summer, 

 Replaced dishwasher before Christmas, new one is stainless not white, so you know the other appliances will have to be changed, OH, and new dishwasher is not as wide as older one, so need wood filler strips, and while I am at it, may as well reface kitchen cabinets and install better hardware (sliders mostly) Probably construct real drawers to replace original builder`s drawers.

Veg trug and self watering raised bed in front

Generator and snow blower filled up with fresh gas, ran and put away, ready for action.
No real snow yet, strange winter so far...

Bob, poking holes in the fabric of time, one bit at a time