Friday, November 26, 2021

Revisiting the Boring till

 For the last little while been sorting, de-rusting and taking inventory of drilling tools and implements.

I have been working out of that till for a few years now, time to address some shortcoming.

How my Boring till looks like today.
Some of the tools boards I am making shown
at the bottom

Don't get me wrong, it works fine as is, but I have a multitude of small accessories required and lots of wasted spaces at the bottom, which keep accumulating stuff.  Time for some holders.

As usual when I go about designing something, I first round up the usual suspects.  Drill bits and assorted implements used, in this case.

Then I sorta separated them in what I thought would be best ??  In other words it had to fit what ever piece of wood I'm using :-)

I have this plastic drill index box on the right hand side , which I find very useful to quickly find out the size of some errant bits,  easier than trying to decipher small markings.  So it has to stay.

On the other side I want to relocate my awls holder off the current shop wall, that left me with a given dimension for a board.

Starting to populate board with various bits and accessories
in some logical manner.

 Then I decided that maybe I can get away with squeezing another narrow strip up front :-)

I was going to make it to fit the length of the two other, 
but decided not to cut short and filled it up.

This is what my final layout looks like.
The empty spaces are for two missing sizes of Yankee adapters 
and two sizes of VIX bits, on order from LV :-)
In hindsight not sure what I was thinking about when putting in the circle cutter.  
Solely used on Drill press.


While I am at it, may as well organized the same variety of bits.

Got all the Jennings and Irwins I could find together.
Now to assemble sets.


Complete sets of Irwins from No 4 (1/4 in) to No 18 (1-1/8 in)
The whole set fit within 14 inches.
So maybe two rows of 7 inches?
 
Made boards with the spacings figured around earlier for the stem.
Then attempted to make spacers sizes for the bits themselves.
It quickly revealed which ones are in dire need of sharpening.
It also shows how two rows behind each other would look.
It is a bit thicker than needed but I was going to cut four half strips from it.

That bit shown in progress of being unwrap for the first time
was a disappointing surprise.  Factory sharpened, undamaged, 
choked up, did not cut through.


I was not surprised to find some bits in need of sharpening, some of these came out of Evaporust before becoming shiny objects again.  But the New Old Stock one got me surprised.
Nice factory edge but the only thing that is obviously different from the old ones is that the grind on top of the routers is much more vertical.  Guessing the ease at which angle the grinder used fit within?

The resulting cutting edge act more like a scraper than a incline edge lifting up the wood chips. It does not go far before choking.
Apparently more recent Irwin auger bits were not individually hand sharpened and tested as they used to?? Probably automated grinding operation. All good or all bad, pick one... machines can be so consistent :-)

Also made a smaller screwdriver holder with a piece of scrap from the above holders

Assortment of Stubby screwdrivers
R-L
Vaco reversible common/Phillips, Stanley Phillips No 2, Fuller Robertson No 1, 
Benchmark Robertson No 0, Yankee ratchet common screwdriver

Th reversible besides the Yankee for size comparison.


And there was my recent marking gauges board, so if you were wondering were are they all going to fit in??  That space under the window.

Lots of wasted space and not easy to add remove holders on the wall.
Brace bits holder is wasteful.  I like the idea but the supports need 
relocating to be more efficient


My latest bright plan for that space is to lined it with about 4 or five rows of French cleats.  Then I can add/remove to my heart content various holders.

So I will recycle some currently set up with hooks for peg boards by attaching the other French cleats in the back. Since the holders would be spaced out away from the wall the thickness of the French cleats are, I also gain some clearances for my fingers behind the tools mounted.

One examples of many holders set up for pegboards mounting.


So in the end, the Boring till is getting an upgrade, the wall under the window is getting re organized and my various drilling bits are getting organized and sharpen.  Should keep me occupied for a little while.


The area in question, including under the boring till.

 
This exercise also highlighted some limitations of my current set up.  I long lamented the lack of spaces for my banging objects AKA mallets, need another holder.  I obviously need some chisels up front of bench.  I rarely used my Rockler bench cookies at that bench, should also make some provision for holding the pair of cordless drills/driver.  They are cordless so fit within a tail less shop :-) 

They do get used a lot and need a home, which mean, will need to add an outlet nearby.

 Also seriously thinking about removing the built in bench on the other wall.  Right now it is overflowing with wood which need to go somewhere else.  That would give me space for a shaving horse and a pole lathe, if I ever get the time for it??

Meanwhile, finally got the door out of my garage and installed.  

I can finally now proceed with the deck and carpet replacement in dining room/living room
After Christmas.


The door to the basement is also installed, big improvement.  NO draft, more light and noticeably warmer in the corner.

My windows I previously fixed are now clad in aluminum.  Will never have to touch them again. 

Remains to put back the shutters after they are cleaned, painted etc... In the Spring.
The Dove? I am an old Cold War warrior
Peace on earth Brothers and Sisters

And now that I can walk around the garage again, the sad shape of those poor neglected machines shows a lot of red rust. Not too alarming, but should be attended to soon...

Yes, it's overdue for some loving attention

That and I need to bring in 220 Volts service inside garage, service panel is at the other end of the house, of course.   As encouragement for me to resurrect my good old Unisaw, I treated her to a new miter gauge, my present from me for my birthday and Christmas. :-) 

Its a miter gauge with a built in box jig and flip stop.
But Honey it was on sale :-)

The review that got me convinced to try it :-)  Bought from banggood

Another review from Woodhaven


Being shipped, should be here before Christmas, but 220 wont happened before next year...

Bob, keeping busy, cause you know, now is not the time to end up on the naughty list :-)


Saturday, November 20, 2021

The greenhouse saga and some tool boards

 Been a tad busy around here at times.  The Greenhouse is still standing but took a hit from a big pine which totally flatten the new metal shed I was in the process of installing and almost killed the plastic shed behind also,  I think I can salvaged it, got some ideas, but it will have to wait.

The 10X8  metal shed we just had moved from her property to our place 

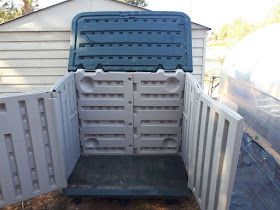
And the plastic Rubbermaid shed behind it were supposed 
to contain all the various plants pots she has.

And if you were thinking that is a lot of pots, that was also what I first thought so I asked her if she needed them all.  She replied: Do you need all your tools?
Obviously, we are going to need a bigger shed :-)

But helas, a big bad tree had other ideas.  We don't often get winds from the south, but it does happened.

The greenhouse survived, the metal shed is scrap, the plastic shed, 
I'm thinking I may be able to recovered? 
Want to try warming up the piece and try to pop it back in place??

The metal shed crumbling under the tree probably helped saved the greenhouse by absorbing most of the impact

Inside afterward. The plastic held up, the metal frame not so much

Was able to gently push most everything back up.
Space is useable, everything that could get damaged has been removed.
The two wood framed ends held up, the back one experienced some twist, but resisted.
The only broken piece is one of the upper support.

Needless to say, I have ZERO confidences in that metal frame anymore.  My plan is to make new hop by bending tubular steel pieces I'm gathering.  A project for Spring.

Meanwhile will monitor the snow loads and how it resist the winds.

Its replacement is going up besides in the Spring, after I finished levelling the spot, which has to wait until some plants in the way are moved ...

The spot in question.
I removed a bunch of saplings in the way and
 removed root balls and roots everywhere.
I have  a flat & level spot in the back, the front shows you
 how much more I have to go up front.
It will end up a few inches lower than the other greenhouse besides it.
The one that takes a beating and keep on ticking 

Still cleaning up and burning branches, weather permitting.


Got three burn days since, a few more to go...

So in between cleaning up, fixing up the greenhouse and recycling the old shed, which was supposed to get demolished this year, it get one more year... and I started a few woodworking projects of necessity.


My small basement shop got also turned upside down so to speak, with the installation of my old post inside for the post drill installation.  All the parts are derusted, cleaned and painted as appropriate, just awaiting turning its wooden back board from a twisted potato chip into some semblance of straightness to be useable... 

Meanwhile...

Got a few more tools thru my Evaporust in a piece of pipe set up, including screwdrivers, so decided to make some sort of stand or rack for them.

 Looking at my pile of wood in the shop , came across a piece of maple molding, made on a shaper.

Thinking it would dress up my screwdriver holder.  Note, I am strictly storing my Cabinet maker screwdrivers, AKA, have parallels edges, so making uses of the flat area in the typical British design.


Using a backer board, which I notched to received the flat part of the screwdrivers,

The basic idea I'm going for

Turns out my glue bottles are too old, 2005 and 2009.
Who knew?  Apparently not me :-)

Only thing I could find a Wally Mart was Gorilla glue,
 not foaming formula, more like a regular white glue??
Dries clear.

Of course the round shaft are thicker than the flat area, 
so had to drill and or rasp  a hole in the middle of each slot.
I like the spacing, that  works for me.

And how am I supposed to secured it on a wall somewhere?

I decided to insert T-Bolt inside the sandwich, so I can use standard jig nuts and screws.
A tad overkill in hindsight :-) 
Will go with a simple French cleat system for my next one.

I had a piece of that molding left over, so I tried a few things.

Marking gauges are next.

I could squezzed in 5 max, but which ones???

Then that leaves those other favorites out.

Plan B, use a flat, wide  board, so I can layout two rows of gauges on it.

Found a suitable maple board, made a few templates first in scrap wood.


I used a No 16 Jennings bit (one Inch) spaced 2-1/2 in apart, in the back.
A tad tight depending on gauges selection and designs

Up front made customs holes for the gauges.
Spacing not to my liking.
The empty hole is made with a No 18 Irwin bit (1-1/8 inch)

Needed a bigger hole size than 1 inch to accommodate
 the twin wooden beams gauges 

Then made a new board with 2-1/2 in spacings between 1 inch holes and the next two holes 2-3/4 in apart next to it.  Want to try various gauges combinations.


Decided to go with 2-3/4 in spacings between all the 1 in holes in the back row.

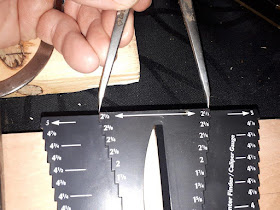
I use a special gauge to set my divider to a know quantity, in this case 2-1/2 in.
Easier than trying to use a ruler or tape measure. 

Once I stepped out my distances, I used an  automatic punch to
 register the locations for the drill bit following

Making it easy to drop the Forstner bit into it.


Took some fiddling with the holes, turns out the Jennings I was using is  a smidgen bigger than 1 inch, Some of the gauges are a tighter fit. Made one bigger hole to accommodate the twin beams gauges.

The holes up front for the metal gauge I duplicated the forms I used previously on my scrap board, except I had the bright idea of using the powered jig saw to cut a square hole and made a mess, went in La La land and oups, shit!

NO biggie, will cover up the hole with some banding later, for now look marvelous with the gauge covering its hole :-)


That work and I left room for a future Tite Mark gauge, because... :-)
Hold ten gauges of various shapes and forms, room for 11.
Should be enough to see me through at least two simultaneous projects.

Now will need to figured out some sort of holder for the gauge board.  And where are those holder going anyway??? Oh, I have some idea, but that includes some more re-arranging :-)

In other news, our car is back from garage, last exactly about 100 Kms before engine light came on, was the camshaft sensor, which they did not replaced so not warranted Grrr..

Not trusting much the car, bought a truck.  Will be more reliable and will help me a great deal with some projects around the yard for sure.  Not to mention to move wood :-)
My new to me 2011 GMC Sierra.
One owner, well maintained.


It never ends does it? :-)

Bob, with a full plate, puttering in between

Sunday, October 24, 2021

A tale of two augers

 Lots of work outside right now, so not much happening in or near my shops, except a bunch of fall maintenance on garden tools: Cleaning, sharpening, oiling spades, shovels, chainsaw etc.

Between all of these, been experimenting with using a piece of ABS drain pipe 1-1/2 with Evaporust for handling more efficiently long pieces.  Quickly found out that tapping the plastic test cap on the ends is asking for a leak.  Just hand pressure, good seal, working great.  I've been soaking...

I have a small collection of hand augers, they had a quick de-rusting at the wire wheel, but never past that preliminary stage.  That was one reasons I want to try this.

Amazingly, it stays securely up, even 
with grand kids and dogs running above.
Later I took the handle off and kept alternating soaking ends

Yeah, it does stays up, but need something's more secured and with different length and sizes.  Some sort of rack.

That particular auger was bought recently, it looked 
promising under the rust, paid $5 for it

At first I was using old blackened Evaporust and it was going slowly, so I dumped it on the grass (lots or iron, grass loves it) and pour fresh new stuff, much faster.  After a few repeat soakings, wire brushing, rinse and repeat until satisfied, looked pretty good

As found.
The up wing spurs are presents and complete.
Threaded tip not damaged.
No apparent damages, except for rust 


Cleaned up pretty good and freshly sharpened

I gave the handle a quick sanding to remove the grunge,
then my usual Howard products routine.
I paint the interior of the eye with rust proofing paint.
Found no markings but it bore a 1-1/4 in holes

You can clearly see how the eye was forged

But how does it cut?  It has no scoring abilities, just a clean inside scooping action.

Boring along the grain

It does kinda chew a hole thru, it cannot score the hole perimeter, lots of leverage and chipping action.

No surprises there. 


So what does it do?  It is designed to cut on the end grain.

The up wing spurs and the bottom cutter act like a gouge
in each corners

Much easier action and better results, faster.
This is dry and splintery PT wood

So it beg the question, not all holes are bored end grain, so, there must be a counterpart auger?

They will be sporting scoring spur(s) at the bottom of the cutting action in order to severe the fibers around the hole before the router (cutting edge) scoop them up.

There are many variations in both varieties, but the one I am working on right now is a modified Jennings pattern.

The cutting spurs action makes all the difference.
Big difference along the grain.
Hard to see but the spirals diameter reduced as the spirals goes up,
making it almost jam proof, but more wobbly.

Boring end grain

The up turned spurs one bore quickly, while the lower spurs one (Irwin) is stalling.
The screw point cannot overcome the force required to push down the fat spurs into the wood.
With power and pressure you could overcome the Irwin stalling  problem 
but it would overheat, not designed for end grain. 

So there you have it, know your auger, their pointy ends tell you their specialty.

Understanding their cutting action is key to understand how and where to file.

The pair I just restored
Top one is 1-1/4, bottom is 1 inch.
If the bright metal "colour" annoyed you, not to worry, it will tarnished
Traditionally they came in bright metal or black oxide finish.
Modern ones come painted.

The smaller one is stamped STAG and 1 (inch)


I have a few more awaiting longer and bigger tubes.  There is currently a different type of auger soaking.


Can you make a bit geometry that could incorporate both qualities? Yes, its called a Scotch eye bit.

It has only one spur sometimes thinner (more fragile), allowing you to more easily overcome the difficulties of two spurs.  The vast majority of hand augers made today have this type of cutting action, a Scotch eye bit.  Yes, they are still made marketed to the woodsman type persons.


They are still relevant today and if using the right one for the intended application, Quick and efficient. no power cord, no battery, then refresh yourself with a cold one and admire the holes you bored by your own power:-)

In construction, they would be boring the holes for the wooden peg used in draw boring the framing members together.

If you are only boring a few holes, a hand auger is your best bet.  If you requires lots of holes, building a complete barn structure or something, a Beam Boring Machine is your better option.

Finally watch how they were made, at Footprint Sheffield England 

Bob