Thursday, October 15, 2015

About wooden plane restoration Step 2 Initial Assesment

See here for Part 1 Identification

Now that we have some indications of its rarity and value, it is time to go over its condition to determine what need to be done to bring it back into a good user.
Collecting notwithstanding, my primary reason to buy old tools is with the intent to put them back into service.  When I look over a tool I'm thinking of buying, my first question is always: Can I make this thing work as intended or not?

The only time I will make exception to this rule is if I am after specific parts or it has some value to me as an example to understand a tool development.

The first things to look at are the overall condition of the wood parts: Body (stock) and wedge.

Is the body straight? Unless you are intent on making circular mouldings, it would be impossible to plane straight mouldings if the plane stock is bowed.
That happens more so with narrow profiles such as small sizes H&R, beaders, snipe bills etc. Anything with a narrow profile will of course be more prone to it.
The wood species used and how it was cut from the tree would of course influence that down the road. But bottom line, wide planes, because of the deep cut on one side for the side escape mouth are not immune to warp. Beware.

So one of the first thing I do is to sight down the sole.
Next, I want to see how well the iron profile is matching the sole profile.
Sometimes, the irons have been swapped and you end up with a miss matched plane.  Years ago I once brought back one from Scotland like that :-( That's when I learned that lesson!

If the blade and the profile of the sole don't match, the plane will not work, PERIOD! Oh, you'll make some sort of shavings, but the end results will be nowhere near what it is suppose to resemble and or the plane will quickly jam.

But we are getting ahead of ourselves, part of my assessment routine is to give it a good cleaning and touch up the blade(s). This way I can uncover defects that are sometimes hidden under rust or grime, and stop any further deterioration.

Full disclaimer, I normally do not do that in the kitchen, but...
Yes Dear. I cleaned up after :-)

On wooden object my first step is to give it a good scrubbing with Murphy soap full strength with a soft bristle plastic brush, followed by a gentle scrub with an old 3M worn green scrubby. I followed with a rinsed brush to get most of the soap off then give it a good wipe with paper towels then a rubdown with an old T-shirt (cotton). I do the same to the wedge, paying particular attention to the surface that contact the iron, sometimes rust make hard deposits on the wood part and on the tang of the blade.  BTW, I try not to wet the inside of the plane throat.

On the one I selected for this run thru, I'm also curious if I can resolve its maker stamp better, I have a hard time making out if the first letter is an E, F or R...

Often a god scrub will reveal better a weak stamp hidden under years of grime.
Also when shiny wet, the shadow plays different.

Humm a bit better but still hard to make out, lets try the pencil rubbing method

Not easy to get a good lift, I can easily pick up MASON, 
but the first letter is still??
Sprinkle some Talcum powder (Baby powder)

Rub gently with your finger

Wipe even more gentler with a soft cloth.


Th owner name is really standing out, so does MASON, 
but again the first letter is ??

BTW, after further examinations, I'm satisfied that the first letter is an R. so R.MASON it is.
My American guide list an C.R. Mason & Co, but I doubt there is anything past MASON, and I'm pretty sure there is nothing before the R.
Need more research...

Once dry, I go over the body with a straight edge to assess its condition.

I sight along the edge toward a light.  Not looking for machinist straight, 
but no big dip or wonky surface.  It is wood, not a machined block of steel!

So overall the body (stock) of the plane is in good condition, the sole has no issues. The mouth area is crisp, the sole well burnished.
At this time the body will show some matted area as it is drying, that's OK, I'll give it a rub with oil later finished with a buffed wax finish to protect it.

Time to turn our attention to the iron. 

You did not think I was bringing my sharpening station 
to the kitchen, did you?

A quick rub on fine sandpaper, just to give me some indication of the flatness condition of the blade without removing much.

I go down to 220 sandpaper to go quicker.
Note that I'm also touching the part of the tang that will be pushed 
against the bed by the wedge.

Similarly, I pay attention to the tang part against which the wedge press against.
See the rust bloom on it?

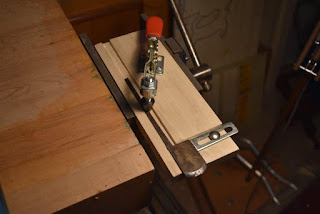
A quick touch up of the edge follows in my version of Ralph's jig

I used my two DMT diamond paddle: Black, (coarse), Red (fine)
followed by a leather strop with LV green honing compound

At this point, that is all I do to the blade, I'm just assessing it.
Can I go past pitting at the edge? If yes, good to go!

That is the minimum routine I do to my wooden planes to assess them, they have not touch wood yet, don't know how they will perform, but don't care.
I know its condition, I have stopped rust and other damages, both the wood part and metal part are protected: Wood oiled and wax.  Metal sharpen then oil wiped. Often I used WD-40, because it displace water, its a good thing.
Some time as part of its treatment, I'll also use Autosol, which leave behind a protective coating.

Bottom line, I do as little as possible not to change or alter the tool. For example, if I was to work on making the sides of the blade straight, I would be changing its radius (which is 60 degrees of a full diameter circle). I would then just give it a quick cleaning with a rust eraser, just to stop corrosion that's all.
If more severely rust, I would drop it in an Evaporust bath.

Once fully dry would be reassembled, not before.

It is now ready to go joined the rest of its brethren in my plane till.
Whenever I have a use for it, that's when I would fine tune the blade and paying attention to the bed/blade/wedge interface.
Why stop now? Because it is strictly in storage for now.  If I were to sharpen the blade to perfection, there is no guarantee that it would remains so for my next use. I normally touch up my edges before starting work, it is just part of my routine, especially that I now have a proper sharpening bench available :-)
And the shape it's in now would cut wood no problem, I'm sure, but yeah, I would refine it some more...

Next part, we will do the final tune up and make some shavings.

Bob, who has an "Hollow"-graphic memory about his tools :-)
Translation: they sometimes go into the black hole of my Random Access Memory...

Wednesday, October 14, 2015

About wooden planes restoration, Step 1 Identification

As you probably surmised from my latest posts, and pictures, I have a "few" wooden planes to rehab, before they go reside into my plane tills.

So, at Gerhard request, I thought I shared with you how I go about it.

First, and probably most important, get as much info's as you can about this plane in your hands.

Why? Because, depending on its rarity and condition, I would change what I am willing to do to it.  It's the collector thinghy in me.

But nonetheless, if its very common, I would not hesitate to do more drastic repairs, such as: Strip, sand and refinish, wood patches as required, make new parts such as wedges, replacing the blade etc.

If it is more rare and or valuable, I would think twice before doing more than a careful cleaning, not wanting to deface it, just preserve it.
But at any rate, I always document the tool both with pictures of before/after and the results of whatever I found about it and its maker history along with its provenance and how much I paid for it etc...

I treat my old tools not just as users but as their caretaker for future generations.

MAKER'S STAMPS

First you need to establish its identity, most plane makers signed their work, most often by stamping imprints in the toe of the plane.  You will sometimes encounter various names stamps here and there, often repeated, but those are owners stamps, not maker stamps.

Often times, the maker stamps will include a location (Town) where it was made;
E.G. Glasgow, Kingston, Montreal, Roxton Pond, Philadelphia, etc.
This often create some confusion as the same name town exist in the UK and Canada, such as London (Ontario) and sometimes the same name is to be found in the US also.
Sometimes besides the name there is a State or Province with it, or a full address.

Thomas L. Appleton (Inc), Boston (Zb)
AS Lunt, 287 Hackney road, London.
The other stamps are owner marks.
These two examples above are what is know as Incised, or Incuse marks.

As a general rule, stamps before 1850-60 are likely to be embossed stamps (the letters are raised, denoted as ZB in some guides, because often found with a Zig Zag border) while after these dates they are mostly incuse (INC) or dug-in (depressed)

These stamps can be hard to see or read for various reasons. Long time ago, moulding planes were 10 to 10-1/2 in long, they finally standardize at 9 inch in the early 1800s.   Some of the older ones were later saw off to make them fit with the rest in the toolchest.  In which case, the makers stamp could have been sawed off.

Other times it is literally obliterated by lots of heavy coatings applied thru the years, it is still there, you just can't see it, hardly.

The Brits especially, used lots of Mutton Tallow on their planes so they tend to look darker woods than North American made ones.

Other times they were simply weak stamping to start with and were almost worn off.
Weak stamp, almost worn off.
_. MASON (ZB) Is it R or B. or E?
Hugh Evans is an owner name.
I haven not determined yet if it is British or American.
If you recognized it, please chime in

Uneven maker stamp.
Arrowmammett Works, Middletown N.J.
The black goop is typical of old dried up tallow. 

 There are many tricks used to "lift" the maker imprint or stamps off the plane.
One of the last thing you want to do at this point is to resort to sandpaper, you could literally sand off whatever details are crucial to its correct identity.

A good example of a Talcum powder enhanced stamp.
Confusing us even more, are the retailer stamps, often large hardware retail store.
But sometimes, if you know the years the retailer operated, it is a  bonus clue.

One of my new favorite is to simply use digital photography.
Once you have a clear picture of the toe, often the flash would create shadow that would make the stamping stand out, or sometimes just by reversing the colors, it stand out better. Of course you can also zoom on it and etc. Many a barely visible markings were uncovered with my trusty camera.

The point of other older methods was always trying to enhance the contrast, by using, talcum powder, dry rubbing on paper with a pencil etc.
It's easier, faster and you don't have to do anything to the artifact, if you are working in the digital format.

Typical maker stamps illustration in guides.
From my copy of American wooden planes.

Many reproductions of plane imprints have been collected thru the years, chance are yours would appears in one of them, but which ones?

Here in North America, the vast majorities of wooden planes were of English, American or Canadian manufacture.   There are over 3000 known British, American and Canadian plane makers alone.  You then need some sort of catalog or repertoire of plane makers of these three countries.
And they are:
American
A guide to the makers of American wooden planes by Emil and Martyl Pollack

My copy are the first editions, 1983 plus an 1989 update.
One of these days, I'll buy the latest edition.

Canadian
The best compendium written so far was by the MacLachlan Museum of woodworking in Kingston On

The third revised edition, 2003, 5th printing 2010.

Here is a small sample of their wooden planes collection.
You may be able to pick up my nose imprints on the glass :-)

And you even get to play with some of them,.. How is one to resist :-)

British
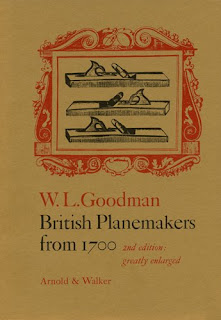
"The" book is by WL Goodman

British planemakers from 1700 by WL Goodman

2nd edition 1978 

Later revised by Jane and Mark Rees
1993 edition


But I do not own a copy yet. So I have to refer to On line research.
Here are some sites I found.  If you know of more comprehensive ones, love to hear about it
http://oldwoodplanes.co.uk/
Mathieson planes ID and value
British planemakers 

Other European plane makers see
http://www.holzwerken.de/sitemap.phtml

Sometimes these guides will also give you some indication of its rarity:
From Common, Frequently Found to Seldom Seen, Rare etc.
Please note that most of these guides were written before a thing called EBay, since then, many previously believed rare planes have surfaced, causing major revisions to these guides. Check which revision you have in hands.  And even then, these guides are revised for other reasons, such as previously unknown makers, to incorrectly identified maker nationality. It becomes sometimes somewhat nebulous between British/American/Canadian makers, some are the same that moved around, some are not related. And then there is that little thing about town names...

THE BLADES

Another good source of info are the markings on the blades, if found.

Typical stamps found on some of my bench woodies

Sometimes, but rarely, there is a name on the small tang of molding planes

Keep in mind, that some plane makers outsourced their irons, you will have to look at the history of a given maker to find out which ones they were using.
And in some bench planes, as the irons get used up, they were replaced thru the years.

THE WEDGES

For most of us, the wedge serves no other purpose than to hold the blade in place, but to some collectors, it can aid in identifying its maker, region, age and etc.

After the mid 19th century wedge shapes became largely standardized, because of mechanization. Earlier wedges were highly individual, reflecting their maker, styles, and training they received. We can then sometimes used the wedge shapes as a clue to its maker, provenance and date. Just remember that just like furniture style, some wedge shapes lasted longer.

Notice how some are relieved at the top, that is to facilitate adjusting the iron without hitting the top of the wedge. That is a nice feature to have.

OLD CATALOGS

Another source of great info are original or reprints of old catalog from past makers and collectors guides.

Seminal work by Kenneth D. Roberts
Lots of good info and reprint of old catalog pages etc.

Sargent planes by David Heckel
Sargent made lots of wooden planes, including H&R

Their H&R are model No 663 and they came in size No 1 to 15

V.A. Emond & Co
Often the cuts were actual size in the various catalog for easier identification.
Most often their planes have the actual size stamped, such as 1-1/2 on mine, instead of arbitrary sizing Nos

Sandusky Tool Co

Sandusky H&R were labelled as such:
No 92 are their regular H&R from No 1 to No 9
No 93 are the same thing but with skew irons
and finally No 94 are H&R (regular) No 10, 11 and 12


And of course, since the days of the Information Highway (the Web), lots more information is coming out and is accessible. But I still like to turn to my books for information.

So once you have identified your plane and have some idea of its rarity and value, we can now assess its condition and determined how much work we are willing to do to it.

And that would be part 2...

Bob, the old tool guy

Tuesday, October 13, 2015

Done with the sewing machine cabinet swap

Got to finished the top repairs; on three spots,

Beside each new hinge location 

And in front by the small swinging door

I am happy the way they turned out. The only thing I missed was on the hinges patches, I was so focused on matching the glue line that I did not pay enough attention to the grain direction.  As a result, on both pieces, the grain runs slightly askew to the panel.  I did better on the last patch, I think I nailed it on that one :-)

Next the coloring, staining, matching start.
The inside rim was a lot easier since it is darker than the top.

In progress, 1st coat.

I'm not crazy about my attempt at matching the patch area, I need to do some more practice with stains, and then I realized (well actually Heather is the one that pointed it out me :-) I wasn't using stains I was using Stain varnish, no wonder I had a hard time to color the wood...
Anyway, the top could use a good sanding and to be re-finished, so that would have to do for now. That is also what I was considering, would have been lot easier, but did not have the time right now, have much bigger preoccupations.

And in the end, my friend is happy, I'm happy, everybody is happy.

Cabinet closed

Cabinet open


Cabinet fully open


And out she goes...

Thinking back on the trouble I had with my "stains" on the plane till project, I obviously need to get the right stuff and get some practice under my belt.
Like a lot of woodworkers, the finishing is what I dread the most.
So must suck it up and practice, practice

Bob, with a stain on this job